

Some time ago I made a rough and ready wall mounting rack for my parallels so they would sit to hand adjacent to the Myford manual milling machine. I used double sided printed circuit board for the construction and while not elegant it worked OK …. until after I had finished it when I found two of the set lurking in a box with a half finished job. I had not allowed for them in the construction and being OCD me, it annoyed me to have two lose ones that did not fit in the grand order of things.
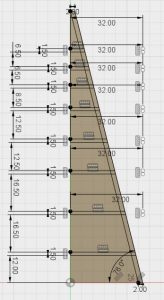
An idle half day lead to a Fusion design to replace the tired old PCB disaster. This lead to some thinking on how to design it. I wanted a rack that sat on the tooling board with the parallels stacked on it with a slight upward angle to keep them in place. I chose therefore to draw it slightly strangely with the ‘back’ at an angle and extruded it accordingly. See below.
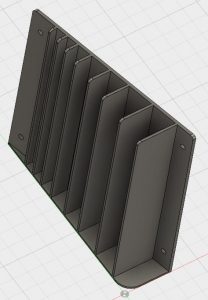
All well and good you might say. Less messing with angles etc.
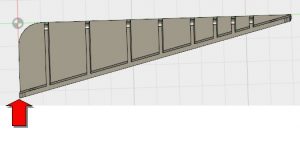
I squirted the job into the Sindoh 3D driver software and then tried to be clever and print it with the backside down on the printer bed …. or at least what I thought was the backside down. You will no doubt spot that that this is not a simple rotation of 90 degrees but I didn’t.
The printer began producing spaghetti that was not bonding to the printer bed. After three re-tries I took a closer look at my design and realised that the only part of the job that was in contact with the bed was the leading edge (red arrow below). The rest was airborne at an angle all due to the way I had chosen to draw the object and rotate it.
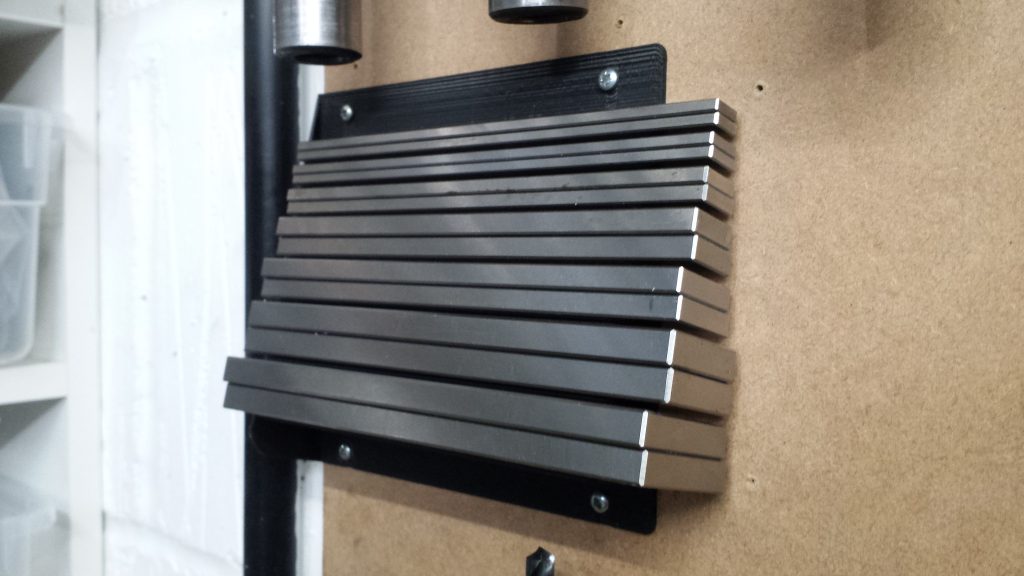
Reset brain and reset printing so it would be now vertical. All was good and my nice new rack sits on the tooling board.
A little bit more brain engagement next time perhaps ?
Similar or related subjects : –
- Qidi X Smart 3 revised fan installation
- Qidi X Smart 3 tweaks
- Qidi X Smart 3 special weekend pricing
- Stop losing Qidi ifast 3D prints down the chamber front gap
- Fitting a Bento air filter to a Qidi ifast 3D printer
- Automated 3D printed collet storage using Fusion 360 parameters
- Fusion 360 Keyboard Shortcuts
- 3D Printed Brass Threaded Insert Soldering Iron Stand
- Creating a worm drive in Fusion 360
- eSUN filament reel silica drying pod