

After a few distractions the Mill Turning Jigs are complete and I have run a test piece that is representative of a clock pillar.
Mill Turning Jigs
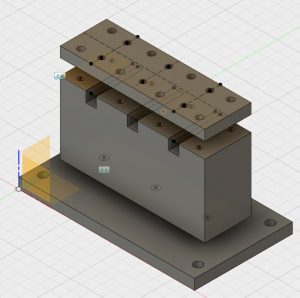
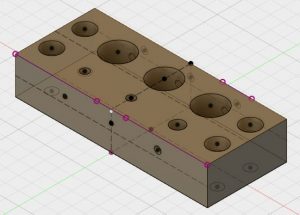
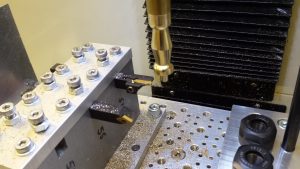
The jigs were both designed in Fusion 360. One consists of a large block with space for three 10mm cross section carbide insert tools and a second block with drill and boring related tools. I have fitted three ER16 collet chucks to this to allow flexibility of tooling choice. Both have mountings to fit onto my 25mm hole matrix tooling plate on the Tormach.
The jig manufacture was relatively straightforward with the exception of needing a new 10mm end mill having extended length (35mm) to bottom out the ER16 collet mounting holes. I got this from APT and the edges were lethally sharp.
Trial Clock Pillar
The pillar had simple geometry as below.
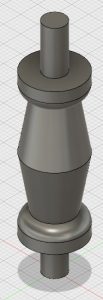
I opted to base this on the largest pillar I had come across in any design which was formed on a 5/8″ brass rod. I held the stock in the spindle in a 16mm ER32 collet held in a TTS holder.
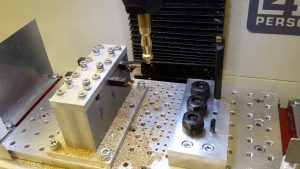
I struggled a bit with the CAM for the trial as the tool geometry of the tools I recently received from Banggood were not in the standard tool library. I got some of the settings wrong. That aside the result of the first run is quite pleasing.
My feeds and speeds were a bit coarse and I cringed once or twice at the tortured sound of brass under pressure. I didn’t complete the parting off as I didn’t fancy ducking from a large piece of brass spinning lose at 5000 RPM.
As ever there was quite a bit of learning while making both the jigs and running the trial pillar test piece.
Drop me an email if you want more information !
Similar or related subjects : –
- Parting Off on the Lathe
- Workshop storage update using Spacemaster 5L boxes
- Plastic heat sealer – a useful workshop asset
- How to square up a scrap piece of stock ready for machining
- Deburring techniques in the home workshop
- First screw threads cut using Clough42 electronic leadscrew
- Machining a job that is outside a milling machine’s table travel using Fusion 360
- Stevenson Collet Block and the Angle of Dangle
- A Lazy Cable Clamp using 3D Printing
- You say Vise and I say Vice but we agree that Clamps are Clamps