Sending a SMS text message to the EU from UK

Success depends on your network provider

Since the UK left the EU we found that we could not send SMS messages via Vodafone to our neighbours in France. Despite asking we never did get an answer why this was a problem. Vodafone also removed free roaming when in the EU and added a daily charge even if you only sent a single SMS or made one call.

Our contract with Vodafone was due to expire this month so we shopped around with a number of alternate providers and in the end decided to switch to giffgaff. This is a UK service provider that uses the O2 infrastructure in the UK. Big plus – they offer free roaming in the EU. The change over process was very simple to do and we ported our old Vodafone numbers using a PAC code. We were probably ‘off air’ with our numbers for less than 24 hours. It was a totally web based transfer with clear instructions and regular text and email updates from giffgiff on the transfer progress.

Once up and running on giffgaff I tried sending a SMS to France. I got an error message from giffgaff. While we will be paying a monthly service charge this does not include International Calls which is how my SMS was regarded. The solution is to put a small amount of money on an ‘extras’ account that sits outside the normally monthly billing. My SMS was then delivered to France and cost me 24p. We can live with that for the number of times we need to send a ‘we will be arriving’ message to our neighbours.

Links to similar or related post are listed below : –

Stop losing Qidi ifast 3D prints down the chamber front gap

A simple solution

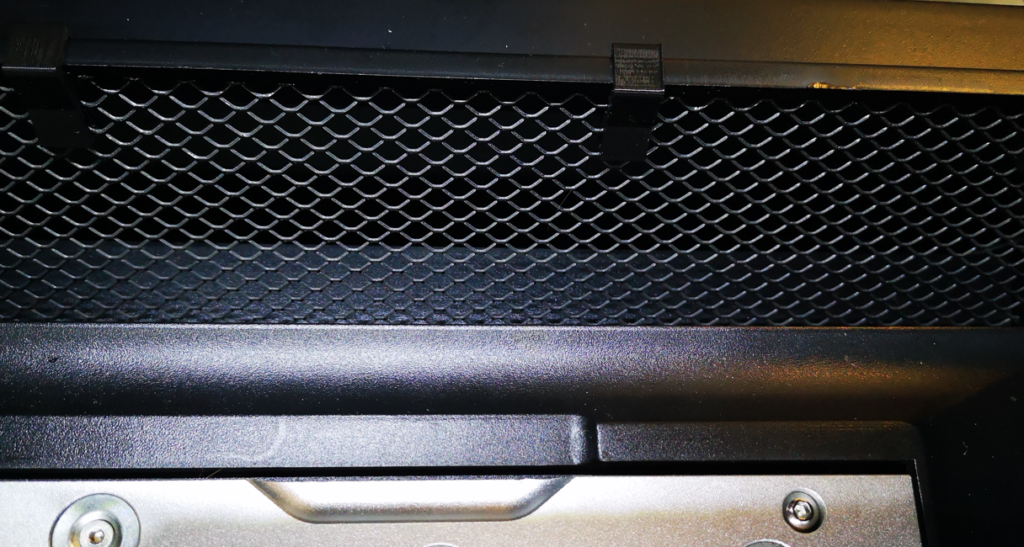
I love my Qidi ifast but one issue kept cropping up. At the front edge of the chamber there is a gap that seems to be a black hole for small prints. They sometimes ping off the build plate when it is being removed from the chamber and rattle down the slot to be lost underneath the machine. They don’t simple drop out from underneath the machine but instead end up lodged on the cover plate to the power supplies. Lifting the machine to remove this plate is a nightmare job as the machine is so heavy. I usually end up printing a second model. There is a similar gap at the rear of the chamber but this is much less of a problem.

There is a YouTube video showing how to a print protective cover for the front and the back black hole slots. This looked interesting but was a long print run and involved double sided tape.

My solution is to use some aluminium ‘expander mesh’ with some 3D printed fixing clips. The mesh is Gauge 10 and is cut as a 70mm wide trapezium shape with the two sides measuring 500mm and 485mm. I sprayed it black to blend in. Here is a picture before and after fitting.

Here is the Fusion 360 graphic of the clip and the download link for the STL file.

Links to similar or related post are listed below : –

Fitting a Bento air filter to a Qidi ifast 3D printer

Hopefully less tickly throat and itchy eyes?

For some time I have been subjectively conscious of fumes created by my 3D printers.   There has been quite a lot of general comment about this problem in the technical press.  I mostly use PLA for my prints using my Qidi ifast and Sindoh 3DWOX.  If you believe the press, PLA is the least likely to cause irritation.  However, my office is small and the printers are both close to my desk so any fumes are likely to be immediately adjacent to my computer activity.   If I do a long print run, I can sense the fumes as a background smell and as an irritation to my throat.

The geography of my office and workshop are such that moving the printers is not an option nor is finding some way to vent to the outside world.   The Qidi ifast is a huge machine and finding a new home for it would be difficult.   Transferring both machines into the workshop would expose them to a residual albeit low level of moisture (nothing rusts in the workshop so it can’t be so bad).

I came across the Bento filter unit which is a free download from Printables.   As an aside Voxel in the US sell Bento kits.

The concept of the design is to house a complete filter unit inside the printer chamber where it acts as a recirculating air filter (a ‘scrubber’). This only acts on the air circulating within the chamber.   This should avoid creating cooling drafts across the print job which might be the case if high volumes of air were being ventilated in and out externally.

The unit is visually shown opposite. It has four sections all stacked one on top of the other.  The air in the printer chamber enters the top section which contains a commercially available HEPA filter cartridge.  The next section is a carbon filter.  This has an inner printed magazine containing carbon pellets. The fan section is next with two fans pulling the air through the two filter sections.  The bottom section is the air exhaust duct. The design is rather well conceived with each of the two filter sections clipped together using small magnets.  This makes these two sections easily demountable for filter maintenance.  The fan tray and exhaust duct are held together with screws and brass inserts that pick up on the fan mounting holes.  

Circulating the air into the unit via the top section and exhausting at the bottom is a nice idea. In the Qidi ifast the print head stays at a constant height and the print bed moves down as the print builds.  The print head activity remains at a constant height to the filter input.  There is a lot of web discussion on fitting the Bento to Bambu Labs units but little about use in other printers so some head scratching was needed on how I might implement the Qidi ifast installation..

Here is a link to ZIP file containing my write up of how I installed the filter in my Qidi ifast together with the STL files for the modified fan tray, exhaust duct and microswitch mounting block.

Links to similar or related post are listed below : –

Soldering Iron bit storage on Lytool soldering station

Including a 3D insert tip holder

In my recent post on a 3D print insert stand I mentioned the use of the Lytool soldering iron station. This uses a Type 936 style soldering pencil and it is supplied with five different profile soldering tips. When using the iron for non insert related soldering, I have found it lightweight to use, very quick to get to temperature and generally a good alternative to my Weller TCP1.

After some research I found that the best match 3D inserts tips for the Type 936 pencil are a screw in set with a common mounting bit. Here is the Amazon link.

Having now got five different soldering tips, the insert holder and six 3D insert tips, things were getting a bit messy and a potential recipe for something getting lost with all the ensuing frustration. The solution was a simple holder for these various components that mounted on the Lytool soldering iron holder. Here is the Fusion image.

and here is the finished item mounted on the soldering iron holder.

Clearly as a 3D print you can’t go putting a hot tip on a plastic prong … but that aside it is functional. As an alternative you could replace the prongs with M4 screws. Here is a view of such a variant. This uses M4 x 15mm countersink screws but space is restricted on the rear side to allow for the screw head size. There is still room for seven standard tips. If the threads don’t print well then the screws could be fastened with nuts on the top side instead. This would also protect the body plastic from any residual heat in the tip.

Here is a ZIP file with the STL files for the two versions.

Links to similar or related post are listed below : –

Tangential Lathe Toolholder for Myford Super 7

Yet another design to add to the plethora out there

The concept of a tangential lathe tool holder had passed me by until Blondie Hacks mentioned it in one of her YouTube posts.  This resulted in an hour or more lost down an internet rabbit hole.   The conclusion seemed to be that I was very late to the party.  There are many designs out there which include the Eccentric Engineering commercial item.

I quite liked the look and simplicity of Mike Cox’s design. With the knowledge gained from my unintended meandering internet research, I tweaked it slightly and committed it to Fusion 360. This is shown in the pretty picture below.   Note my design was to be mounted in a QCTP on my Myford Super 7 and is intended to hold a 3/16” HSS tool. Here is my Fusion 360 image of the model.

The following ZIP file contains my full write up along with the Fusion 360 model for the toolholder and an associated 3D printed sharpening jig.

Update : This tool is very good. It can tolerate decent depths of cut and leaves a nice finish both turning and facing.

Links to similar or related post are listed below : –

Verified by ExactMetrics