Replacement Cowells Chuck Key (Part 2)

Sintered Tool Steel Experiment

Some while ago I posted about my experiment in reproducing a Cowells ME lathe chuck key as it seemed there were a few owners with broken teeth on their keys.

Since then I have received a number of requests for replacement keys which I have tactfully declined.  They are not the easiest of things to reproduce and a potential for broken tooling.

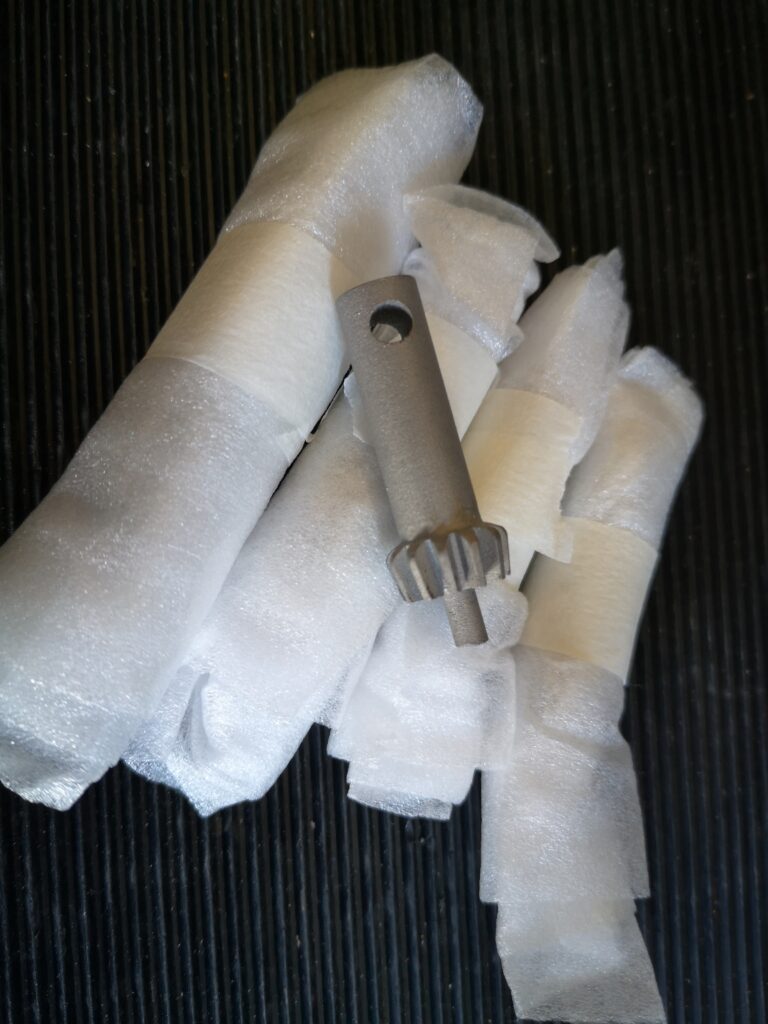
I use PCBWay for my production PCBs and I recently noticed that they can produce sintered 3D objects from a STL file.   They offer various materials for this process.  Out of curiosity I sent the STL file for the chuck key to them and ordered 5 pieces in sintered tool steel.  Twenty days later I received 5 chuck keys.   They look good and they match my dimensions and more to the point they work in the chuck.  I have no experience on how strong sintered tool steel might be but this video from My Tech Fun is quite impressive.

My Tech Fun

The downside of course is that they were not cheap (~£50 each, heavily thumped by courier costs) but if you have a Cowells and the frustration of a chuck key with a broken tooth maybe this is a reasonable price to pay.  Let me know quickly if you are interested in buying one otherwise I will put them on EBay.

Links to similar or related post are listed below : –

Fusion 360 Keyboard Shortcuts

Fusion 360 Shortcuts Lookup table and keyboard overlay

In an idle moment I have updated my collection of spreadsheets to include the Fusion 360 shortcuts listing. The workbook tab also includes an edited version of the Fusion keyboard overlay.

You can download this and other eclectic tabs as part of my Engineering Spreadsheets workbook.

Links to similar or related post are listed below : –

3D Printed Brass Threaded Insert Soldering Iron Stand

A simple solution for holding a soldering iron when inserting brass threaded inserts into 3D printed items

NOTE – This is a revised posting with a modified write up.

When faced with adding threaded holes into 3D models I am faced with three choices.

The easy option is to model the threads in Fusion 360.   This is fine for a ‘fit and forget’ single fastening but for repeated screw insertion and removal the modelled thread will begin to wear.

My preferred solution is to use embedded nuts in the plastic or leave an open hex cavity to fit a nut into after printing.   Some jobs do not have enough space to use the embedded nut technique so brass inserts are the next choice. Brass threaded inserts come in a number of sizes and geometries and are available from Amazon and other sources.  The inserts are melted into the printed medium with a soldering iron or other such heat source.

Having had mixed success with a handheld iron I pondered for a while with Fusion 360 whether I could make a jig to improve insertion repeatability.   This led to some internet searching and finding a couple of solutions.   The first one was via Clough42.   He showed a heavily engineered solution supplied by Naomi Wu.

Naomi’s product was impressive but seemed to be way over the top.   Next up was a site by Valera Perinski.   His site is remarkable and oozes all manner of 3D printed objects, one of which was just what I was looking for – a simple insert punch.  

https://www.myminifactory.com/object/3d-print-stand-press-2-in-1-80752

Valera’s design, while simple, looked elegantly functional. I downloaded the STLs.  Valera offers these free of charge with a comment that he would appreciate any contributions. A contribution was duly made. Thank you Valera !

My modified version of Valera’s design is shown above and is described in the attached ZIP file along with the my versions of the 3D print STLs.

Links to similar or related post are listed below : –

Water Softener goes AWOL

Lesson to be learned – protect your overflow pipes

We’ve had a few weeks in France and were worried to hear from our UK house sitters that our TapWorks water softener’s sump had filled with water and was leaking salty water from the kitchen cabinet onto the floor.

My immediate instructions were to isolate the softener using the bypass valves and turn the supply off.

On arrival home I drained the sump and tried a regeneration routine. This revealed water leaking from the pressure vessel. This clearly was the source of the excess water in the sump. What was not obvious was why the sump had filled when there was an overflow pipe to an external drain.

The overflow pipe would have been far more effective without the nest of insect life that had chosen the pipe as their new home.

Moral to the story is to make sure all external overflow pipes have a gauze mesh protecting them from new residents.

That aside the pressure vessel was acting like a mini volcano slowly weeping out the balls of the softener medium. Given it was installed in 2008 it has given a good run for its money.

Links to similar or related post are listed below : –

Creating a worm drive in Fusion 360

The hard way and the easy way

A colleague asked if I could model a worm drive in Fusion 360 such that the result could be used to 3D print the worm and the associated wheel.

My first attempt was to create the assembly from first principles. This was painful and took a number of versions before I got a process that I could repeat and appeared to work. I was not happy that the result correctly reflected the dynamic shape needed on the wheel teeth.

Somewhat appropriately I then went down an internet worm hole and discovered there is a scripting plug in for Fusion 360 that allows the creation of these components. Not only that but the author Shwivel has also created a number of similar script routines for other gear related constructions.

The routines are chargeable (USD20 each) but given the time I spent try to do it the hard way, this seemed like a good price for what looked like a better result.

The script once downloaded appears as an icon in the Fusion top menu bar under the Shwivel tab.

Once opened it needs various parameters entering and allows entry of centre holes in each component. Once you’ve entered the parameter the script goes off and crutches the result. This can take a few minutes so patience is needed. The Dimensions section gives you all the values you have entered and the resulting parameters created.

I had a weird initial experience whereby the script entry window kept giving me red error messages no matter what measurements I entered. This was resolved by doing a RESET in the software FILE menu.

Here is my resulting design for a 60 tooth wheel.

While the routine allows the bore hole dimensions to be entered, I have found it easier to keep these to a small reference diameter hole and then revert to normal extrusion routines once the two main component shapes have been created.

Unlike a normal model, once you have created a model you cannot ‘right click’ in the timeline to edit it. Instead you have to click once again on the Shwivel top menu item and this gives you the entry screen for editing.

All in all I have been impressed by the results achieved but as yet I have not run any 3D printed models.

Links to similar or related post are listed below : –

Verified by ExactMetrics