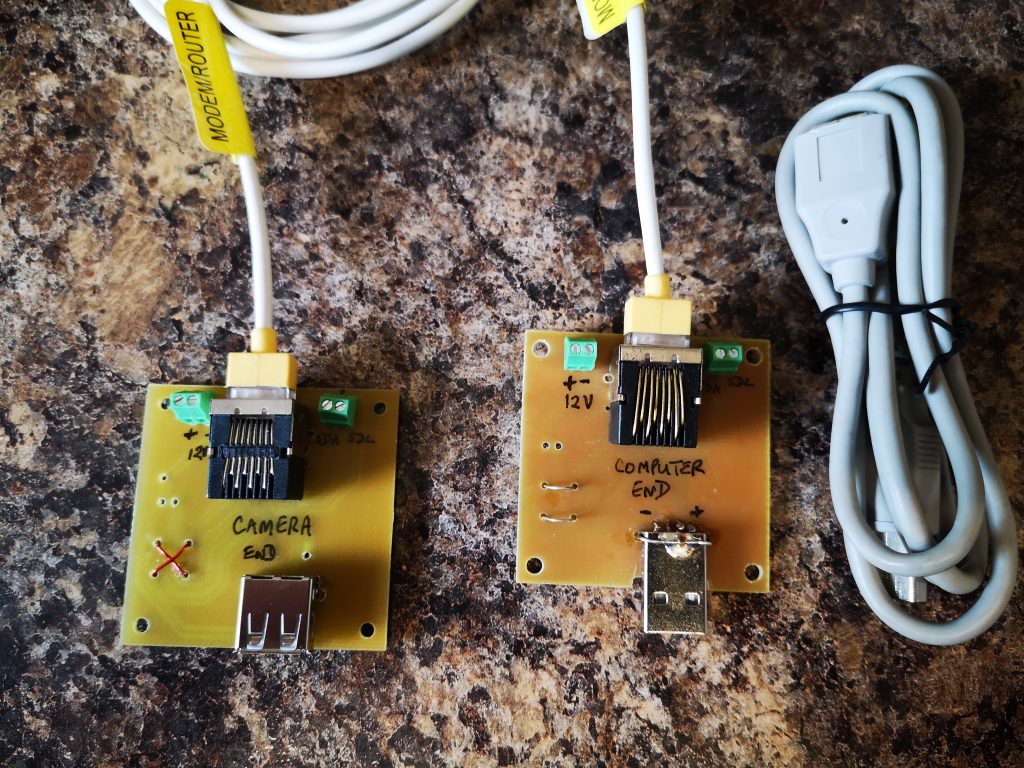
Supply, IC2 and USB connections over CAT5 connection

CAT5 Breakout Board

One of our group of ‘silver experimenters’ is building an Arduino based celestial camera tracker.   This will be deployed in the garden and he needed all control to be routed back inside the house.   The garden installation consists of a USB webcam mounted on a servo controlled platform all powered by 12V DC.

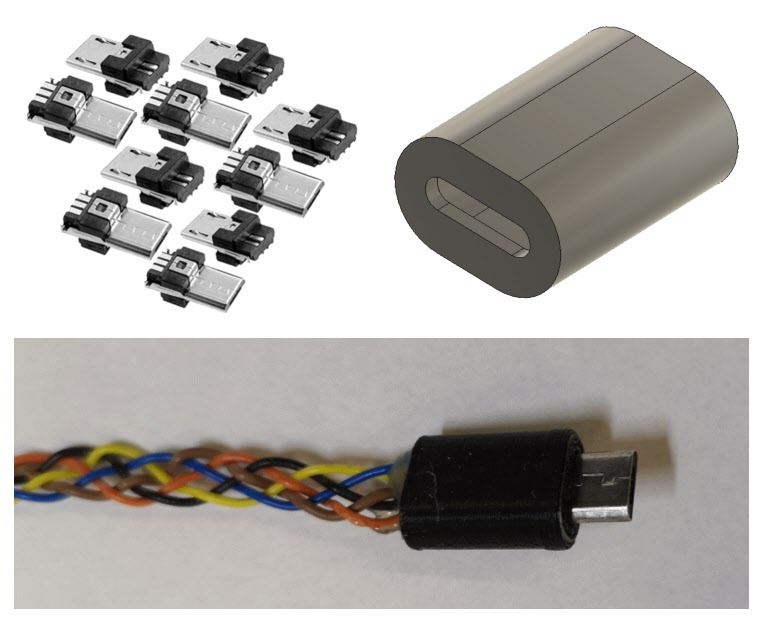
We pondered long on how we might remotely connect to the garden.  The crucial thought was that the Arduino servo board was a two wire interface using the I2C format data exchange.   Given that the USB needed four wires and the DC supply two wires we had a need for an eight core cable connection.  It seemed like a length of CAT5 cable would do the job and we could elegantly use standard CAT5 sockets.

The PCB was designed in Design Spark and milled on the Tormach PCNC440 using FlatCAM.

There is a problem with running USB over more than 5m but I did some tests at 10m and all seemed fine which should be adequate for the application.   

The breakout boards had a male and female USB connector fitted and the connections had to ‘cross over’ on one of the breakout boards to maintain continuity.   We also paired the Data + and Data – connections with the +5 and Ground twisted pairs in the CAT5 so the Data + and Data – were not twinned together.

Nothing technically magic but a simple solution to a project need.

CAT5 breakout board for USB, I2C and DC supply
CAT5 breakout boards for USB, I2C and DC supply

  Similar or related subjects : –

How to Register Velux radio controlled windows

Velux Window Registration of Window to Controller

An Off Piste rant ….having just had a few hours of my life dribble through my fingers I thought others might want to avoid having the same misery.

We have two Velux centre hinge windows in our ‘Summer Room’.   They have been temperamental about behaving to the handheld controller over the years and at the weekend they both went AWOL to the controller while open.

The handbook is a bit disjointed and has a circular path if you have a problem that does not get you anywhere apart from very frustrated.

First thing is that if you end up with the window open and not responding there is a tiny white button on the electronics box inside of the window frame which if you press once will cause the window to close.  This assumes that the window has failed fully open and you can get at the button….

Now to the main problem, getting the remote control to ‘see’ and register the window(s).   I got the spectrum analyser out and checked what was happening.  When you take the batteries out of the controller and give it a hard bounce it takes you into a primary screen asking for the language option you want.   This is followed by a Register menu option.   When I selected this I could see a polling signal at 868MHz (European short range devices frequency allocation) so the controller looked to be working OK.

To activate the window to listen for a poll from the controller you have to switch off the power to the window and then switch back on.  For the next 10 minutes it should be listening for the controller polling request.

Well I followed all this but the controller was not seeing the windows to register them.  I could not see the ACK on the analyser coming back from the window so something was wrong.

Digging in the handbook there is mention of a ‘window reset’.   The same white button that allows you to close an open window also acts as a reset button for the window.   If the window is closed you can manually open it to get at this button. You hold the button down for 10 seconds and this causes the mechanism in the frame to cycle back and forth and make noises.

When all stopped and it went quiet I turned the windows off and on and re-tried the controller and immediately both windows registered.

Magic.   I can now get on with something more important or at least more interesting.

In summary : –

  • Remove the batteries from the remote controller.
  • Manually open the window and press the white button on the black electrical unit on the frame for ~8 secs. The white T shaped part of the mechanism will go into an ‘in and out’ process for 6 or more times and then stop.
  • Close the window manually and switch off the power to the window.
  • Put the batteries back in the controller.
  • Switch on the window.  You now have 10 minutes to register the window.
  • The controller will ask for the language to be selected and will then give an option to Register. Cross all your fingers, hold your breath and then press Register and wait for registration to happen.

Hope that helps someone lose a little less of their life trying to get this to work.

Similar or related subjects : –

Micro USB with 5 core cable

Lots of activity to be documented and posted but let’s start off with a short note.  Not earth shattering but might help someone somewhere.

I had the bright idea of using Micro USBs as a connecting medium on a couple of projects.  This was driven by the need for a 5 wire connection.   The design was finished and I dug out the Micro USB to Micro USB cable that had been bought in for the project and connected things together.   All the LEDs went out on my project circuit board.  Gloom.

After buzzing the cable through I found that on a standard Micro USB cable the Sense pin is linked to the Ground pin.   There are not 5 independent and isolated cores as you would expect.  Just four. What to do ?

By chance I had some Micro USB connector ends with solder tabs but no shells.   I did not have any flexible small diameter cable with 5 cores.  After some discussions with my other half she offered to plait 5 independent cables together for me as a cable form.   These were soldered to the Micro USB ends.  Two small end caps were quickly designed in Fusion 360 and took 10 minutes to print on the 3D printer. Job complete and project back up and running.

custom micro usb with 5 core cable
Custom Micro USB 5 core cable components showing solder terminal end connectors, 3D printed shell and plaited 5 core cable courtesy of my wife.

Similar or related subjects : –

Remote WiFi and GSM Switches

I have had two IT related issues of late.   Both involve devices on the house networks that have ‘locked up’ and needed a hard bounce – a complete mains power down, wait and switch on again. One of these was in our house in France and one at home.   

The one in France was a lock up of the broadband router.   Clearly once this is down all comms stop and we do have various monitoring systems in place that are important.  Searching online came up with a GSM based mains switched outlet.   This simply plugs into the a wall socket and the device to be controlled plugs into it.   You need to fit a PAYG SIM into the device and then you talk to it with your standard mobile using SMS messages from anywhere there is a mobile phone signal.   As the SMS usage will be very low, a GBP10 SIM will last for ages but it is important to remember that if a PAYG SIM is not used for 3 months it automatically gets cancelled.   Fortunately the device does acknowledge back via SMS each command received so it is possible to maintain SIM activity remotely.  The device has a number of facilities such as temperature measurement and activity scheduling.  This has now sorted the French Connection and I can bounce the router anytime it misbehaves.  Here is the Amazon reference.

https://www.amazon.co.uk/gp/product/B00PKGL7YC/ref=ppx_yo_dt_b_asin_title_o00_s00?ie=UTF8&psc=1

The home issue was on a device on the home wired network which was important to keep running.   Very occasionally and usually at an inconvenient moment it would lock up and the only way to reset it was a hard bounce.   The device is a pain to get at to do this and if we were away from the house even more so.  Fortunately the WiFi router at home is reliable so all I needed was a WiFi equivalent of the GSM device mentioned above to give the offending device a controlled hard bounce.   Amazon offer one such device which was easy to set up and works a treat.  For those interested it accepts speech commands via Alexa etc

https://www.amazon.co.uk/gp/product/B07KXBQKXX/ref=ppx_yo_dt_b_asin_title_o01_s00?ie=UTF8&psc=1

Hopefully now we will have remote control of these two weak links in our communication backbone.

Similar or related subjects : –

Wireless Tag technology for remote sensing and security

Useful Wireless Tags for Monitoring Assets

Some while ago I happened upon wireless tag net which market a range of simple to use wireless tags for temperature, humidity, movement etc.   These devices use short range wireless comms to a wireless node connected to the house broadband router.   Once activated the tags can be monitored and controlled via the web.   There are a number of extensions to this using other technology devices which all in all make them rather attractive and useful.

I decided our house in France would benefit from the use of these devices and this would allow us to monitor the house from the UK.   I bought a package of 5 temperature/humidity/movement tags and a single moisture tag for the garden.

These are really easy to set up and add to your web portal.   Results are graphed for you to see trends etc.   Really nice simple and useful product.

I could put lots of pictures up but the best thing is to follow the link as above and read all about it.   Deliver to the UK was quick but got hit for import duty and VAT.

Similar or related subjects : –

Verified by ExactMetrics