With a secondary use for checking how bad your arthritis has become.
While working in a remote and physically difficult location I had a need to check an arbor diameter and judge its concentricity. I could get a caliper on the arbor in one axis only so something better would be needed.
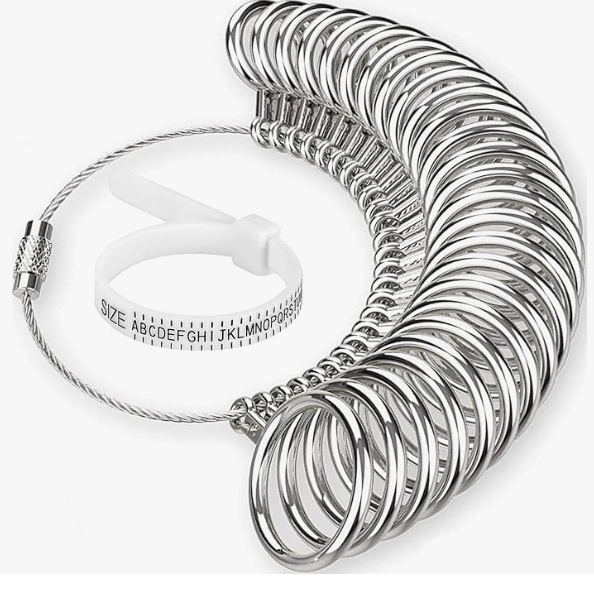
My simple solution was a set of ring sizers as used by jewellers to measure fingers for fitting a ring. These are readily available from multiple sources on Amazon. They come with a sizing chart and are remarkably accurate albeit in weird step sizes.
Sizing the arbor using these rings allowed me to zero in on the best fit. Adding some thin paper around the arbor to pack out the residual gapping allowed me to get a very good feel for how concentric the arbor was.
Not exactly serious engineering practice but needs must.
Links to similar or related post are listed below : –
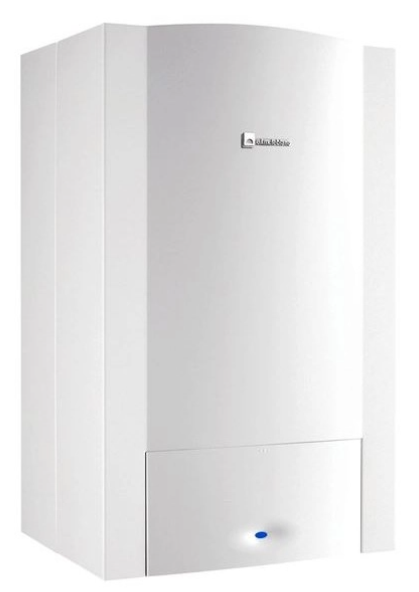
Not something of general interest – our house in France has an Odealis LPG fired boiler. This provides both hot water and central heating and works very well and is good on efficiency. The hot water side is particularly good in that it is on demand when you run a hot tap and has a limited buffer volume of hot water stored internally.
For sometime we were having problems which resulted in an A9 error message being shown on the control panel. We had a service engineer call twice on this issue and no real resolution. The symptoms were that on demand for hot water the boiler would fire up, run for a short while and then the over temperature cut out would kick in and the boiler stop firing until it had cooled down sufficiently.
If you look in the handbook for error code A9, it tells you to check the temperature measuring thermocouple. This checked out okay and was not the issue.
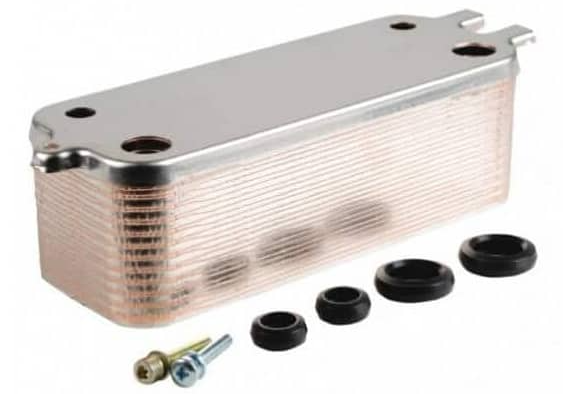
The boiler has a device called a plate heat exchanger (French term). It is a laminated stack of copper capillaries that have both the hot water and the central heating water flowing independently through them but thermally coupled. It is a heavy lump of metal.
My thinking was along the lines of if this gets blocked the flow reduces through the capillaries and the water temperature rises as it cannot be easily conducted away. I couldn’t decide which side could be causing the problem. We do have a water softener installed which would tend to suggest that the problem was not on the hot water side but more likely on the central heating section.
I requested a service call and this time told the supplier unequivically that I wanted the heat exchanger replaced and that he should leave the old unit in the utility room for me to inspect on our next visit.
On arrival the over temperature problem had gone away. On inspection the old heat exchanger was clogged with metal debris liberated from the inside of the radiators. The capillaries are so fine that this was always likely to become an issue with age and usage.
Having replaced the heat exchanger, I decided to try to alleviate future problems by fitting a Vortex magnetic trap in the boiler return feed. This is a large Neodymium magnet in a trap that forces all the return water to circulate around it and grabs the metalic debris. The trap can be valve isolated so the magnet can be periodically removed and cleaned.
Hopefully the problem has gone away and the new exchanger is better protected from blockage with the magnetic trap doing its job.
Sorry not very interesting but just might save someone the same frustration we had with a supplier who didn’t really understand the source of the problem.
Links to similar or related post are listed below : –
I am working on some very low current Arduino projects using the Seeed Xiao. These use LoRa radio connectivity and I needed to go walkabout with the receiver module to check the radio coverage. A power bank seemed like a useful portable power source. The problem with some power banks is that they auto switch off if they do not see 50mA or so of current drain. My receiver was using much less current than this so the power bank kept turning off. Frustrating and irritating.
The good news is that one of my power banks is a Charmast device as shown below and linked.
Thoughtfully this device has a soft workaround. If you plug your device into the USB-C connector and turn on the power bank you will see the battery capacity displayed. If you then hold the power button in for a few seconds, the display changes such that the last digit of the readout cycles round its constituant segments every 15 seconds or so and the power will remain on.
I am guessing that there is an electronic timer in the power bank that pings a surge of current every few seconds to disguise the overall low current drain.
Not all power banks are made equal.
Links to similar or related post are listed below : –
One of those tools you wonder how you managed without it
While attending a model engineering show here in the UK I happened upon a stand (booth) demonstrating the GyroCut cutting tool. Their strap line is ‘works like a pen …. cuts like a knife’.
After standing watching the demo for more than a few minutes I came away with two of their cutters, one for me and a child friendly version for my granddaughter.
The GyroCut does what it says on the tin. You use the tool like a pen to trace the outline of the object you want to cut. It is available with different blades depending on the medium you are working with. It is now in regular use in my workshop. I would put it almost on a par with my 3DConnexion SpaceMouse for its impact on my way of working. (It has the added benefit that I am not needing so many sticking plasters to staunch my scalpel induced blood letting).
I have no affiliation with GyroCut, just very pleased to have discovered this useful tool. Have a look at their website to see it in action.
Links to similar or related post are listed below : –
In my experience there is only one fixing style that works with plasterboard lined walls. These are shown in the image below and are supplied in various mounting thread sizes. The image below shows the 4mm and 5mm versions. Also shown is an example of how they expand out when you clamp them inside the cavity behind the plasterboard. Note that while intended for dry lined walls, these can also be used on thin walled surface such as a modern ‘hollow’ door (good for bathroom towel hooks). The fasteners are available in various lengths to suit the mounting surface thickness.
In use you drill the appropriate clearance hole for the body (6.8mm for the 4mm version and 8.8mm for the 5mm version) and push the fastener into the hole so it is flush with the outer surface of the plasterboard. You tighten the screw to cause the ‘wings’ to expand in the cavity.
There are a few issues with this. To cause the expansion process to start you have to apply a lot of pressure downwards on the screw head. Once you feel the screw beginning to turn easier you are on the way to crushing the wings against the wall inside surface. The next test is judging when you have reached optimum expansion of the wings. This comes with experience. The screw rotation will go from relatively easy to increased pressure.
When used on plasterboard the two triangular prongs on the fastener are supposed to grab into the plasterboard surface and stop the fastener rotating as you tighten the screw to initiate the wing expansion. My experience is that you need to apply heavy downward pressure on the screw head to stop the prongs just rotating free and cutting a nice circular vee groove in the plasterboard surface. This is slightly less likely to happen if you are fitting one to a hardboard surface such as a hollow door as the hardboard will give greater resistance to the rotation.
This tightening process can be helped if you put a washer under the screw head with some grease. This eases the possibility of the whole fixing rotating.
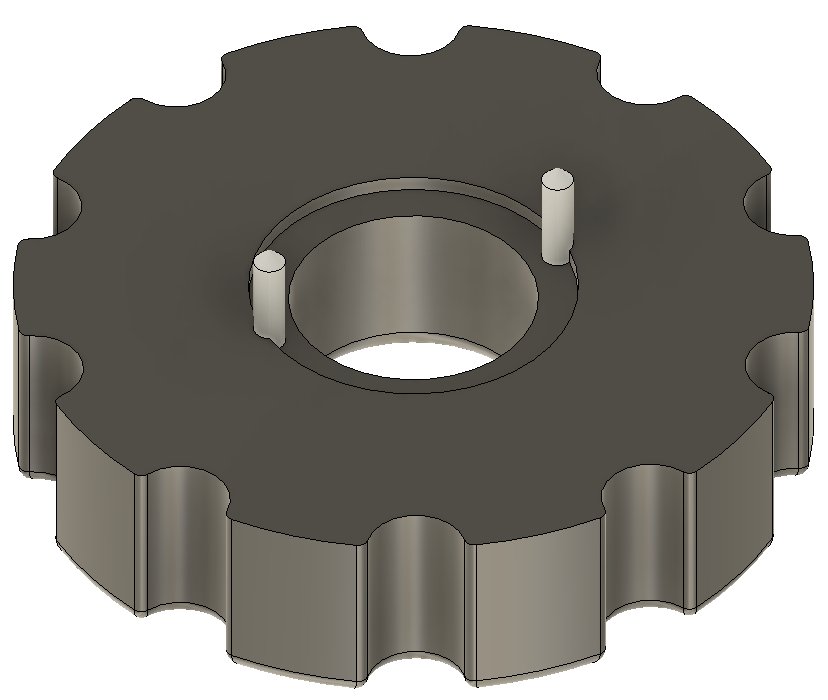
You can buy a tool for mounting these fixings. My version is a 3D printed double pronged restraining jig. So far I have created two sizes, one for 4mm and one for 5mm threads. It is simply a disc with two 1.6mm panel pins embedded in it that mate with the notches in the fitting. The tool is offered up over the fastener with the pins in the V grooves and then pushed home into the plasterboard. The pins embed deeper in the wall surface than the prongs on the fastener and stop it rotating.
A couple of other comments. Once you have the fastening in place on the wall the screw thread will likely be longer than you will need to hold the object being fastened to the wall. You can therefore substitute a shorter screw as needed so long as it is long enough to mate with the fastener thread. You can also change the screw head style. When fitting curtain battens I use a number of these fittings along the batten length and replace the dome head screws with countersink heads into which I fix the commercially available small plastic star head covers (see below).
Here is an image of the fasteners, the two jigs sizes I use, a view from the rear of how a fastener expands in the cavity and the small coloured plastic covers that can be used to cover countersink screws.
Depending on the technique that has been used to fix the plasterboard, you can sometimes have a reduced depth of cavity for the fixing. This can be overcome by drilling the mounting hole for the fastening not just through the plasterboard but as deep as need to match the fixing’s length into the solid wall behind. This allows you to get the fastener in place and the expansion of the wings will not be inhibited. Clearly this is not so easy with a steel lintel behind the plasterboard …..
The STL files for the two sizes can be downloaded on the link below. I used PLA with a 4 perimeter print and 0.25mm layer depth. Once printed, clean out the two panel pin mounting holes with a 1.6mm drill. Cut the panel pins to around 6-8mm length and push home into the drilled holes. The small counterbore on the print surface will match the fastener flange but not to full depth so there is a pressure exerted from the jig as you push it against the wall.