Qidi X Smart 3 tweaks

From the title you will have guessed that I could not resist the temptation to buy an X Smart 3 while they were on special offer at GBP299.

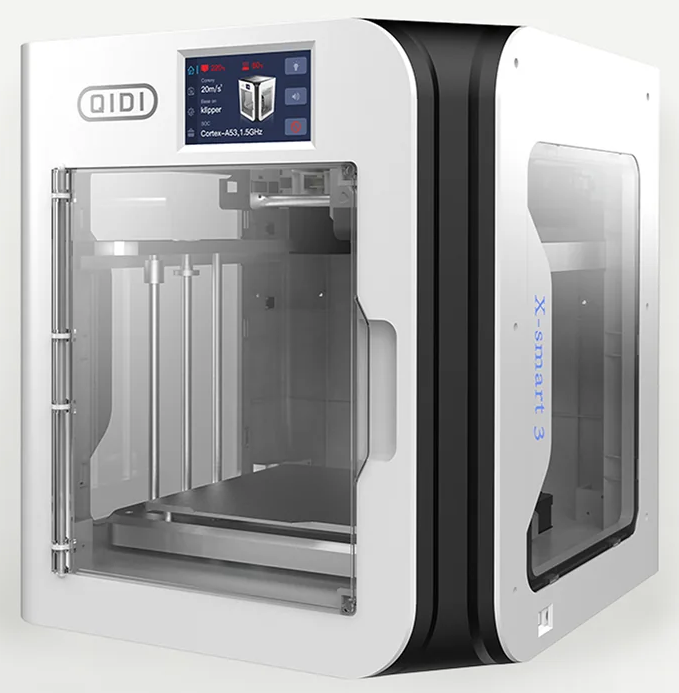
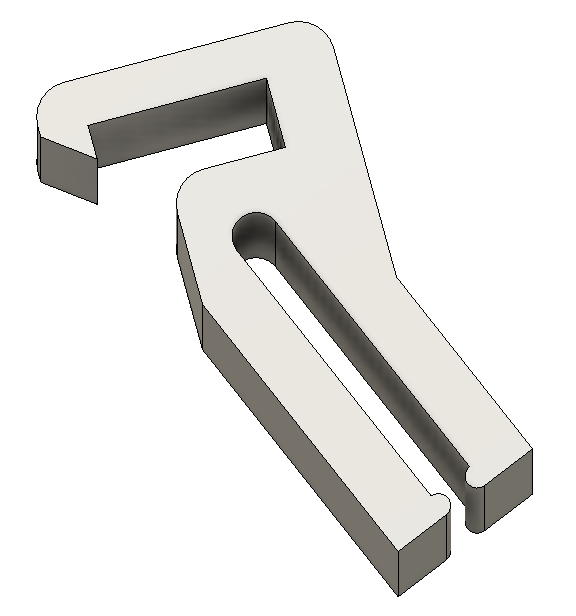
The X Smart 3 is a lovely little machine. It prints excellent high quality models at a very fast speed. My testing suggests around a third of the time as on my Qidi ifast but of course it has nothing like the same chamber build volume.

I have had some issues with the X Smart 3, some of which were finger trouble on my part and some that needed recourse to Qidi’s excellent support team.

Attached to the link below is a ZIP file that has the full write up detailing my modifications to the X Smart 3 to add a LAN socket, modify the processor fan operation and to add extension feet to raise the body of the printer to allow more air flow. The ZIP file contains the PDF document and two STL files, one for the extension feet and one for a printed template to aid positioning the hole for the LAN socket.

Note that the LAN connection will not appear on the printer control panel but is visible by the Qidi Slicer application. The IP address allocated will be automatically defined and you will need an application like Fing to discover what this is. The control board will be discovered as a Raspberry board.

Since the above write up I have progress on a HEPA filter housing for the X Smart 3 rear fan. Below is a write up on this and some changes I also made to my i-fast. Note that since posting this write up I moved the rear fan filter housing inside the chamber so that the fan is pulling air through the filter rather than trying to push it through. This worked out nicely with the rectangular shaped filter housing.

I have also made a replacement top cover with a large HEPA so air can get in and out of the chamber to mitigate having to leave the lid off.

Update – Fan Noise

The only remaining frustration with the printer is the power supply fan noise. This is present all the time the printer is running whether under full print load or just on standby. Unlike the ifast the X Smart 3 only has one power supply. It is therefore impossible to get the power supply to switch off when it needs to be on to run things. Contrast the ifast where it goes completely quiet. There are suggestions that there maybe better substitute power supplies that have proportional speed fan control driven by the supply current demand. I debated this but decided there would still be noise even when backed off.

My solution is a bit steam age. I bought in an Alexa compatible AC switch. I now tell Alexa to turn the printer on and off. Much easier than trying to get round the back of the printer to the power switch.

On the subject of Alexa devices, I also bought in a Google/Alexa air quality monitor so I can check the VOC level around the printer. This seems to be quite sensitive and suggests the HEPA filter modifications are working.

Links to similar or related post are listed below : –

Qidi X Smart 3 special weekend pricing

Worth considering ?

For those of you considering getting or upgrading a 3D printer, Qidi are offering their X Smart 3 on a special weekend price reduction from £399 to £299. This is a lot of printer for the price with a heated enclosure and fast printing speed. You can watch a review by Aurora Tech here.

I have no affiliation with Qidi but have a great respect for the company, their products and their superb support infrastructure.

Links to similar or related post are listed below : –

Stop losing Qidi ifast 3D prints down the chamber front gap

A simple solution

I love my Qidi ifast but one issue kept cropping up. At the front edge of the chamber there is a gap that seems to be a black hole for small prints. They sometimes ping off the build plate when it is being removed from the chamber and rattle down the slot to be lost underneath the machine. They don’t simple drop out from underneath the machine but instead end up lodged on the cover plate to the power supplies. Lifting the machine to remove this plate is a nightmare job as the machine is so heavy. I usually end up printing a second model. There is a similar gap at the rear of the chamber but this is much less of a problem.

There is a YouTube video showing how to a print protective cover for the front and the back black hole slots. This looked interesting but was a long print run and involved double sided tape.

My solution is to use some aluminium ‘expander mesh’ with some 3D printed fixing clips. The mesh is Gauge 10 and is cut as a 70mm wide trapezium shape with the two sides measuring 500mm and 485mm. I sprayed it black to blend in. Here is a picture before and after fitting.

Here is the Fusion 360 graphic of the clip and the download link for the STL file.

Links to similar or related post are listed below : –

Fitting a Bento air filter to a Qidi ifast 3D printer

Hopefully less tickly throat and itchy eyes?

For some time I have been subjectively conscious of fumes created by my 3D printers.   There has been quite a lot of general comment about this problem in the technical press.  I mostly use PLA for my prints using my Qidi ifast and Sindoh 3DWOX.  If you believe the press, PLA is the least likely to cause irritation.  However, my office is small and the printers are both close to my desk so any fumes are likely to be immediately adjacent to my computer activity.   If I do a long print run, I can sense the fumes as a background smell and as an irritation to my throat.

The geography of my office and workshop are such that moving the printers is not an option nor is finding some way to vent to the outside world.   The Qidi ifast is a huge machine and finding a new home for it would be difficult.   Transferring both machines into the workshop would expose them to a residual albeit low level of moisture (nothing rusts in the workshop so it can’t be so bad).

I came across the Bento filter unit which is a free download from Printables.   As an aside Voxel in the US sell Bento kits.

The concept of the design is to house a complete filter unit inside the printer chamber where it acts as a recirculating air filter (a ‘scrubber’). This only acts on the air circulating within the chamber.   This should avoid creating cooling drafts across the print job which might be the case if high volumes of air were being ventilated in and out externally.

The unit is visually shown opposite. It has four sections all stacked one on top of the other.  The air in the printer chamber enters the top section which contains a commercially available HEPA filter cartridge.  The next section is a carbon filter.  This has an inner printed magazine containing carbon pellets. The fan section is next with two fans pulling the air through the two filter sections.  The bottom section is the air exhaust duct. The design is rather well conceived with each of the two filter sections clipped together using small magnets.  This makes these two sections easily demountable for filter maintenance.  The fan tray and exhaust duct are held together with screws and brass inserts that pick up on the fan mounting holes.  

Circulating the air into the unit via the top section and exhausting at the bottom is a nice idea. In the Qidi ifast the print head stays at a constant height and the print bed moves down as the print builds.  The print head activity remains at a constant height to the filter input.  There is a lot of web discussion on fitting the Bento to Bambu Labs units but little about use in other printers so some head scratching was needed on how I might implement the Qidi ifast installation..

Here is a link to ZIP file containing my write up of how I installed the filter in my Qidi ifast together with the STL files for the modified fan tray, exhaust duct and microswitch mounting block.

Links to similar or related post are listed below : –

Updated Qidi i-fast driver for Simplify3D v5

Great Support from Qidi

Simplify3D has just released version 5 of their 3D printing slicer program. Simplify3D is a subscription program and is unlike Cura and Prusa which are both free. There is a special price for the upgrade if you are updating to the new version. I had been running the previous version of S3D and fully expected to be able to upgrade and use the same driver file (.fff) for my Qidi i-fast. Not so …. despite S3D saying my printer was compatible etc etc.

I sent a message to Qidi support and next day had a reply giving details of edits to the start and finish GCode routines. They also sent me a new .fff file that had been issued by S3D so clearly others had contact S3D with the the same problem. To be clear I am not saying S3D are not responsive. I just expected that they would check out these issues before issuing a major upgrade. Five Stars to Qidi though who as always are red hot on support.

Attached below the upgrade details as received in a ZIP file. Note that I am currently travelling so I have not had chance to check out the changes …. proceed with caution !

Links to similar or related post are listed below : –

Verified by ExactMetrics