That old Chestnut …. Again
Go onto any home workshop forum and I am sure you will find a number of threads on the fractious subject of parting off on the lathe. It is a perennial topic that everyone has their sometimes not so humble opinions on. It seems to be the machinists equivalent to the search for the Holy Grail.
If you have a bulky rock stable mass for your lathe the problem is easier to solve. Rigidity rules when it comes to parting off. If you are less privileged on funds or workshop space you are more likely to have a Myford equivalent machine. The problem will then get magnified simply because there is not so much stability in the machine structure.
I have tried various parting tool configurations and I have to be honest I get a severe case of ‘squeaky bum time’ when faced with parting off steel. Brass and ally I can cope with but steel usually makes me wimp out and rush for the hacksaw.
My parting weapon of choice is a hand graver. This is appropriate for small diameters and using a graver is very educational. You can feel how the cut is progressing and you can feel how the cutting action changes as you change the angle of attack. It is a lovely craftsman’s tool and for clockmaking, in various geometries, is indispensable.
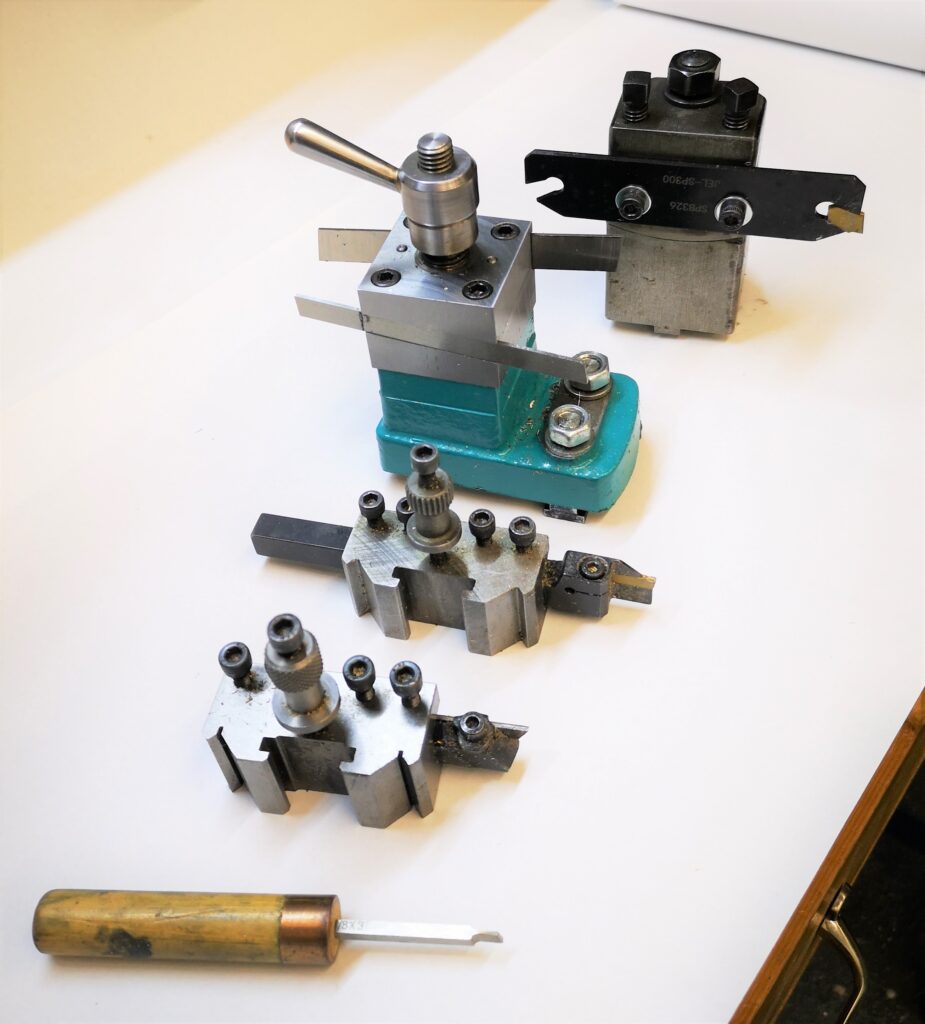
For larger diameter parting I have progressed through HSS front cutting, insert front cutting, Hemmingway kit rear cutting and now the latest variant – a simple insert tool holder rear cutting.
To be fair the insert front cutting does work for brass and ally but on claggy ally the tool would often dig in and can jam the chuck no matter how much lubrication I use. This I assume is because front cutting leads to a digging in action whereas rear cutting throws the tool outward from the cutting groove.
The Hemmingway kit was a thoroughly enjoyable experience to build and it looks brilliant but the blades seem too prone to flexing. It is a real shame given how nice the finished tool looks. (Yes, I do accept that it might be something to do with my construction). So nice as it looks I tend to have little universal confidence in it.
So what is my latest parting panacea ?
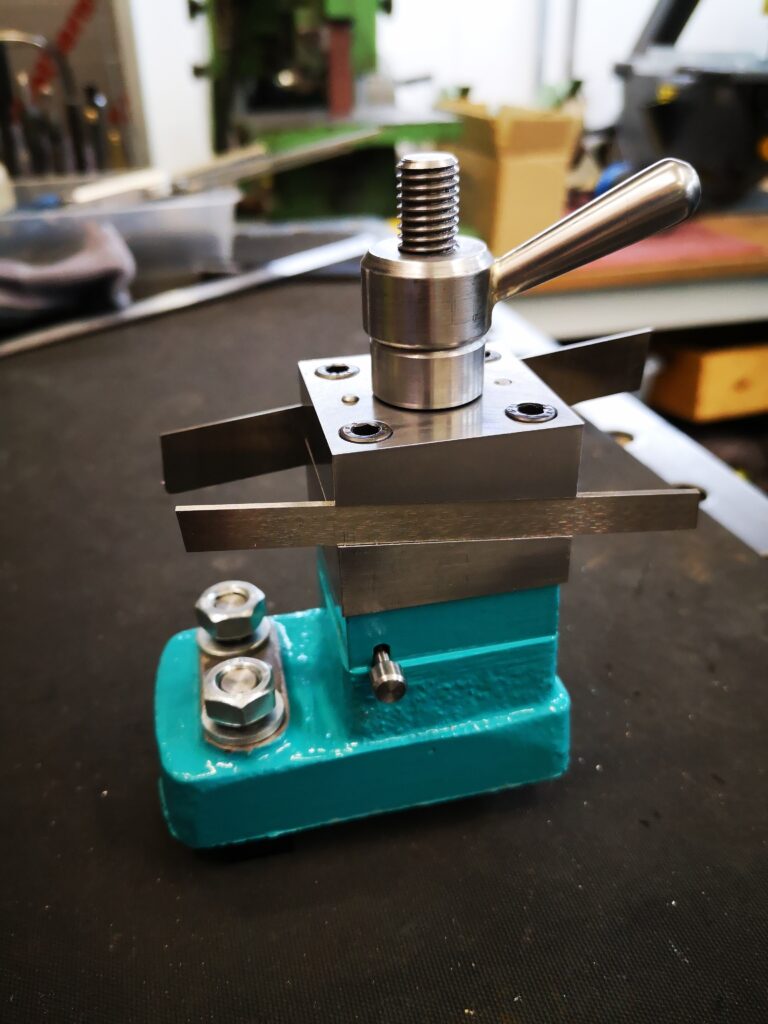
I have mounted a standard, universally available, insert blade parting tool (SPB326) on the side of an old rear mounting post that originally came as part of a knurling tool. The tool clamping on the post has a sliding curved pressure support surface which allows tool height variations. I fixed a 12mm square steel clamping block on the rear of the parting blade with 2 x M5 cap head screws and clamped this in the mounting post.
I did a few facing actions on some brass to get the centre line correct and then began trial partings on brass and ally. It worked like a dream. Encouraged by this I moved onto a piece of 10mm silver steel (drill rod). Plenty of cutting oil was applied and apart from the initial engagement chatter it just cut beautifully. Lovely snails of swarf, no SBT reaction, no hacksaw needed.
Alright the blade and the insert are wider than ideal (3mm SP300) but this probably adds to the rigidity of the setup. A consequence will be that I will be wasting more metal in the cutting action but at last I seem to have a tool and recipe that I trust to work.
Well, for the time being anyway.
Links to similar or related post are listed below : –
- Parting Off on the Lathe
- Workshop storage update using Spacemaster 5L boxes
- Plastic heat sealer – a useful workshop asset
- How to square up a scrap piece of stock ready for machining
- Deburring techniques in the home workshop
- First screw threads cut using Clough42 electronic leadscrew
- Machining a job that is outside a milling machine’s table travel using Fusion 360
- Stevenson Collet Block and the Angle of Dangle
- A Lazy Cable Clamp using 3D Printing
- Mill Turning Jig