Each of the axis locks on my VMB mill uses two M8 cap head screws in association with a lock nut. This works OK if the hex driver is in reach …. but it never seemed to be …. so I decided to remove the cap head screws and fit lock levers instead. Lock levers come in male and female format and various thread sizes. The M8 versions all have 40 to 50mm long lever arms. This length doesn’t work comfortably in the space constraints on the VMB X and Y axis but is fine for the Z axis. Similarly I also had to reduce the length of the lever thread.
The obvious solution was to cut down the length of the lever arms. The trouble with this was the raw open end of the arm looked naff and did not sit easily with my usual perfectionist approach. The solution via Fusion 360 was to create some 3D printed end caps which I then bonded in place with Araldite. This finished the job properly.
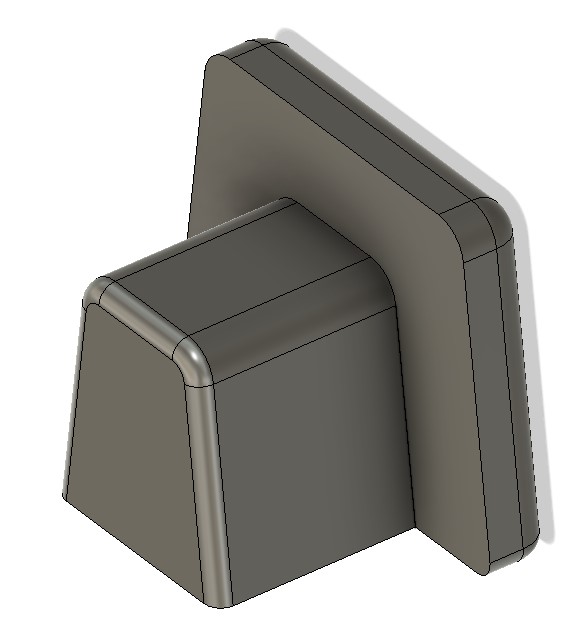
Fusion 360 modelled end cap for the shortened lock lever arm open end
The Fusion 360 3D modelled end cap printed in under 4 minutes with a further 5 minutes for the Araldite to cure. I now have a much more elegant looking solution.
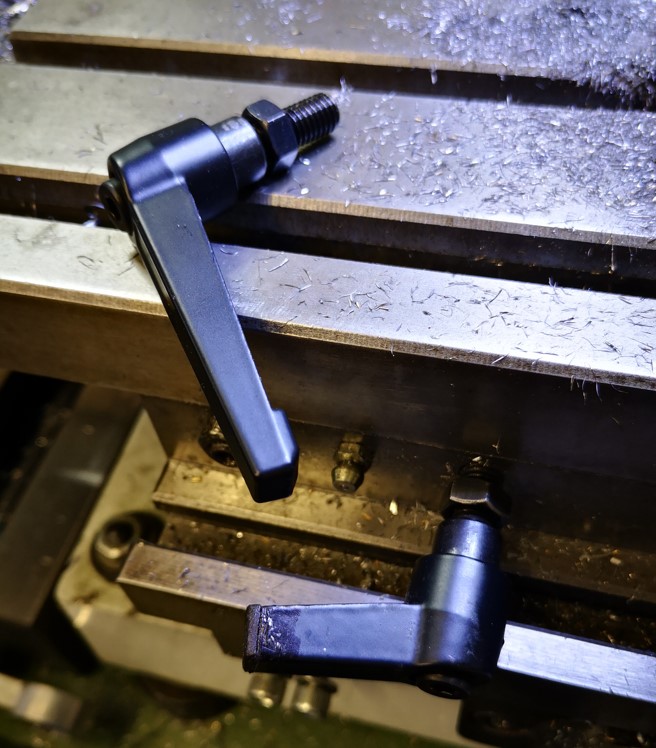
Full length lock lever and the truncated version with 3D printed end cap mounted on my VMB mill
All of which has led to a rethink the lock levers on my Quorn tool grinder. I get in a real mess with these clashing with each other. Where did I put the Araldite ? …..
Links to similar or related post are listed below : –
First of all some background and then the techie bit at the end.
Some years ago while we had extension building work undertaken on our house we opted to install a large underground plastic water storage tank (>3000 litres). This was supplied complete with tank and submersible pump from Rain Water Harvesting. The tank is topped up with water from all the house roof down pipes. The water stored is used for all external water demands such as garden watering and car washing etc. We get a discount on our local authority water rates for having such an installation.
The house is fairly old and some months after the extension work was completed we began work clearing the garden. In the process of this clearance we discovered a cast iron manhole cover buried deep in the vegetation. On lifting the manhole cover we discovered … another underground water storage tank. This was of brick construction with a cement skimmed surface and doing some quick calculations appeared to be a similar volume to our recently installed new tank. The tank appears to have perhaps fed a hand pump or similar but it is unclear where the incoming feed originated. We added some new guttering to an adjacent building and the run off from this roof now tops up the old tank. Here is a view to the murky depths with the new pump and incoming feed installed.
The original pump suppled by RWH eventually began to give problems and started to blow the electrical breaker. RWH were very helpful and a new pump was supplied and installed. After some period of time it also began to become erratic in starting up when it saw demand. A third pump was then bought and installed. I also bought a maintenance kit for the second pump and then installed it in the old brick tank. The maintenance kit was very good and includes a new Hall Effect switch to sense flow demand. RWH support fitting the maintenance kit with some very good instructional videos. The second pump worked for a good period in the old tank but then started to blow the associated electrical breaker.
Rather than buy yet another RWH pump I opted for a more expensive solution from Pump Technology who are a local company servicing industrial pump applications. The new pump (Divertron 1200X) was more expensive but does appear to be of a much more professional build quality. It stands vertically in the tank and has a floating inlet pipe which ensures the water is drawn into the pump at surface water level rather than from the murky depths where all the accumulated silt sits. So far both new pumps are behaving well and have been a boon to keep the veg plot irrigated in the current very hot period.
The important issue that comes to light is the logic of the pump demand sensing logic.
The pumps sit quiescently at the bottom of the tank and look for a flow in the output pipe in order to turn on to meet the demand. They also have protection circuitry that detects against what they interpret as leaks which would lead to the pump hunting and potentially overheating. After a number of hunting starts the pumps go into reset mode and need a power reset. Similarly if the tank runs dry they also switch off. The problem with the logic occurs where you have a dribble irrigation system or a leaking tap union. The dribble irrigation nozzles do not give a full flow so the pump hunts for a number of times to satisfy demand then interpret this intermittent demand as a leak and switches off. Likewise if you have a leaking tap union the pump sees this and eventually switches off. If you are trying to protect your veg plot using timed irrigation both these problems cause the pump to switch off and only work again after a power reset. This doesn’t help when you are out of the country and believe your garden produce is being watered.
Clearly weeping tap unions can be fixed so that clears that problem but a dribble system is more of a problem. My solution is to mask the presence to the pump of the dribble system by having it timed to run in parallel with the main sprinkler system. This seems to fix the problem and no more ‘hard bounces’ are then needed to the pump electrics.
The other method of solving both intermittent demand sources is to fit a pressure vessel in the pump output feed. This acts like a water based ‘capacitor’. The bladder in the pressure vessel fills with water at full pressure and then supports the dribble demands from leaky taps or dribble irrigation systems to mask the effects to the pump sensing logic. I have bought a pressure vessel but not installed it as yet.
My thanks to Rain Water Harvesting for all their support over the years and it will be interesting to see how the new style pump behaves long term. I believe RWH also offer the Divertron 1200 X pump.
Sorry if that was a bit boring but it might help someone somewhere who is having the same issues with erratic pump operation and resulting withered vegetables.
Links to similar or related post are listed below : –
A 3D Printed Version of John Moran’s Drill Point Inspector
John Moran has an excellent website that details all manner of engineering projects. He is a keen advocate of four facet sharpening of drill bits and he details a Drill Point Inspector device for checking grinding results. I quite liked the concept and thought it would also be a useful asset for checking the condition of milling tools. The design uses a small inspection eyeglass magnifier lens that can be flipped from end view to side on view for tool tip inspection.
Those who know me through my blog will know that I am of a lazy disposition which tends to cause me to step back and look for an easy way to manufacture something. John’s design immediately suggested to me that a conversion to a 3D printed equivalent would be a practical solution. I also picked up on a comment that John made that you needed good light to be able to view the drill point clearly. As a result of this comment, the 3D design evolved with the addition of a simple LED illuminator. I also added a ‘right angle stop’ so that when hinged for side viewing, the lens was held more repeatably.
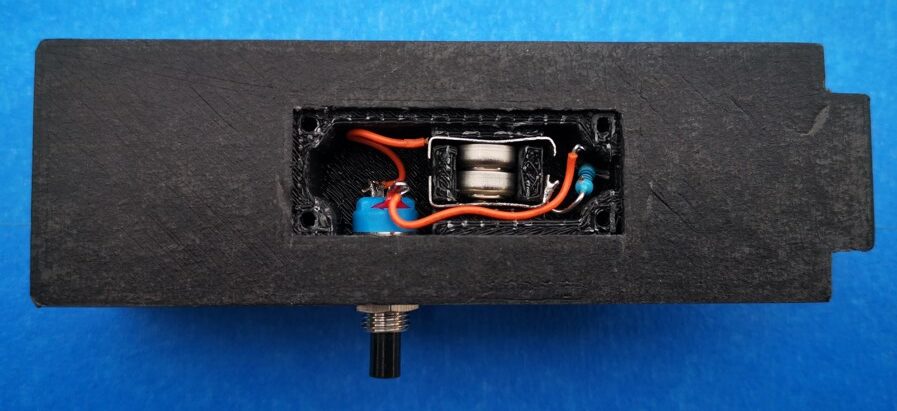
Because the inspector will only be used now and then, I opted for two small hearing aid batteries as the LED power supply together with a single resistor and switch. I printed two slots in the cavity for a pair of nickel silver battery contacts to sit in.
View into the battery and switch cavity. The battery contacts are bent pieces of nickel silver or tinplate
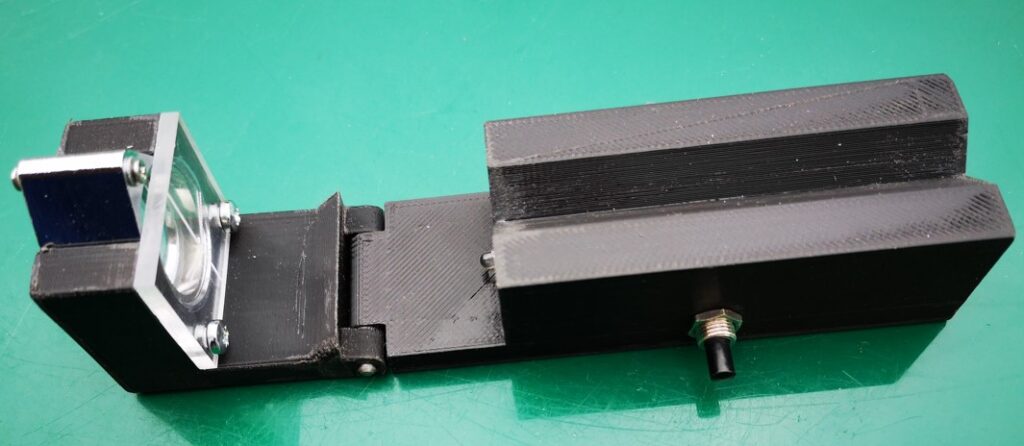
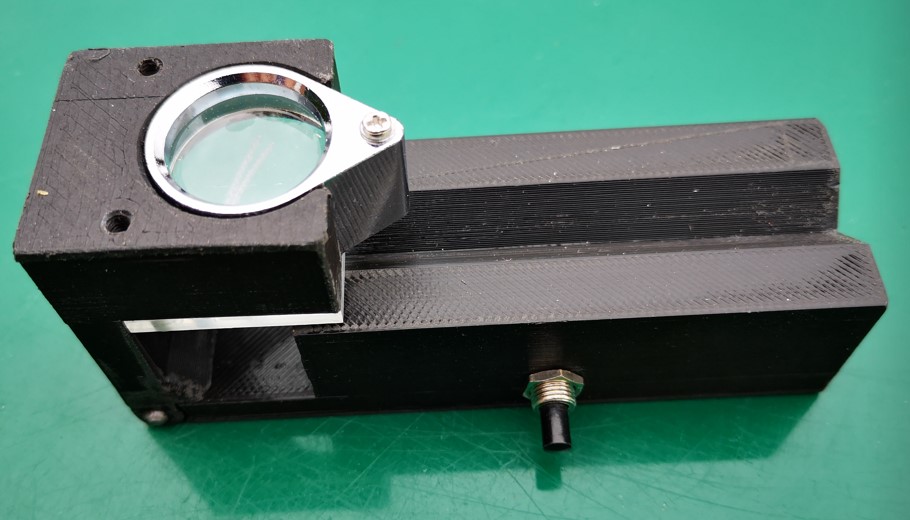
The design was modelled using Fusion 360. The two parts of the body were 3D printed. The Perspex viewing graticule was CNC milled to size and the reference comparison lines were also engraved on the CNC. The inspection lens is available from many sources on EBay (x30 21mm). The inspection screen mounting holes are 3D modelled. Here are a couple of shots of the finished model.
Model hinged flat for end viewing of the tool (the LED is just visible)Model hinged up for side viewing of the tool
Note that the addition of the LED illuminator needs the modelling of a cavity on the bottom surface of the main body. When printing this part it will be necessary to have the printer provide support structures. I also printed a cover for the cavity but this could be an offcut from an old credit card or similar thin plastic sheet.
Once printed I found the parts needed slight ‘fettling’ to remove any surface striations on the V block section, in and around the hinge section and around the eyeglass mounting slot. That aside it printed fine and the parts went together easily. More to the point it works well and is a useful tool to have to hand.
The Fusion 360 file and STEP files for the main two model parts are available in the following ZIP file. If you need additional information please get in touch.