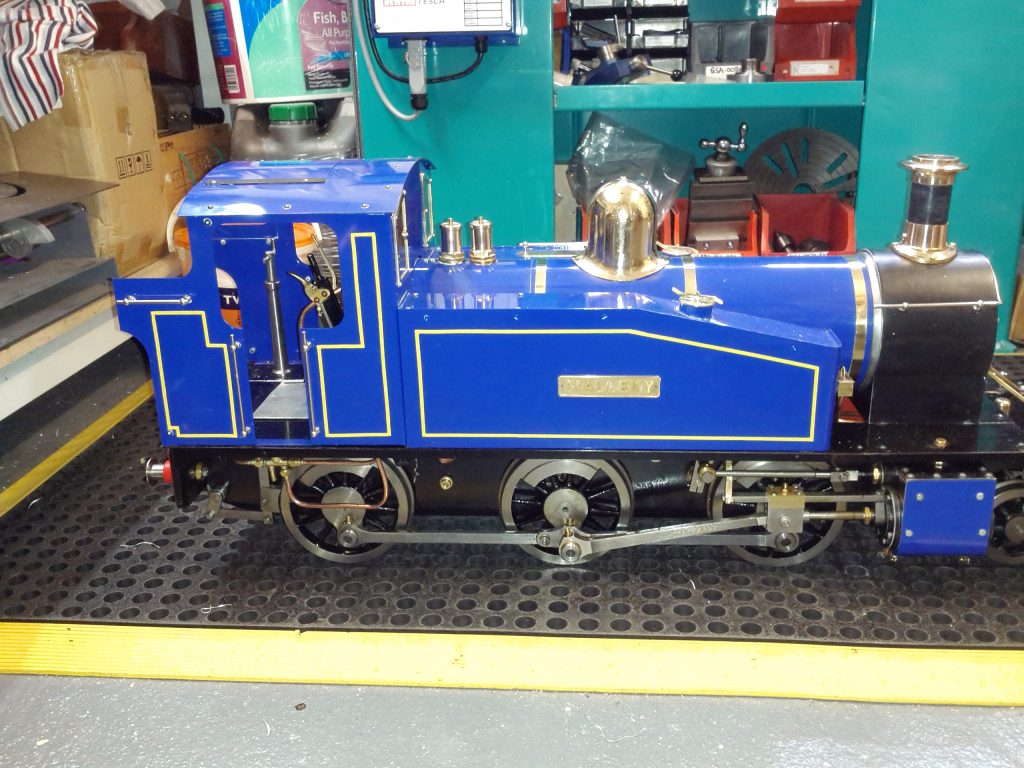
Rosebud Fire Grate on a Silvercrest BR Class 4

I received a blog enquiry asking if I could make a fire grate for a Silvercrest 5″ BR Class 4. The owner had inherited the locomotive but it was missing the fire grate. Given the age of the model Silvercrest were unable to help. I gamely said I would ‘have a go’ but on the basis of making a rosebud rather than a conventional bar grate.

What I didn’t realise was that the grate on this model is made up of 3 separate long sections which are shuffled into place via the firebox door …

I asked the owner to first of all make a template of the grate size based on three equally wide sections of hardboard. This resulted in an overall grate size of 57mm x 209mm. From this I used my Excel spreadsheet to derive a grate with 15% hole area occupancy from a matrix of 25 x 6 holes each of 4mm diameter counterbored with a BS4 centre drill.

I thought it might be a good idea to have a draft angle on the inner edges of the grates. Don’t ask my why – it just seemed like it would make it easier when dropping the middle section into place and perhaps reduce air leakage through the joint .. and of course this makes the design more complicated than necessary and added to my machining woes. This can be seen on the image above.

The design was created as a single grate and then extrude cut into the three sections so the middle and outside grates could have their own CAM program. Here is the Fusion model view looking from the under side.
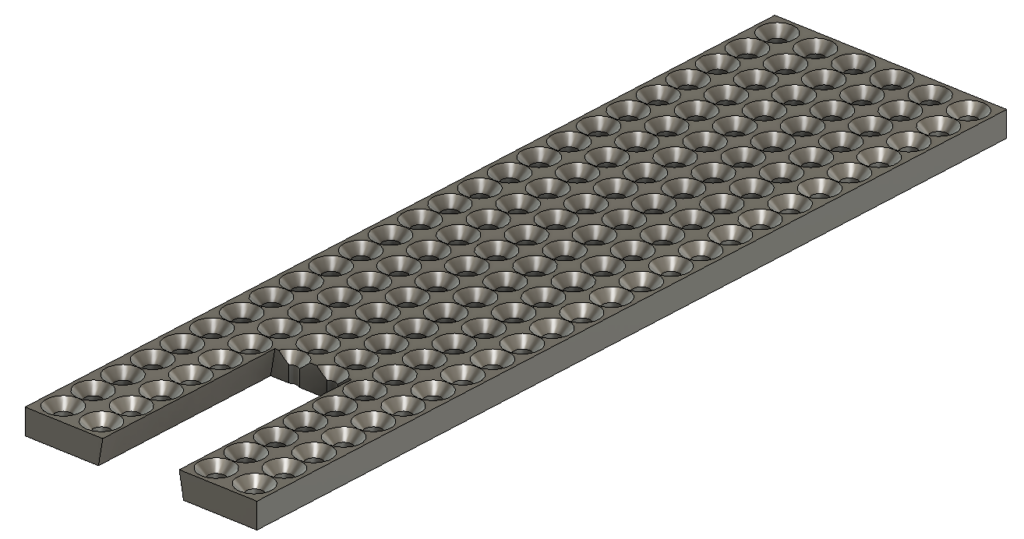
Having grasped the basis of the design I sent the owner a set of 3D printed grate sections which he cross checked and confirmed would fit correctly. (Could these be the ultimate chocolate fireguard I wonder ?)

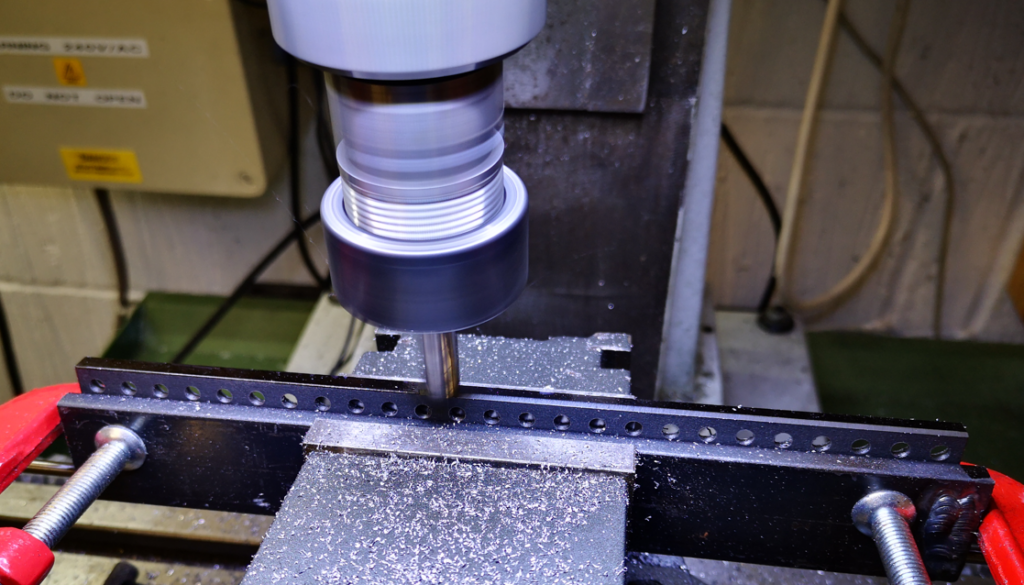
The next step was to think about the CNC CAM operations and the stock holding. I find holding the stock and the order of doing things to be the most challenging part of the machining process. As the three sections of grate were all under 25mm I opted to use 6mm x 25mm BMS as the base stock material. I had the Fusion 360 model reference the stock at the centre point. This is easy to probe using the Tormach PathPilot inbuilt routines. I cut three pieces of the BMS to 215 mm lengths and mounted each in turn on parallels in the machine vice. I had a vice stop set up to make the process repeatable. Each section was then drilled for the 4mm through holes (50 off in each) and then counter bored with the BS4 centre drill such that the taper on the drill finished flush with the stock top. This just left the outer profile of the model to be cut on the residual stock.

This was accomplished by using a piece of 30mm wide BMS as the sacrificial backing jig mounted on parallels. This was centre referenced and a number of the 4mm hole locations were drilled at 3.2mm and then tapped 4mm. These holes were then used to bolt down the three grates in turn so they could be profiled to size. The profiled width had to be the maximum width ignoring the intended draft profile (i.e. 19.10mm + 20.916mm). Here is the end view (upside down) showing the three grates with their draft angle .

The machining process was then transferred to my Myford VMB manual mill. This was set up with a tilting vice set to 10 degrees. The two bright edges of the centre grate and one edge of each of the outside grates were then blackened with a Sharpie before each being placed in the tilted vice and skimmed at 10 degrees such as to just remove the blackened surface.
The resulting grates all butted up together nicely and the job was complete. Here is the bottom side view.

These were shipped off to the owner for trials and he later confirmed that they fitted nicely into the firebox. I am not sure if anyone has made a rosebud for a Silvercrest with split grates so it should be interesting to see how well this configuration steams out on the track.

I think the above should give you enough to think about but there is one other spin off that resulted. While drawing up the grate in Fusion 360 I decided it would be much more convenient if the rosebud grate design could be automated using Fusion’s parametric functionality.

This resulted in the Excel spreadsheet being modified and the Fusion model also being updated. The result is the ability to get all the factors needed for the Fusion parameters from the Excel sheet (but you have to manually copy them between Excel and Fusion).

Here is a ZIP file with both these files included.

Update : the user has reported back that the grate performs well. Like other installations of a Rosebud grate, he has found a need to keep the blower slightly open.

Links to similar or related post are listed below : –

A Mini Vacuum Clamping Table for PCB Engraving

You know only too well how I keep on going on about FlatCam and milling printed circuit boards on the Tormach PCNC440.

You will also have read about my preoccupation with trying to hold the PCB material flat to avoid variations in milling depth.

I have got it to a reasonably repeatable process using mechanical clamping but you know when a perfectionist starts something it has to be as good as possible …. step forward the Vacuum Clamping Table.

The thinking for this followed on from the Rosebud Grate experiments on my live steam locomotive.   The grate consisted of a matrix of larger holes on the underside of the grate leading to a small bore hole on the top side of the grate.   The theory as I understand it was that the reduction in size creates a Venturi type effect and boosts the air stream into the fire.   I wondered therefore if I reversed the air flow i.e. sucked the air from the large hole into the small hole whether this would be beneficial in providing a boost of the suction.   It is a bit tenuous I must admit and I can’t point to lots of science to back this up, but certainly worth a play.

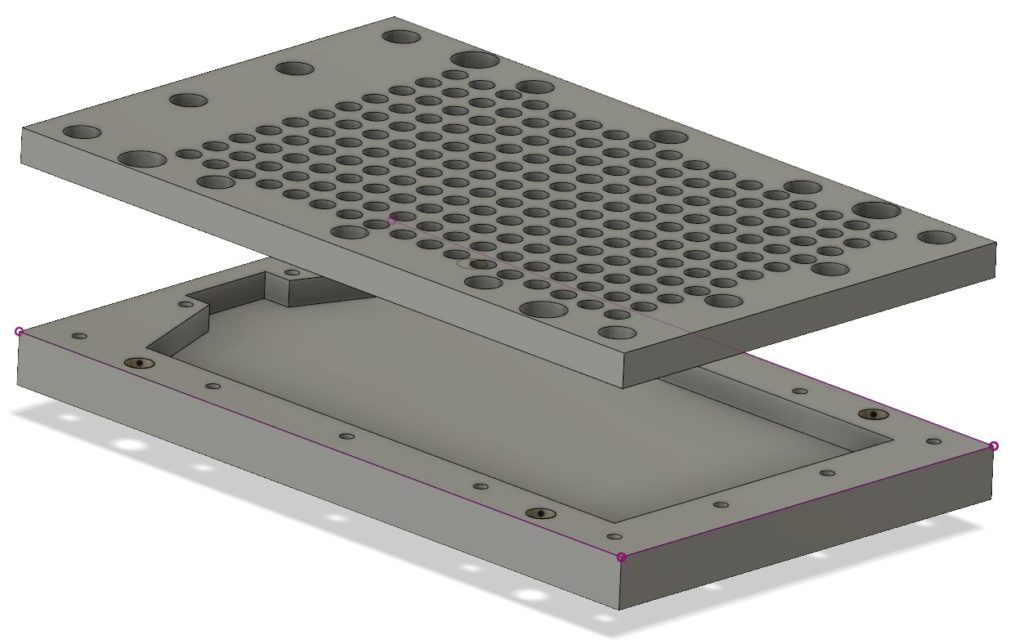
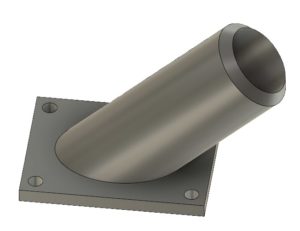
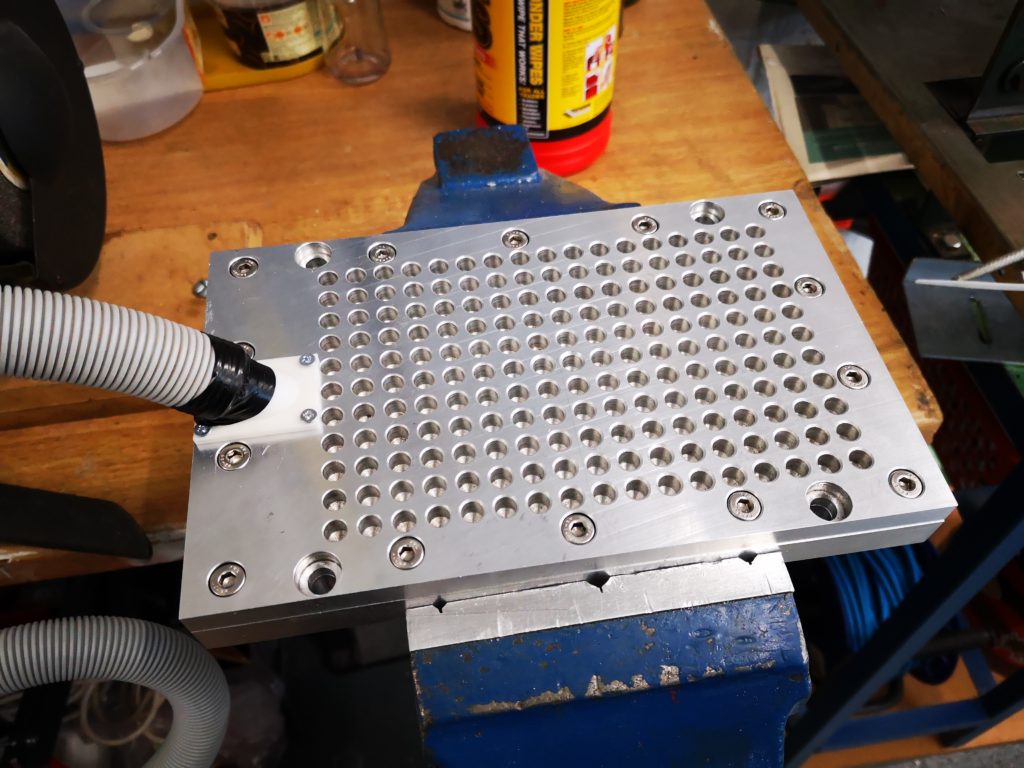
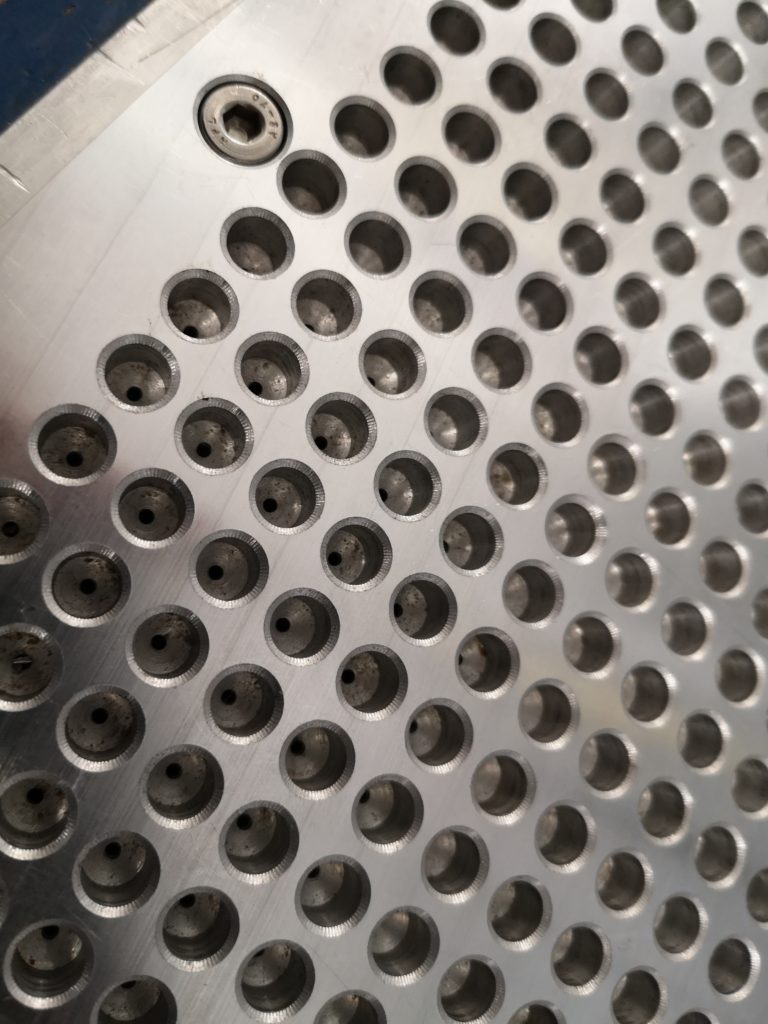
First stop was Fusion 360 and a two part plate was designed.   This consisted of a top and bottom part.   The bottom part is 15mm cast aluminium with a milled trough and the top plate is 10mm cast aluminium with 6.8mm holes (no science – this is tapping size for M8 that was already in a Tormach collet) on the top side that reduce down to 1.3mm holes (ditto also already in a collet) as breakthrough holes on the bottom surface.   Around the edges are M6 screw holes to clamp the two plates together and also M8 mounting holes to fasten the plate to the tooling plate on the Tormach. I didn’t quite think the suction connection fully.   After I had worked out the total area of the 1.3mm holes I realised that to accommodate this I needed a 16mm diameter hole for the air inlet.  This was not going to be possible to mount on the 25mm overall edge of the plate.   The solution was to 3D print a connecting pipe and mount this on the top surface.   This adapts to the vacuum cleaner pipe being used as the suction source.    The 3D printed adapter did not provide a good seal to the top plate so I had to fit a rubber gasket on it.  The parts were all put together as shown below.

Finished vacuum plate on test in the bench vice
Close up view of the 6.8mm blind holes leading to 1.3mm through holes

To my amazement it seems to work !

There does not seem to be leakage on the joint between the two plates and the vacuum pipe adapter with the rubber gasket seems to seal alright.   If I put a large piece of PCB material over all the holes it is very difficult to move it.  Single sided board is naturally bowed in the manufacturing lamination process and I can see it visibly jump flat when I turn on the vacuum.  If the PCB is smaller than the total area of suction holes it does not seem to matter about covering over the ‘non-used’ holes to maintain the grip.

Proof will be when I try to run a board.   

The milling process will not have major sideways pressure as the depth of milling is quite small so it should be fine. Clearly I can’t go drilling the component mounting holes in the PCB material with this holding technique but I can spot drill them to say 1mm depth and then finish them by hand having got a guide hole to start me off.

But all this will have to wait as the X axis limit switch has come apart on the Tormach and a spare has been ordered and is on its way.

UPDATE Feb 2021 – Flatcam and milling pcbs 2021 pdf download

Similar or related subjects : –

Setting up the timing on a Polly V locomotive

TLC for the Polly V 


Polly V Live Steam 5″ Locomotive

I have been the owner of a Polly V 5″ gauge locomotive for some time now.  It has run OK but I have always had some unexplained happenings with it.  Things like being reluctant to start and sounding ‘out of balance’ to use a clock making term. I also admit that while I know the overview of how it works I have never got to grips with Stephenson Valve Gear.   I decided that some investigation was needed.

New Piston Rings

A bought a new pair of O rings for the cylinders a few weeks ago and decided it was time to fit these as a first step in an engine health check.   This was easier to do than I expected.   The end face of each cylinder is held in place with eight hex head screws and when these are removed the end plate can be taken off.   The cylinder rod can be disconnected and the piston pushed out of the end sufficiently to swap out the O rings.   A liberal coating of silicon grease on the new O ring allows the piston to be gently squeezed back into the cylinder and job done.   Having completed this exercise I was feeling a bit more confident.

The Stephenson Link

Out of curiosity I decided to have a look inside the valve chests on top of the cylinders.   These were a bit more fiddly to get at as I had to remove some of the chassis work but not a major problem.   On the bottom face of each valve chamber are two slots.  These slots allow steam in and out / to and from the piston cylinder.   The timing block moves back and forth across these openings to alternately allow steam in and out of the piston chamber.   The movement of the block is controlled by mechanical linkage and each cylinder is out of phase with the other to balance the drive to the wheels.

Having opened the two chests I noticed that both looked to be set up in a different way and as I rolled the engine up and down on the bench the openings in the bottom face of the chest were not revealed in a synchronised manner.  Some investigation was needed.

When I bought the engine I also got a full set of the construction notes supplied with it from which the previous owner assembled it from new.   I found these notes difficult to follow which was due to the fact that I was not conversant with the names of the individual parts mentioned.  I stuck with it and the first thing that struck me as wrong was the gap at the end of the Stephenson Link was not the same in ‘Forward’ and ‘Reverse’ settings on the quadrant reverser.    I had no idea why this was important and no idea of this was an absolute gap size that was needed (an actual measured distance) or just a relative similar size.   Clearly it was not either of these and I needed to adjust it. 

Much gloom followed as I realised the adjustment for this was behind the side water tank.   This would have to come off.   This looked fairly straightforward except the injector water feed is coupled into this tank in the cab area.   The gland nut holding this is inside the water tank and a real pain to unfasten.  The amount of arc that is possible to apply to the nut is very restricted.   Eventually I managed to free this and the tank came away to reveal the quadrant rod adjuster.   It was then a two minute job to adjust the quadrant rod length to balance up the end gaps on the Stephenson link in Forward and Reverse.

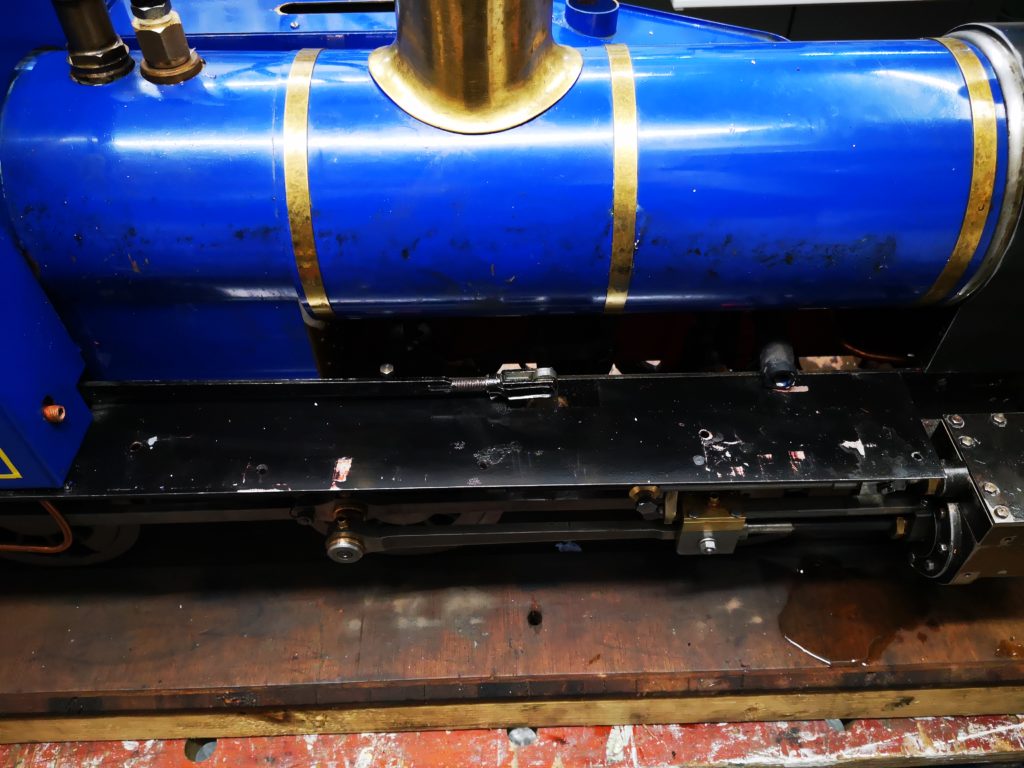
View showing side tank removed and the quadrant rod adjuster

Timing the Valve Gear

Having balanced the Stephenson Link, the next step was to adjust the valve blocks.    I put the quadrant reverser at its Centre position and rolled the engine up and down on the bench watching each valve block move.   The movement of each block was not symmetrical .   In the Centre position the block should only just move a small amount back and forth to just reveal the two port openings in the base of the chamber.

This is easy to adjust by removing the valve actuating link arm screw.   After some back and form adjusting I got the blocks to achieve the minimal movement needed about the centre position.

If I now rolled the engine back and forth on the bench in ‘Forward’ or ‘Reverse’ the movement of the blocks increased to reveal the full area of the two ports and with each side of the engine leading in turn.   I now had a nice action of the valve blocks alternately opening and closing over the front and back ports with no excessive movement.   Things looked much better.   I cleaned up the valve chamber lid and fitted a new gasket to each chamber. I put the engine on the rolling road and using compressed air ran the engine up.  Wonderful !   It now sounded more balanced and was much happier to start in Forward or Backwards.  Here is a pictorial representation of the valve action.

Without the balancing in the Stephenson Link this would not have been possible to achieve.

The Eccentrics

While delving around on the underside I noticed that one of the eccentrics had movement on it and the eccentric arms were sloppy.   On the Polly kit the eccentrics are positioned with a grub screw into pre-drilled holes on the axle. 

Another major gloom session ensued as it looked at first sight that the boiler would have to come off to work on the eccentric arms.   However after playing with positioning of the eccentrics I found I could get the clamping screws out, drop the arms off and so allow tightening of the grub screws.   In the process of doing this I found that there were tiny packing pieces between the faces of the eccentric arm halves.   Clearly the original owner must have believed the eccentric arms were too tight and had packed them out.    I did a trial fit without the packing and the eccentrics ran freely.  Perhaps this had been done as a running in adjustment.  On completion I did a second run on compressed air with no obvious issues. 

Putting it back together

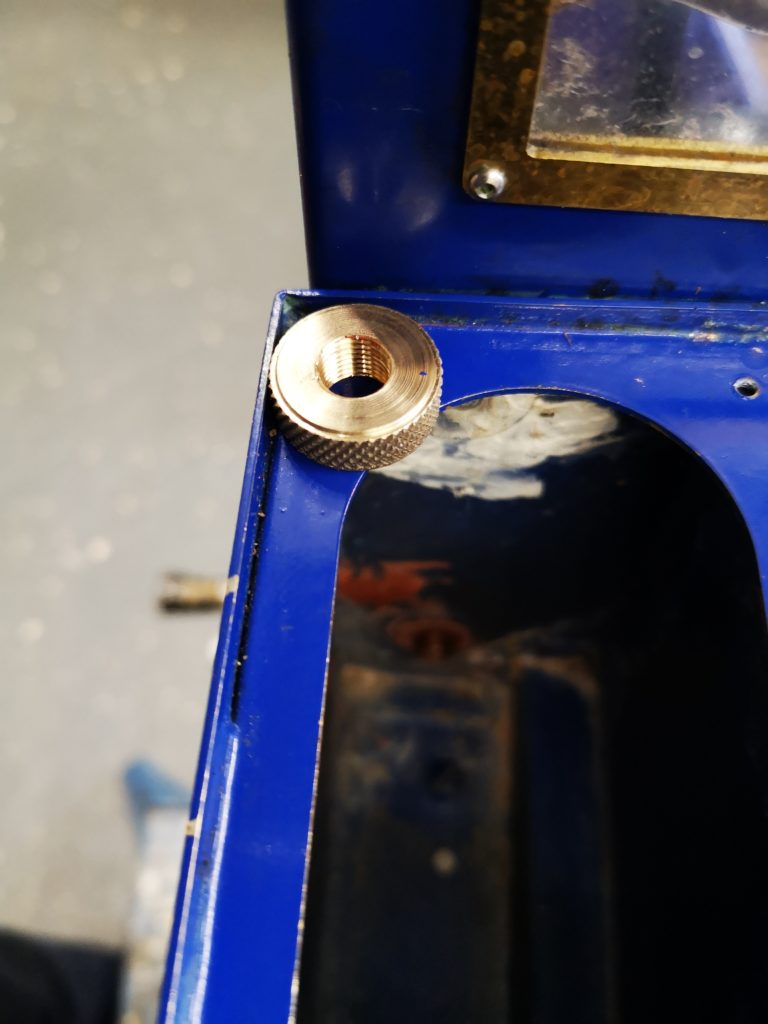
Re-assembling the chassis work was straightforward except replacing the side tank water feed to the injector.   The original nut had been mangled by the previous owner so needed replacing.   Rather than just fitting another hex nut I made a brass knurled nut.   In the confines of the side tank this gave me better grip with my finger ends to tighten the fitting.   Once it was finger tight I could use the end of a screwdriver to increment it tighter using the knurling surface to give me purchase.

Replacement knurled nut to fasten the injector water feed into the side tank

Other work

While having grease embedded under my finger nails I did a few other jobs on the engine.   

The whistle valve had always leaked steam and I had bought in a new version of this with a stronger spring action.   This was fitted along with a new steam valve feeding the injector.   

I re-positioned the pressure gauge to be central in the cab rather than off to one side as originally fitted.

I fitted a new set of drain cocks on the cylinders.

Finally I adjusted the cylinder lubricator which had been a bit too liberal with its feed delivering a snotty chimney edge and a fine mist of oil to my face while driving.   The adjustment screw was unlocked and moved back a small amount.

All back together and a good days work.   A lot learned which is always a bonus and less fear of the black art of steam engines.

The next day I took the engine down to the club track and made quite a few circuits on the raised level track.   The engine sounded and ran quite differently.   It ran much better on lower levels of steam pressure.  I also did not get a bath of lubricating oil but judging by the edge of the chimney there was still sufficient being passed into the cylinders.

Similar or related subjects : –

Halloween Steaming of the Polly

Each year the engineering club I am a member of has a Halloween Steaming evening for families and friends.   The 7″ ground level track (1.35 miles / 2.2km) and the 5″ raised level track (1361 yards / 415m) get decorated with spooky stuff and we run with lights on the locos.

I fit a 100mm diameter angel light ring on the smoke box door and have a couple of small LED torches either side of the front running board and a red flashing rear light.   The front view is pretty bright as a result but evening running in cold weather means lots of steam and seeing what is going on is difficult.   Add to this I need my spectacles on to see the water level in the glass and my specs steam up.   Add to this the fact that the oiler is running a bit heavy at the moment so my specs also get a fair amount of oil splatter.

I started the fire using charcoal soaked in white spirit and had steam pressure fairly quickly.   I loaded the fire to just below the first line of tubes and set off.

I was pulling both my driving trolley and the passenger trolley and worst case this was 3 adults.   I had severe wheel spin if I wasn’t careful with the regulator movement.   The raised level rails are aluminium and the weather was damp so this was not unexpected.   When heavily loaded the fire was really drawing well but as the evening went on it became more of a struggle to maintain steam pressure.   The top of the fire had a crust of darker red on it but when the fire was poked this broke away to an incredibly bright fire.

Analysing this is difficult.   Was the fire too deep and the draft from the Rosebud not sufficient ?   Were the holes in the Rosebud getting clogged with ash and reducing the draft ?   Or something as simple as letting the water level drop too low ?

Lots of questions that I am still working on.   That aside I definitely need a session on the rolling road to adjust the oiler.

Picture taken by my son as myself and Dave prepared for another run.

Polly V on the Halloween running


Similar or related subjects : –

Rosebud Grate further tests

I took the engine to the club on Sunday and did around ten loops with the Rosebud Grate in place.

I made a mess of lighting the fire initially by trying to go to coal too quickly and as a result had to put the external electric blower back on.  Once the fire was glowing well I migrated onto the track.

The engine pulled well but was lightly loaded with only me on my small driving trolley.   The fire appeared evenly spread over the grate and there was definitely a more noisy ‘drawing’ sound.   Other members who had fitted Rosebud’s to their engines commented that they find that they have to leave the steam blower on more than they had been used to when the engine is idle.

So a bit inconclusive so far and more testing needed.

Similar or related subjects : –

Verified by ExactMetrics