

Brocot escape wheel preset added.
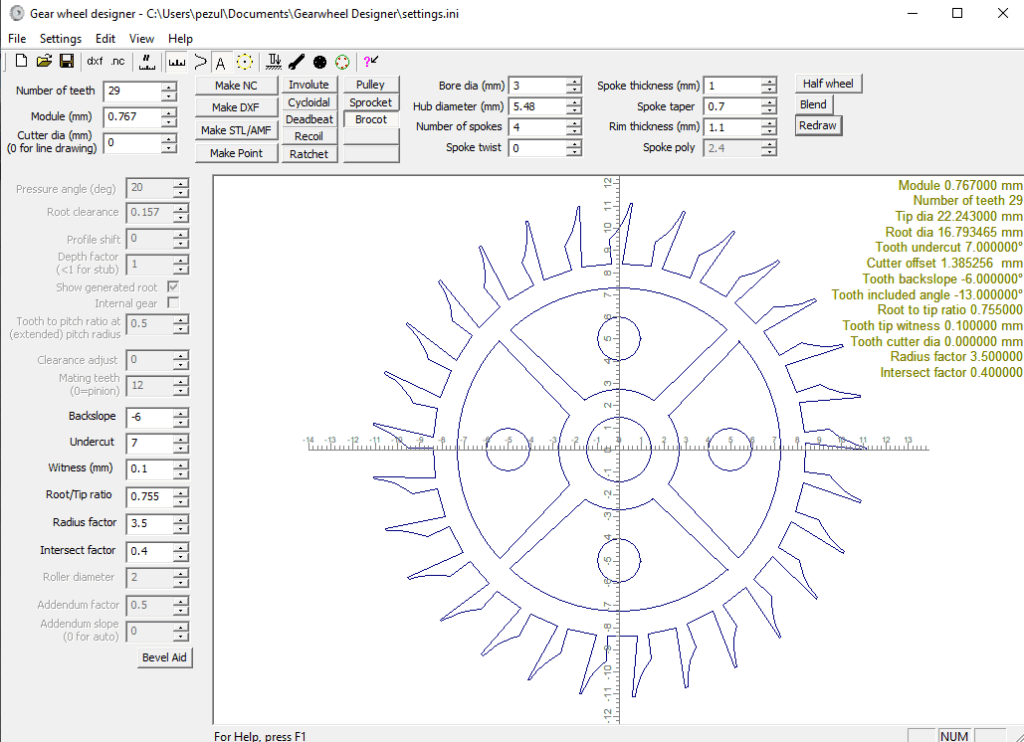
Graham Baxter has added a Brocot escape wheel design preset button in his latest version of Gearwheel designer (GWD). This additional preset function came in useful as I had a client asking whether I could copy a 22mm diameter 29 tooth Brocot wheel from a French clock. The wheel was damaged with missing tooth and two further teeth which were bent .
I had never before attempted cutting a wheel this small and fragile looking but it might be a good learning experience so I stuck my neck out and said ‘yes I can do that’ before I had actually seen how delicate the wheel would be.
I measured one tooth under the microscope and then used Fusion to create a circular array. The update to GWD allowed me to make a second version. Here is a screen shot of the model.
Using GWD in this respect needs some additional comments.
GWD will let you create the 2D geometry of the wheel and from this create a DXF. You can also create a direct CNC code to cut the wheel or a STL version. It is a very powerful piece of software.
My normal route is to export the DXF from GWD into Fusion using the Fusion’s Insert menu. Once in Fusion I can then extrude the 2D design to the required thickness and create the manufacturing GCode in Fusion. A qualifier is needed on this. If you are running the Fusion hobby licence you cannot import a DXF into Fusion. This is a real pain for hobbyist users.
If your intention is to create a 3D printed version of the GWD wheel then you can create a STL export and import this directly into your slicer without going via the Fusion route. With this direct route you need to set the Z depth in GWD. The Z depth value is the thickness of the wheel (equivalent to the extrusion value if you had gone the Fusion route). Note that in GWD the Z value is always a negative value. So if you want your 3D printed wheel to be 3mm thick you enter -3 in the Z offset box.
The next bit is a bit weird. When you import the STL created by GWD into your slicer it will appear as just the edges of the wheel outline with no infill. If you then run the slicing routine the infill appears correctly and you are good to go on a print. (I have tried this direct STL route and via the DXF Fusion route and the model in the slicer is exactly the same).
Back to the Brocot wheel …
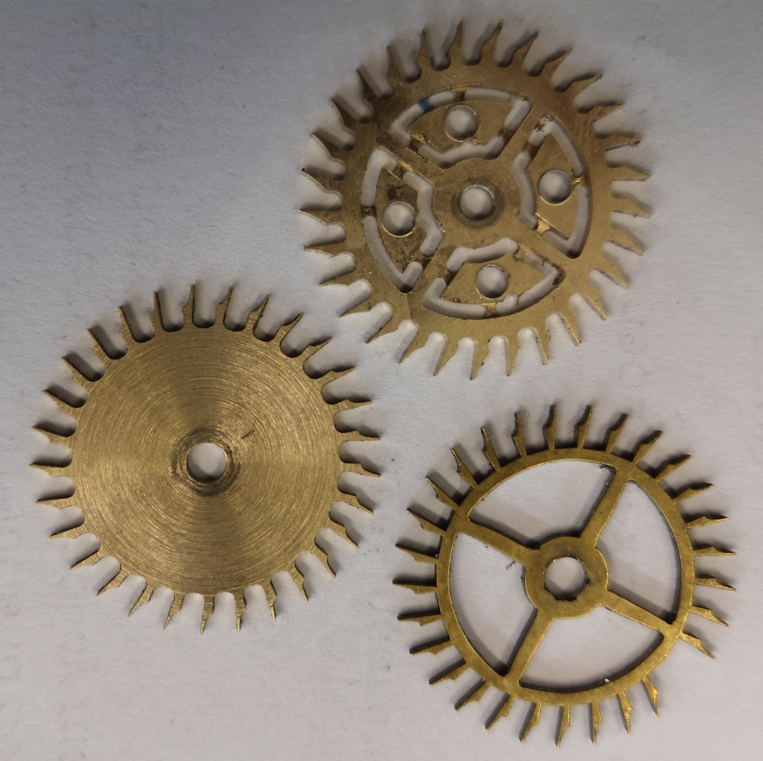
Both versions were cut on my Tormach 440 CNC machine with the CAM created in Fusion. I used a Blue Builders tape superglue fixture to hold the stock in place. Here is a picture of the result.
The left hand wheel is the microscope measured version before the petals were cut. The upper one is the GWD version with the petals cut but retained in place by breakout tabs. The lower one is the original. Machining was done with a 1mm diameter end mill at 10,000 rpm.
The client chose to install the fully finished GWD version and the clock is now running happily once again.
There is a full write up of my process in the February 2026 edition of the Horological Journal. This is the monthly magazine of the British Horological Institute.
Links to similar or related post are listed below : –
- Fusion 2026 Update Furor
- Confusion over the 10 files limit in Fusion hobby licence
- DXF import to Fusion
- Adding a second monitor to your Fusion work space
- Fusion Tips using 3D Connexions SpaceMouse
- Custom Threads in Fusion
- Upgrading to Windows 11
- Fusion Electronics Library Notes and Crib Sheet
- I had a ChatGPT experience
- Fusion Sheet Metal model export as PDF