

Set up your preset buttons for Home view and direct 3D print
You can buy the 3DConnexion SpaceMouse and CADMouse combination as a single package. If you haven’t got a SpaceMouse you are missing a major enhancement to your pleasure while using Fusion. It’s worth every single penny.

The SpaceMouse is a 3D manipulation mouse and the CADMouse is just a conventional mouse. Originally when bought as a package they shared a common dongle. I found that servicing the two devices simultaneously via one dongle led to a laggy experience. The new versions are Bluetooth connected and are not affected in this respect. If you are considering getting one (and you should) then keep an eye on EBay.
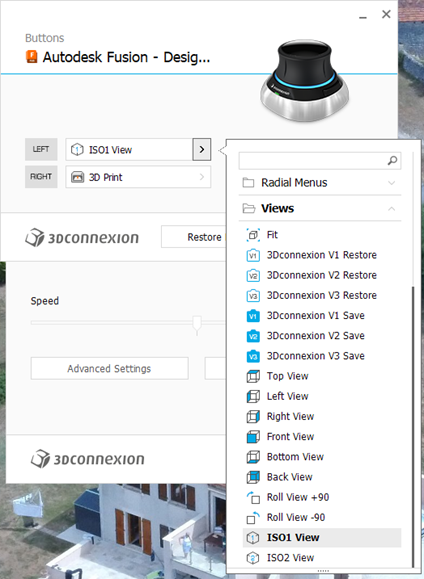
There are two programmable buttons on the basic SpaceMouse which can be preset to shortcut functions. I have my left hand button set to ‘ISO-1 view’ which means I can quickly reset the modelled object on screen to its home view. You know how it is when you get totally disorientated when spinning and zooming …. Note that there are more complex versions of SpaceMouse with loads of buttons but this would be asking too much of my memory.
To set up the buttons you need to be in the Fusion Design screen. The 3DConnexion software ‘knows’ what application you are using and which module in the application so this is important. In a wider sense this allows the SpaceMouse to be customised specifically to every application you are using on your machine. (Google Earth fly-by is fun with the SpaceMouse).
To access the settings menu, click on the right hand end of the Windows taskbar and then right click on the 3DConnexions logo to open the Settings menu. This will bring up the following menu stack. Note that you must have the Autodesk Fusion – Design… as the title. The available button options are specfici to each of the other Fusion modules. For example I have two other functions set for when I am in the Electronics PCB design module.
If I right click the SpaceMouse button this takes me to the 3D print submenu in Fusion. This is the same as clicking on the File menu in Fusion and clicking 3D Print. This will bring up the following 3D print sub-menu.
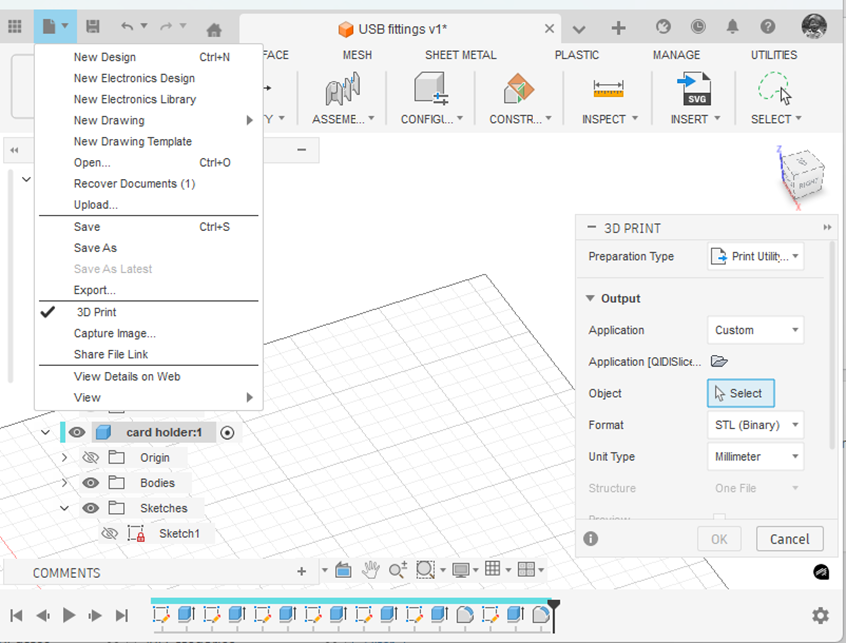
(Side comment – if you haven’t discovered it yet … the ‘House/Home’ icon shown at the end of the top menu takes you to a wonderful full page view of all your recent modelling activity. Yes I know it has probably been there ages. I always was a slow developer but what joy when I found it).
Note that I have the Application box set to ‘Custom’ and the Application folder below this is pointing to the QIDI Slicer EXE file which is found in Explorer as below. Note this is in ‘Program Files’ and not ‘Program Files (x86)’.
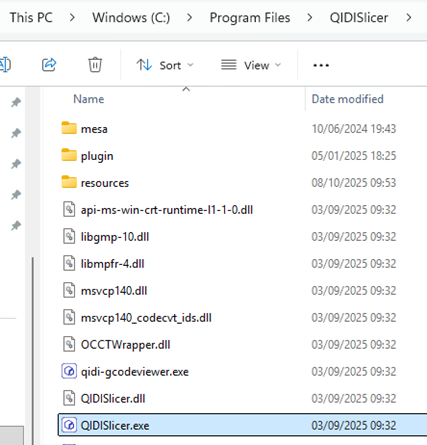
Click on the little folder icon in the sub-menu and navigate to and highlight the .EXE file location. You will now have a direct boot to the slicer software you are using. This will be activated either from the File menu or your SpaceMouse programmed button.
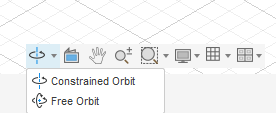
One extra comment – remember to set the Free Orbit setting or the Spacemouse will resist certain orientations.
Have fun !
Links to similar or related post are listed below : –
- Fusion 2026 Update Furor
- Confusion over the 10 files limit in Fusion hobby licence
- DXF import to Fusion
- Adding a second monitor to your Fusion work space
- Custom Threads in Fusion
- Upgrading to Windows 11
- Fusion Electronics Library Notes and Crib Sheet
- I had a ChatGPT experience
- Fusion Sheet Metal model export as PDF
- Drawing a parabola in Fusion