I have had my Sindoh 3D printer for quite a while and it is a lovely machine to use in conjunction with Fusion 360. I have printed all manner of items for the workshop, for projects and for friends and family.
For some time it has been a problem to print objects central on the bed. While they would print OK, they are reluctant to come away from the bed surface and then having removed them from the bed, the raft would be very reluctant to leave the printed object. I have got round this by offsetting the print position in X and Y on the table. If I have a large object to print that overlaps the problem area I sprinkle talcum powder on the bed surface to ease freeing the object from the bed but this does not help the raft removal.
The print bed is an aluminium sheet that slides in and out of the machine. This has a PTFE style laminated coating sheet held in place by adhesive. If I inspect the centre of the plate I can see the clear outline of bubbles under the lamination sheet. These have got worse as time has gone by. I imagine the bubbles create a finite air gap that upsets the temperature stability of the plate in the damaged area.
The situation had reached a frustrating peak today and lead to me totally removed the laminating sheet to leave bare aluminium. The printer could not cope with bare ally and the PLA would not stick. Some other laminating medium was going to be needed.
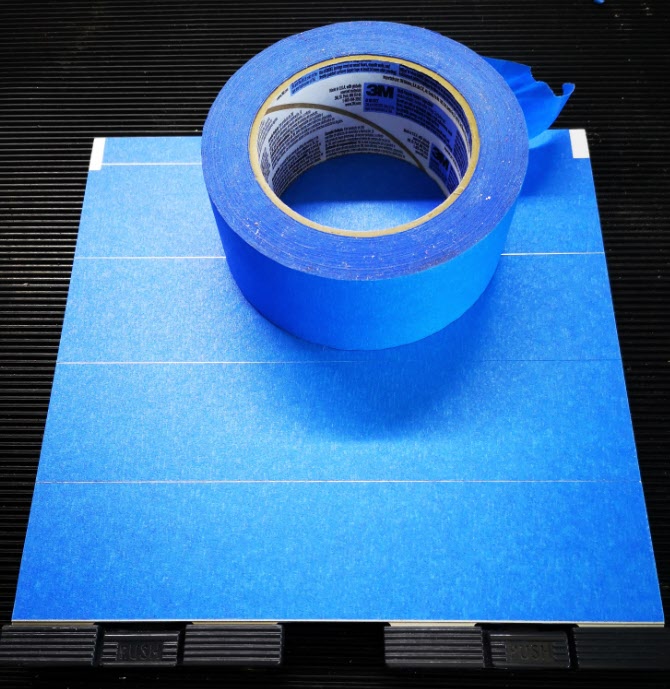
I had seen discussion regarding the use of what we in the UK call Masking Tape as a laminating medium. I use 3M Blue Multipurpose Builders Masking Tape for Super Glue mounting of stock on the milling machine. Having this to hand, I thought it worth a try. The tape is 48mm wide so I had to fix a number of strips across the plate to cover it completely and then trim the edges. As you can see below, I didn’t quite get them parallel and butted to each other I was keen to run a test print.
Maybe I was lucky but the job came off the tape easily and the raft pulled off straightaway with no damage to the print. The tape hasn’t bubbled or coming off in any way so it looks good.
I am not sure how long the tape is going to last but I have got a full reel to keep swapping it out.
Update : 17/6/2021
I have been using the blue tape bed coating for over a year now with no problems other than an occasional replacement when it gets torn.
The other thing worth noting is that if your bed clips break there is an excellent replacement print model to download here
https://www.thingiverse.com/thing:4487138
Similar or related subjects : –
- Hybrid 3D brass threaded insert tool
- Tap shank adapter for 4mm AF hex drivers
- Qidi Slicer auto support error on my part
- Qidi X Smart 3 revised fan installation
- Qidi X Smart 3 tweaks
- Qidi X Smart 3 special weekend pricing
- Stop losing Qidi ifast 3D prints down the chamber front gap
- Fitting a Bento air filter to a Qidi ifast 3D printer
- 3D Printed Brass Threaded Insert Soldering Iron Stand
- eSUN filament reel silica drying pod