Plan B Fogbuster Mounting on the Myford lathe
Of late there has been a long thread running about Fogbuster use on the MEW forum. This set me thinking. The forum debate centred on whether mist lubricant or flood coolant was more or less healthy. For hobbyists the consensus seemed to favour the mist coolant. This was with the proviso that the jet and coolant mix is carefully balanced. An interesting point was made about ensuring the air stream was pointing away from the operator to avoid blowback. If all is good you should not be able to smell the lubricant. (N.B. I use QualiChem Xtreme Cut 250C at around 8% dilution).
The installation on my Tormach PCNC440 is fine with respect to blowback at the operator. Both nozzles are on flexible mountings and can be easily directed towards the back of the mill. (See prior post).
My installation just completed on my Myford Super 7 is not quite so perfect. I was using a T slot at the back of the saddle as the nozzle mounting. This meant the nozzle was playing on the back of the workpiece and towards the operator. Perhaps with hindsight not the most healthy option. OK so I don’t use lubricant on the lathe that much as most of my work is brass and aluminium so maybe less of a critical issue. Because of the infrequent use I wanted the Fogbuster to be quickly demountable until the next steel job comes along, hence the T slot idea.
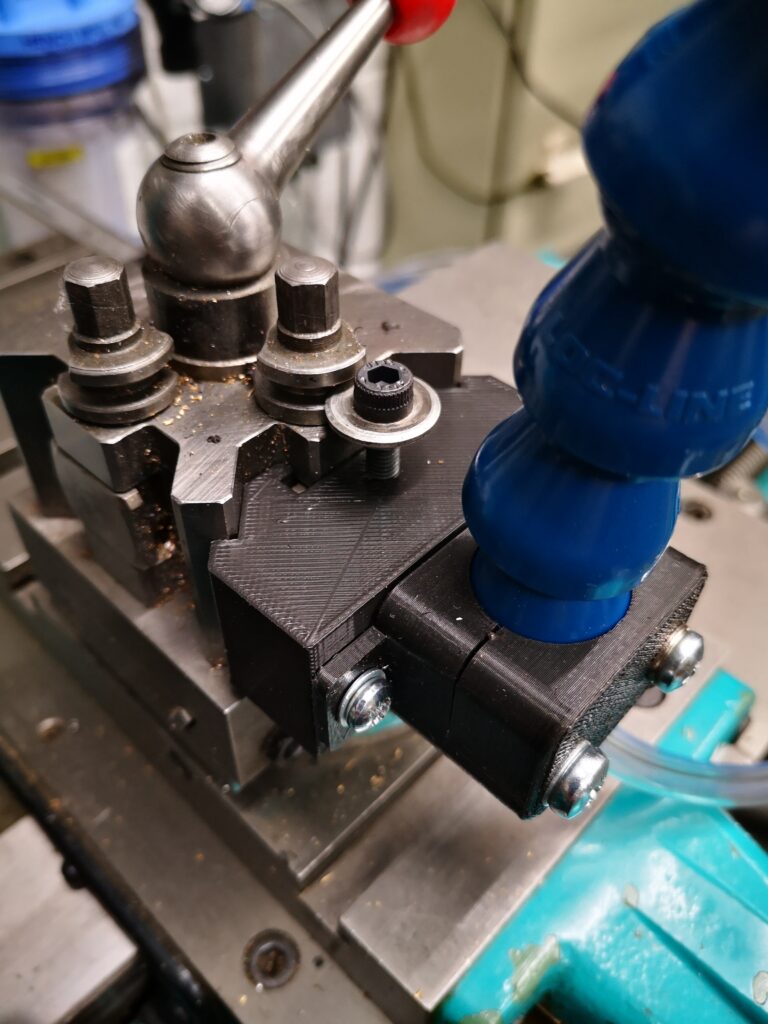
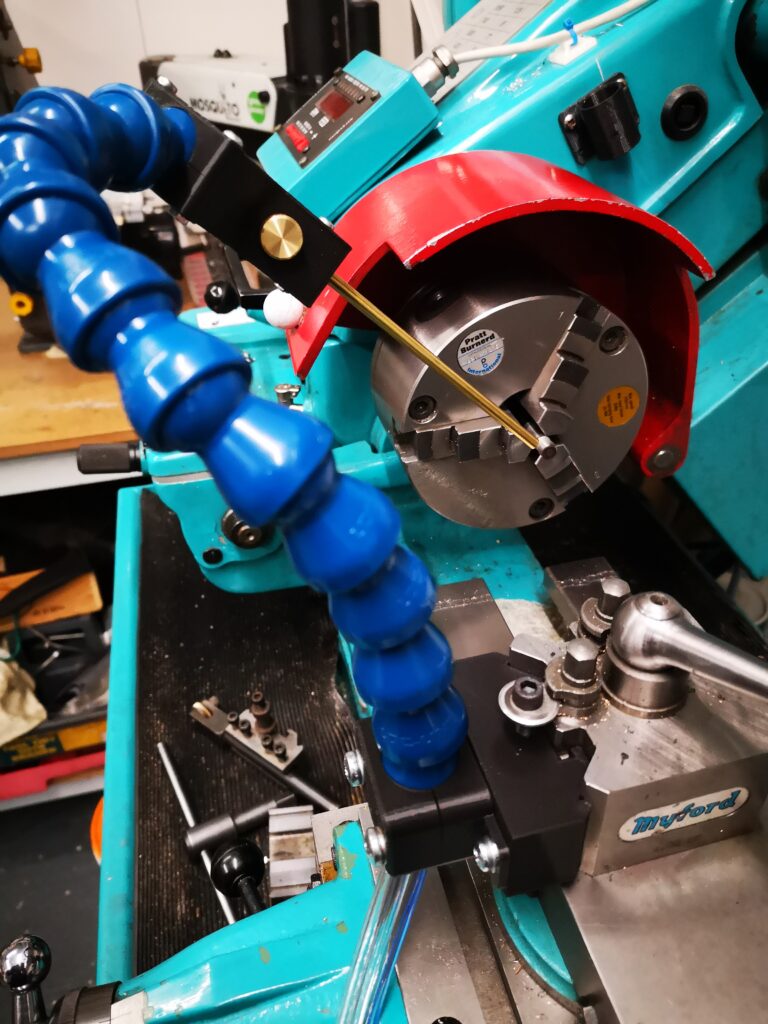
I have a Myford Quick Change Toolpost fitted on the Super 7 which has two tool holder positions at right angles to each other. It struck me that the Fogbuster could be mounted in the QCTP unused slot. This would allow the air jet and lubricant to point forwards towards the workpiece. Normally I would have the empty slot on the far side face so a boring bar can be dropped into place. By rotating the QCTP through 180 degrees the spare slot would sit nearest the operator and be ideal for the Fogbuster.
I didn’t really want to dedicate a steel tool holder to the Fogbuster so I created a 3D printed version. This picked up on the prior mounting holes I had modelled in the flexible clamp.
I needed to make sure my 3D printed profile was a good fit in the QCTP so after fully modelling it I moved the time line in Fusion back to the profile extrude and reduced this from 26mm to 5mm and ran a test print on just a 5mm depth version. This allowed a quick print to be done which gave me feedback to do some minor edits. The timeline then was dragged fully forward and a full size print run. Try doing that as easily and quickly in steel ?
The pseudo toolholder 3D print ran in around 90 minutes and looked and fitted well. To finish off, I turned up a small clamping button to match the normal clamping and height adjustment screw on the QCTP.
Hey presto a new Fogbuster forward facing mounting ready to go.


Similar or related subjects : –
- Qidi Slicer auto support error on my part
- Qidi X Smart 3 revised fan installation
- Qidi X Smart 3 tweaks
- Qidi X Smart 3 special weekend pricing
- Stop losing Qidi ifast 3D prints down the chamber front gap
- Fitting a Bento air filter to a Qidi ifast 3D printer
- 3D Printed Brass Threaded Insert Soldering Iron Stand
- eSUN filament reel silica drying pod
- Sindoh 3DWOX filament feed upgrade
- Sindoh DP200 conversion to Open Material

