TIG and MIG Welding and a Jasic AC/DC inverter


We have had 5 weeks of our welding course so far and have focused on MIG only.   It has been a steep learning curve but we are now able to produce reasonable looking joints.   Coping with so many variables  takes some getting your head round.

Talking to the other guys on the course they all commented that for what I am doing I might find TIG more appropriate.  The tutor on our course suggested that TIG was like using one hand to pat your head while the other hand was rubbing your stomach and you were jumping up and down all at the same time.  I can now see what he means.

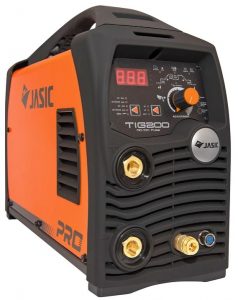
After many hours of YouTube watching I have invested in a Jasic TIG welder that does both DC and AC so I should be able to do aluminium joints.  It is a nice piece of kit and I am slowly learning its functionality.

So it’s back to practice and more practice but I quite like TIG.  It is gentle and focused without all the sparks you get with MIG.  It reminds me of my school days when I was doing gas welding.

No projects as yet but it is only a matter of time.

Similar or related subjects : –

Magnifier Lens Scratches and Polywatch

Working on small items requires me to use optical magnifiers such as the Rolson one with swap out lens.   These inevitably pick up scratches and other marks.

I recently bought some Polywatch polish from my clock parts supplier to polish a plastic clock dome which was looking pretty rough.   Polywatch transformed it to the point of where it looked almost new.

You can buy it on Amazon.

Today I tried Polywatch on my favourite Rolson Headmagnifier lens and I can now see what I am doing once again.  Worth remembering.

Similar or related subjects : –

Finishing the surface of 3D Models

Over Christmas I had 3D printed a clock frame for my granddaughter’s birthday.   The size ended up being three separate prints which I later glued together.  All three prints were done ‘face down’ on the Sindoh bed and all printed on a raft.   Once the raft had been removed the finish was not very elegant as it showed the striations of the raft on what would be the viewed surface.   The print was in PLA and I initially did some tests on scrap prints to see if I could rub a surface down.   This was not an ideal approach and I was not too keen to start on the clock in this manner.

Next idea was to use Gorilla twin pack glue cut with Meths.   This created a very runny adhesive mix that could be brushed onto the surface of the print.  Surprisingly enough despite being ‘modified’ the glue went off and was quite hard to the touch.   It did not rub down all that well.

Reading up on the net there is a product called XTC-3D which is made just for this purpose.   It is expensive but does stretch a long way in use.  It is a twin pack mix in 2:1 ratio and once mixed it has a setting time of around 20 minutes so you need to get your act together and be well prepared. The makers recommend using a wide foam brush to apply the compound.   This was quite good in that it ‘scraped’ across the tops of the striations and the filler settled like levelling compound does on a floor.

I left it to harden off overnight and then rubbed down wet with 400 grit paper on a flat surface.   This kept the dust damped. The finish was excellent.   I then undercoated and glossed with acrylic spray paint.

The final clock frame looked very good with no obvious signs of the printing artefacts.  While pricey, I would recommend the XTC-3D product for this purpose.

Similar or related subjects : –

Another Haimer tip bites the dust or at least the mill bed

When I was at NYC CNC I saw that John was selling posters as shown below.

I didn’t realise the significance until I started doing CNC …..

I had been doing OK on breakages of late then like buses, two came along at once.  One was excusable (to my conscience) but the second was a disaster always likely to happen.

I had the Haimer held in a collet in the Myford VMB manual mill.  This means you need both hands occupied to contra rotate the collet and spindle when locking and unlocking.   I just overdid the realise pressure and the Haimer dropped out onto the mill bed.  Crunch, expletives, gloom, expense.  The tips are not cheap at GBP20+ each but Amazon do sell them.

There is the same issue to a lesser extent on the Tormach when releasing the power drawbar even though you are holding the Haimer the sudden momentum of the drop from the collet can sometimes catch you out if the mill table is close.

While discussing my gloom with a friend he suggested putting some sort of protection around the tip when loading and unloading from the spindle.   The Haimer is not an ideal shape for gripping something along these lines given its curved surfaces.  However after some thought a solution was found.   I drew a simple cylinder in Fusion that was 40mm long, 38mm OD and 32mm ID and 3D printed it.  Note these dimensions are for the Haimer FH 3D Taster version.

The cylinder sits over the probe and rests on the outer rim of the tip mounting.  The 32mm ID is just tight enough to squeeze the Haimer rubber gasket and so hold the tube in place.

Not only is this useful for mounting and dismounting the Haimer but it also works as a general protect guard when not in use.

Similar or related subjects : –

Verified by ExactMetrics