While watching This Old Tony’s latest post he dropped a quiet bombshell for me. Something that I really should have known …. the tapping size for a metric thread is the diameter of the thread less the pitch dimension. Very simple. Very obvious (now). Somebody somewhere in the distant past must have decided to do something about the chaos of Imperial standards.
Check it out.
Links to similar or related post are listed below : –
Go onto any home workshop forum and I am sure you will find a number of threads on the fractious subject of parting off on the lathe. It is a perennial topic that everyone has their sometimes not so humble opinions on. It seems to be the machinists equivalent to the search for the Holy Grail.
If you have a bulky rock stable mass for your lathe the problem is easier to solve. Rigidity rules when it comes to parting off. If you are less privileged on funds or workshop space you are more likely to have a Myford equivalent machine. The problem will then get magnified simply because there is not so much stability in the machine structure.
I have tried various parting tool configurations and I have to be honest I get a severe case of ‘squeaky bum time’ when faced with parting off steel. Brass and ally I can cope with but steel usually makes me wimp out and rush for the hacksaw.
My parting weapon of choice is a hand graver. This is appropriate for small diameters and using a graver is very educational. You can feel how the cut is progressing and you can feel how the cutting action changes as you change the angle of attack. It is a lovely craftsman’s tool and for clockmaking, in various geometries, is indispensable.
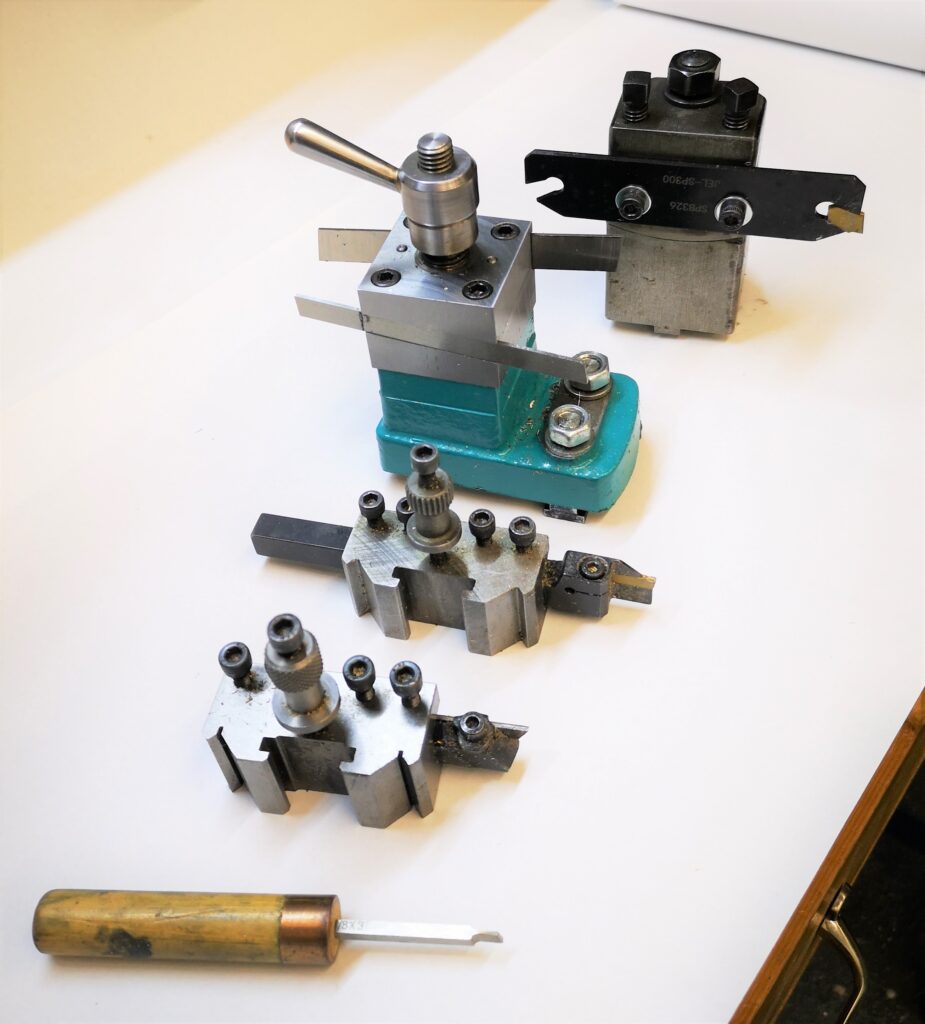
For larger diameter parting I have progressed through HSS front cutting, insert front cutting, Hemmingway kit rear cutting and now the latest variant – a simple insert tool holder rear cutting.
My parting collection – graver, HSS, front insert, Hemmingway and the new rear insert
To be fair the insert front cutting does work for brass and ally but on claggy ally the tool would often dig in and can jam the chuck no matter how much lubrication I use. This I assume is because front cutting leads to a digging in action whereas rear cutting throws the tool outward from the cutting groove.
The Hemmingway kit was a thoroughly enjoyable experience to build and it looks brilliant but the blades seem too prone to flexing. It is a real shame given how nice the finished tool looks. (Yes, I do accept that it might be something to do with my construction). So nice as it looks I tend to have little universal confidence in it.
So what is my latest parting panacea ?
I have mounted a standard, universally available, insert blade parting tool (SPB326) on the side of an old rear mounting post that originally came as part of a knurling tool. The tool clamping on the post has a sliding curved pressure support surface which allows tool height variations. I fixed a 12mm square steel clamping block on the rear of the parting blade with 2 x M5 cap head screws and clamped this in the mounting post.
I did a few facing actions on some brass to get the centre line correct and then began trial partings on brass and ally. It worked like a dream. Encouraged by this I moved onto a piece of 10mm silver steel (drill rod). Plenty of cutting oil was applied and apart from the initial engagement chatter it just cut beautifully. Lovely snails of swarf, no SBT reaction, no hacksaw needed.
Alright the blade and the insert are wider than ideal (3mm SP300) but this probably adds to the rigidity of the setup. A consequence will be that I will be wasting more metal in the cutting action but at last I seem to have a tool and recipe that I trust to work.
Well, for the time being anyway.
Links to similar or related post are listed below : –
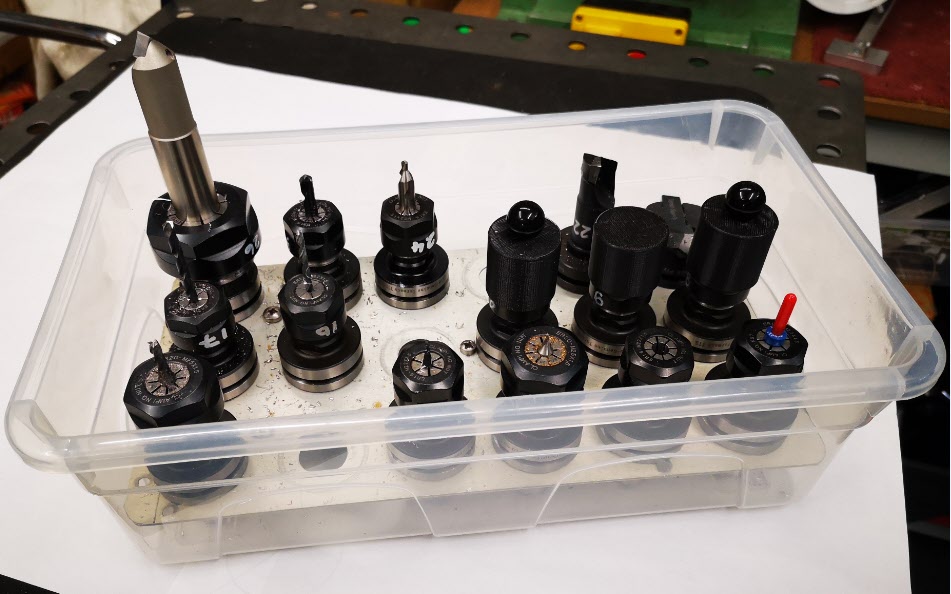
Some time ago I posted a note about using the Spacemaster 5L storage boxes for all things workshop. These are an incredibly versatile size and I admit to having a plethora of them sprinkled around the workshop including use for storage of my Tormach TTS tooling collets.
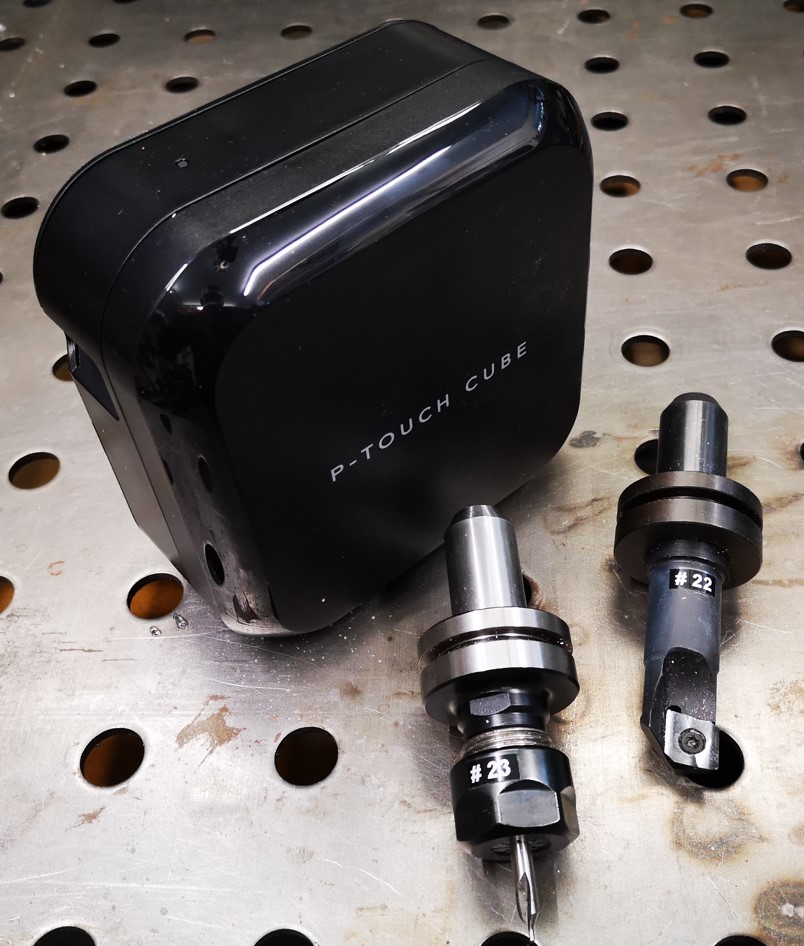
On the subject of TTS collets, I grew weary of having to repaint the tool number on the side of the collets and have migrated instead to printed labels.
These are printed on a Brother P-Touch Cube printer using their 6mm White on Black tape stock. These look very professional and time will tell how robust they are when subjected to cutting fluid. The P-Touch is nice in that it is battery powered and connects on Bluetooth so I can print ‘on the go’ from the Android App. The only frustration with the P-Touch is that it wastes around 2cms of tape at the beginning of each label print. I minimise this wastage by concatenating all my labels into one long print and then cut them up individually with scissors after printing.
Clough42 has just posted making a protective cover for his plasma cutter control screen. As ever with James it is engineering perfection with stitched corners.
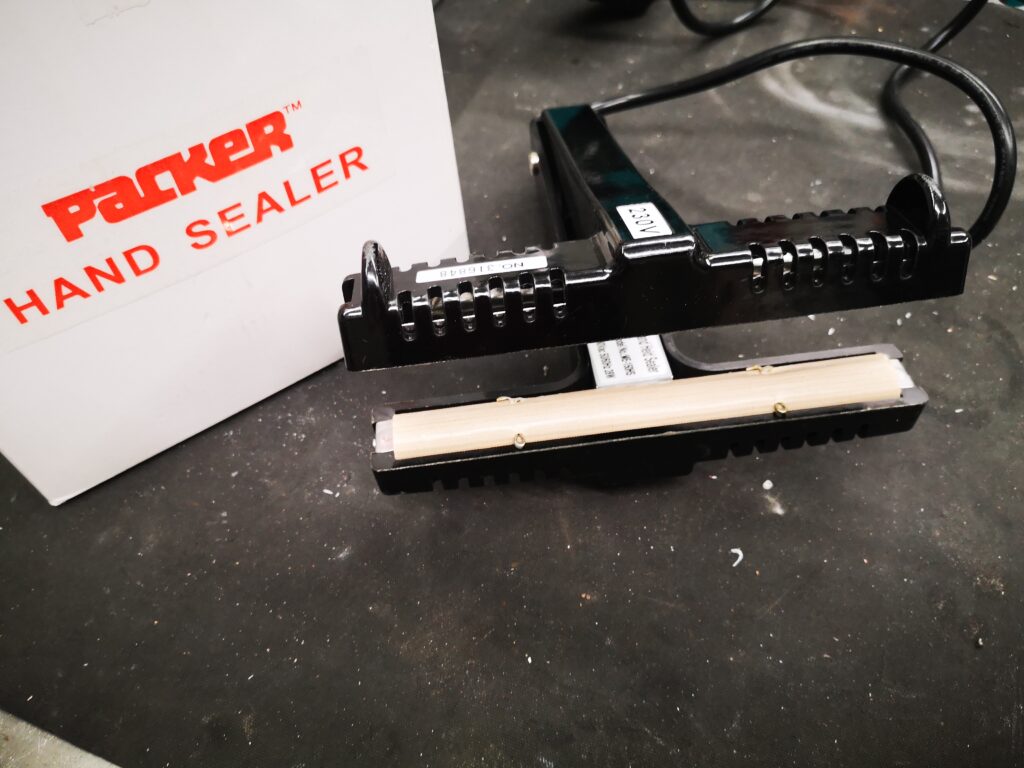
My lazy way (as ever) is to make such items using polythene plastic sheeting and a heat sealer.
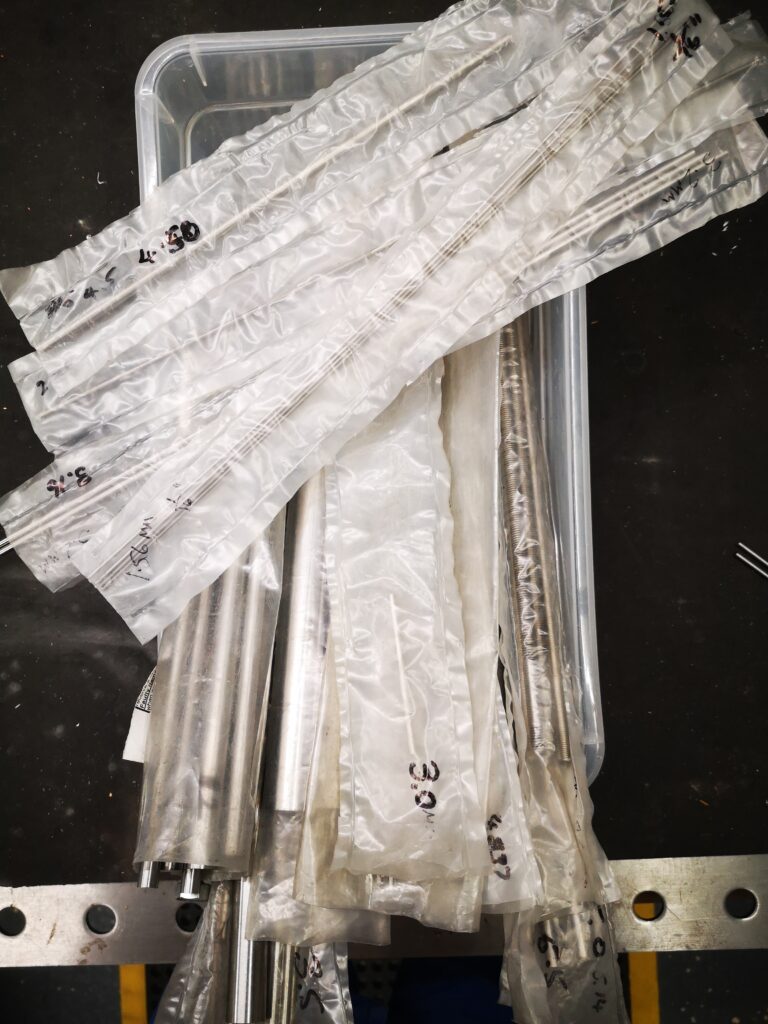
This allows me to quickly make bespoke covers and pockets for all manner of applications. Here are a few examples.
All my silver steel is stored in such pockets and has the size written on the sleeve using a Sharpie.
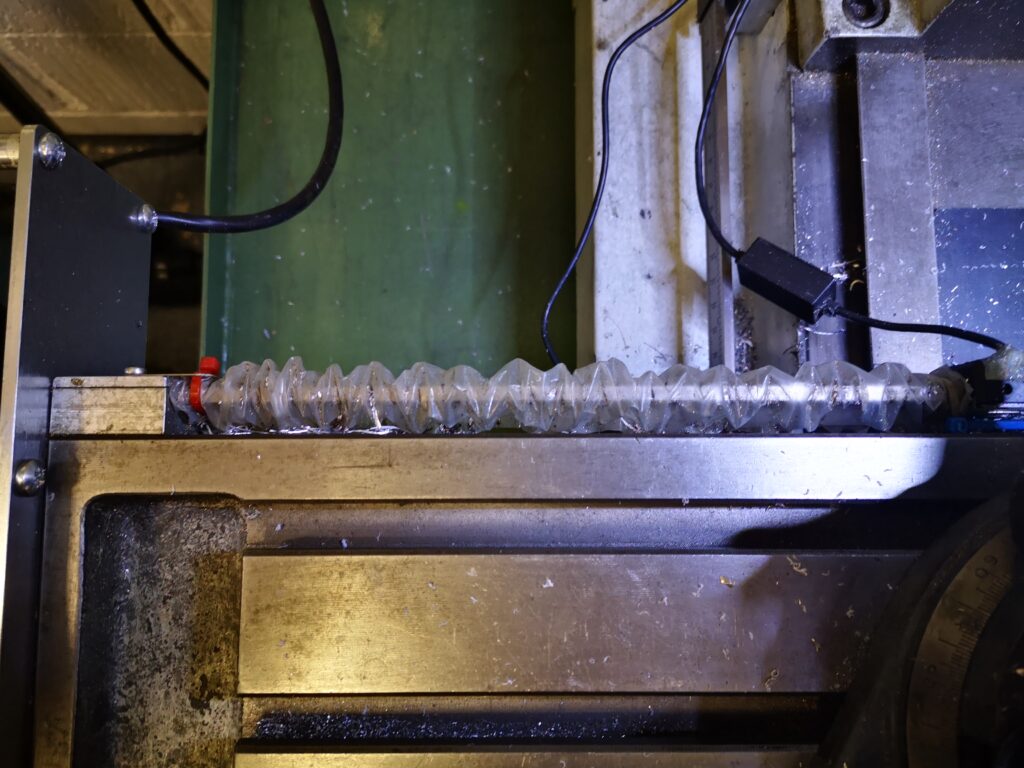
The rear DRO scale on my VMB has an open ended pocket either side of the vice that acts as a concertina cover to keep cutting oil from affecting the scale reader.
So another useful tool to have available (without having to thread a needle).
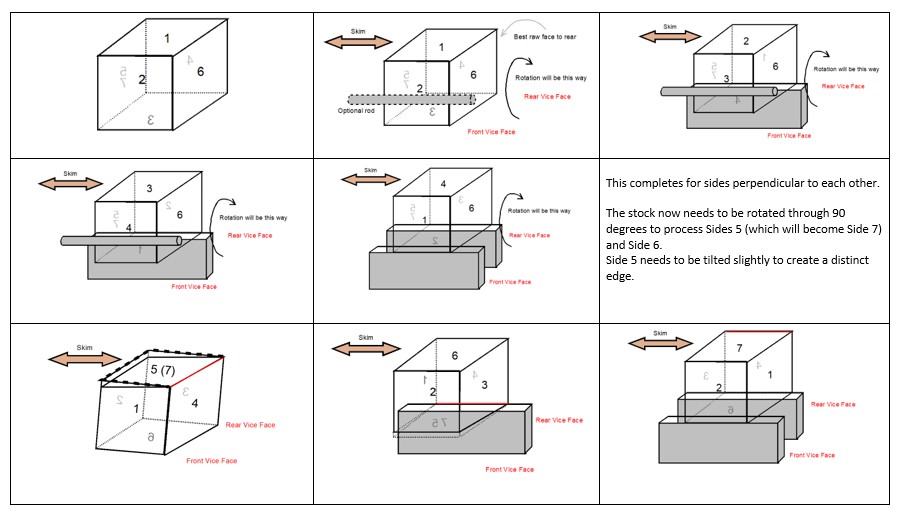
Can’t Remember How to Square Up Material Stock ready for CNC ?
I sometimes have to dig deep in the odds and ends heap of rough bits of materials to use on a project. This results in having to square up the find so it can be easily programmed into Fusion CAM. I always have to scratch my head on the process which is well documented by Tom Lipton and This Old Tony among others. What I needed was something to pin on the wall to remind me.
The result of this frustration is a write up and a graphic which you may find useful. Here is a screenshot and the link below it provides both this document and the write up in a ZIP file.