Tormach Purchase Costing Sheet

I haven’t been completely idle while on holiday …

After I decided to buy a Tormach milling machine I had debate whether to go for the 440 or the 770.   This confusion was based on available workshop space and to a lesser extent on cost.  I also did not have a feel for the total cost of not just the items I needed to buy but also what the total package would cost when it landed on my driveway.  In the UK we pay VAT on not just the goods but also the delivery cost.

To help my thinking I put together a spreadsheet on Excel that split out the basic machine parts and then had a common section showing all the accessories I would need.  This totaled everything up in USD and I then did a conversion to GBP at spot rate and then added VAT and duty factors for UK import.

This sheet helped my enormously and once I had all the key prices loaded from the Tormach site I could do ‘what if’ calculations to fit my budget.

I was recently contacted by another potential buyer of a Tormach and I sent him the sheet to help his thinking process.  For anyone else thinking of buying either in the US or an overseas country I thought the sheet might help so I have spent some time cleaning it up and and I attach the new version below.

Simply put a quantity of each item in the column associated and see the impact of your shopping list at the bottom, either as a 440 or a 770.   Clearly the sheet could be extended to a 1100 if that takes your fancy.  (Don’t forget to check the current pricing from the Tormach site by searching on the product code shown on the sheet).

Excel – Tormach mill costing

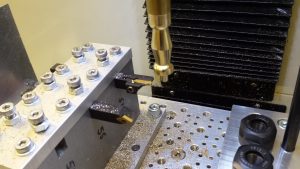
Don’t forget you will always need one more TTS collet than you have ordered …..

Similar or related subjects : –

Holiday Twitching

I know it has been quiet for a couple of weeks but we took a holiday to get some sunshine, some golf, some snorkeling, some eating and sleeping.  Much enjoyed but I am starting to twitch now and need to get back into the workshop.  Still it has given me time to think about the next project and I have had time to book for the NYC CNC Open House in Chicago in September.

I got a Dell XPS13 from EuroPC just before we left home which I have been playing with under the guise of sitting ‘relaxing’ on a lounger.  I am impressed with it as a machine.  Nice screen,  decent battery life and quick to boot.   It came with Win10 Pro which I had never ventured into and while it has some nice touches I still prefer Win 7.   I managed to download all the apps I needed at the airport lounge before we left (including Fusion …) so it has been fun to play but you need a real job to do in order for things to sink in and to learn.  Incidentally I did a speed test at the airport and was staggered to see 100Mbps download and upload speeds with a few ms ping time so clearly on fibre.

I also downloaded a load of books onto the Kindle to keep me occupied and was impressed by Los Alamos by Joseph Kanon which is a ‘who done it’ woven around the Manhattan Project.  This lead me to Wiki to refresh me on the background on Trinity etc.  Incredible engineering and if I have my dates correct, no CNC systems to manufacture the parts.

Similar or related subjects : –

Mill Turning Jig

After a few distractions the Mill Turning Jigs are complete and I have run a test piece that is representative of a clock pillar.

Mill Turning Jigs

The jigs were both designed in Fusion 360.   One consists of a large block with space for three 10mm cross section carbide insert tools and a second block with drill and boring related tools.   I have fitted three ER16 collet chucks to this to allow flexibility of tooling choice.  Both have mountings to fit onto my 25mm hole matrix tooling plate on the Tormach.

The jig manufacture was relatively straightforward with the exception of needing a new 10mm end mill having extended length (35mm) to bottom out the ER16 collet mounting holes.   I got this from APT and the edges were lethally sharp.

Design in Fusion 360
Mill Turning Lathe Tool Holding Block
Fusion 360 design
Mill Turning Drill and Boring Jig

Trial Clock Pillar

The pillar had simple geometry as below.

Simple Clock Pillar Trial Cut

I opted to base this on  the largest pillar I had come across in any design which was formed on a 5/8″ brass rod.   I held the stock in the spindle in a 16mm ER32 collet held in a TTS holder.

I struggled a bit with the CAM for the trial as the tool geometry of the tools  I recently received from Banggood were not in the standard tool library.   I got some of the settings wrong.  That aside the result of the first run is quite pleasing.

My feeds and speeds were a bit coarse and I cringed once or twice at the tortured sound of brass under pressure.   I didn’t complete the parting off as I didn’t fancy ducking from a large piece of brass spinning lose at 5000 RPM.

Mill Turning Setup showing both Jigs in place
Zoomed view of Trial Cuts

As ever there was quite a bit of learning while making both the jigs and running the trial pillar test piece.

Drop me an email if you want more information !

Similar or related subjects : –

Verified by ExactMetrics