

A Different Approach to Soft Jaws
A comment that I often make is about how having varied resources available to do a job creates on the one hand a quandary as to what route to take but on the other hand it can lead to a light bulb moment. Having a 3D printer available along side a CNC machine often creates this dilemma and often to advantage.
Stick with me on this.
I am currently immersed in creating parts for an old turret (church) clock as pictured below. My wife put it down as a JSN job but once again the challenge it presented won the day.
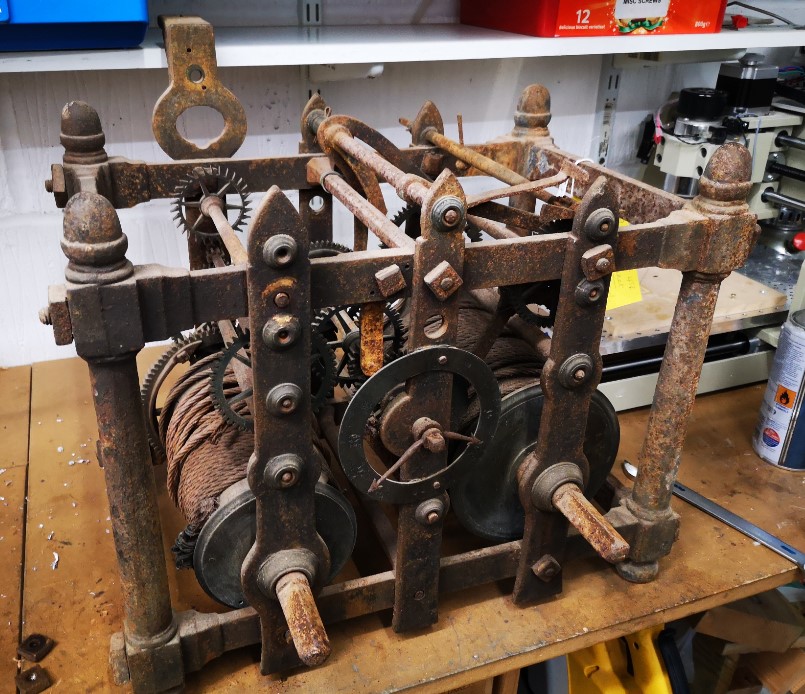
The client found me from my blog entry about creating the Brocot wheel in CNC. His clock as you can see is missing the pallet arbor, pallets, crutch and arbor suspension bracket. If that wasn’t enough it also needs a new escape wheel. This is very similar to the aforementioned Brocot wheel but smaller in size. Fortunately the old escape wheel was still in place but in poor shape with the teeth ends fairly battered and one tooth partially missing.
I created the CAM for the new escape wheel in Fusion 360 and then from the wheel design created the geometry for the pallets. (There is a great document created by the BHI as part of their DLC called ‘Drawing Clock and Watch Escapements’ that helped on this as did W.J. Gazeley’s book ‘Clock and Watch Escapements’). In order to check the pallet design I decided to first of all print a 3D model. The printed part looked like it would work when tried against the original battered escape wheel.
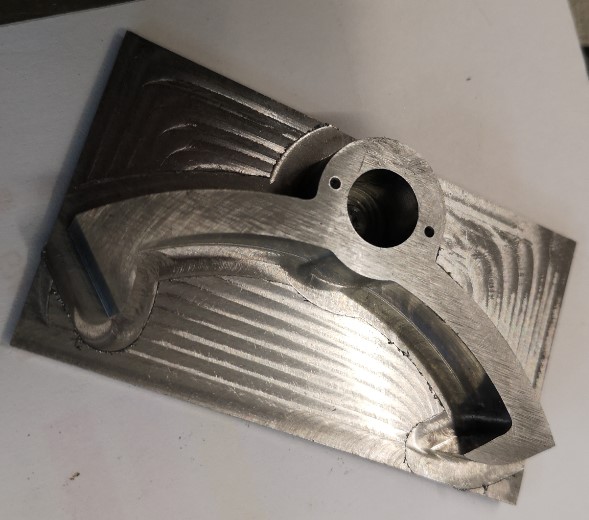
Next step in my evolutionary process was to make an aluminium version on the Tormach CNC. I used a superglue mounting block and cut the pallet profile for the full 10mm stock depth and down to the blue mounting masking tape. Because the aluminium was so soft and I kept the DOC gentle this turned out well.
Although the aluminium version worked very well and helped me prove the working of the clock, aluminium is too soft for clock pallets. A steel set would now needed and I opted for 20mm ground flat stock as the ideal material.
Side #1 was cut while being held in the machine vice on parallels. A 2mm thickness of stock was left as the gripping layer. All went to plan.

Side #2 now became the headache. I could have used the super glue bonding of the stock as per the aluminium version. My twitch was that this would leave very little of the pallet material remaining to act as a secure bonding face with the superglue. Given I was cutting steel there was every chance of things parting company. I could hold the model inverted in the vice but there was a real danger of the nib tips getting crushed. Not a good idea.
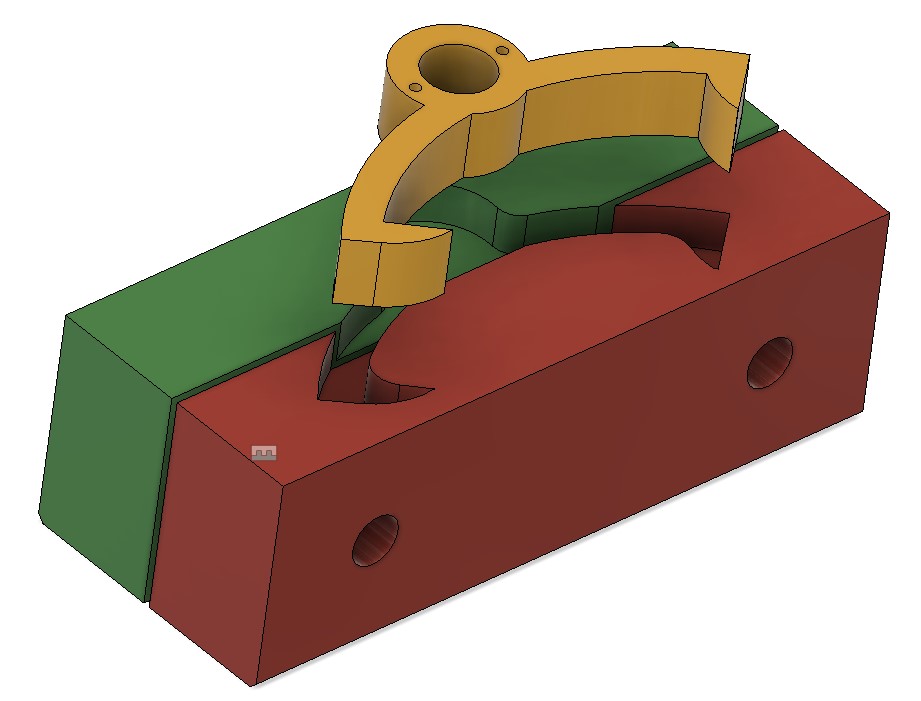
Clearly the right solution was to make a pair of soft jaws to grip the pallet shape while I was decking off the side #2 residual 2mm.
Now here is the light bulb moment. I designed the soft jaws in Fusion so they would swap out the existing steel jaws on my machine vice. This is a straightforward process using the Project function. The best demo of this that I have seen is by Cough42 and is worth a watch.
I was about to order some aluminium stock to make the soft jaws when the 3D printer winked at me from the corner of the workshop. Could I print the soft jaws on the printer and get enough grip to allow the last 2mm to be decked off ? This had to be worth a try and had the advantage that I could be getting on with another of the clock components while they were printing.
Taking this route I decided I would need to modify the design in Fusion. The 3D printer always leaves cavities a bit under size. I used Fusion’s Offset Faces to increase the profile shape by 0.2mm all around. I set the gap between the two jaws at 1mm.
Print time was around 2.5 hours for each each jaw. With CAM and setup time, running them in aluminium would have been similar. I gained the 5 hours to do something else. (i.e. Drink tea watching the mill ….)
The idea worked. The PLA tightly gripped the inverted Side #1 profile while I decked off the 2mm residual stock. I didn’t go too aggressive on DOC.

A set of PLA soft jaws – not a radical idea but food for thought.
Aluminium soft jaws are essential if you are going to be undertaking detailed feature machining of Side #2 but if it is a simple decking skim then PLA would seem more than adequate. Soft jaws are 1 off items dedicated to a particular part. They are consumable as is the PLA but the PLA versions are overall quicker to produce.
This has been another situation where what would have been a no brainer ‘this is how we normally do this’ turned into a ‘how else could I do this with the resources at my disposal and make life easier ? ‘. It is that lazy side of me shining through yet again …..
Onwards to the next phase of the clock activity.
Similar or related subjects : –
- Arduino Processor Reference Clock Accuracy
- 3D Printed Length Gauge for In Barrel Mainsprings
- The “Modern Clock” by Goodrich
- Microset Timer interface using Fusion 360 3D model with Fusion Electrical
- Clock adjuster rod for measuring spring and fusee drive power
- Update notes on modifications to the Devon Sea Clock
- A church clock problem and lockdown timekeeping
- Repairs to an ancient Thwaites clock completed
- Further 3D printed soft jaws for the Thwaites clock escape wheel
- Workshop resources all coming together like clockwork