Probably An Inconclusive Ramble
Some while ago I was asked to 3D print the component parts of a 1200mm wingspan glider. The design STL files are available as a paid download from the SoarKraft website.
The first problem this created was that my Sindoh 3DWOX had insufficient Z height for the 200mm high print sections. This was a thinly disguised excuse to upgrade my 3D printer to a Qidi ifast. This has proved to be a good decision and I am very impressed by the Qidi and the quality of the print results that it generally produces.
I now need to qualify that statement because I have struggled (and also learned a lot) trying to print thin wall prints for the glider parts.
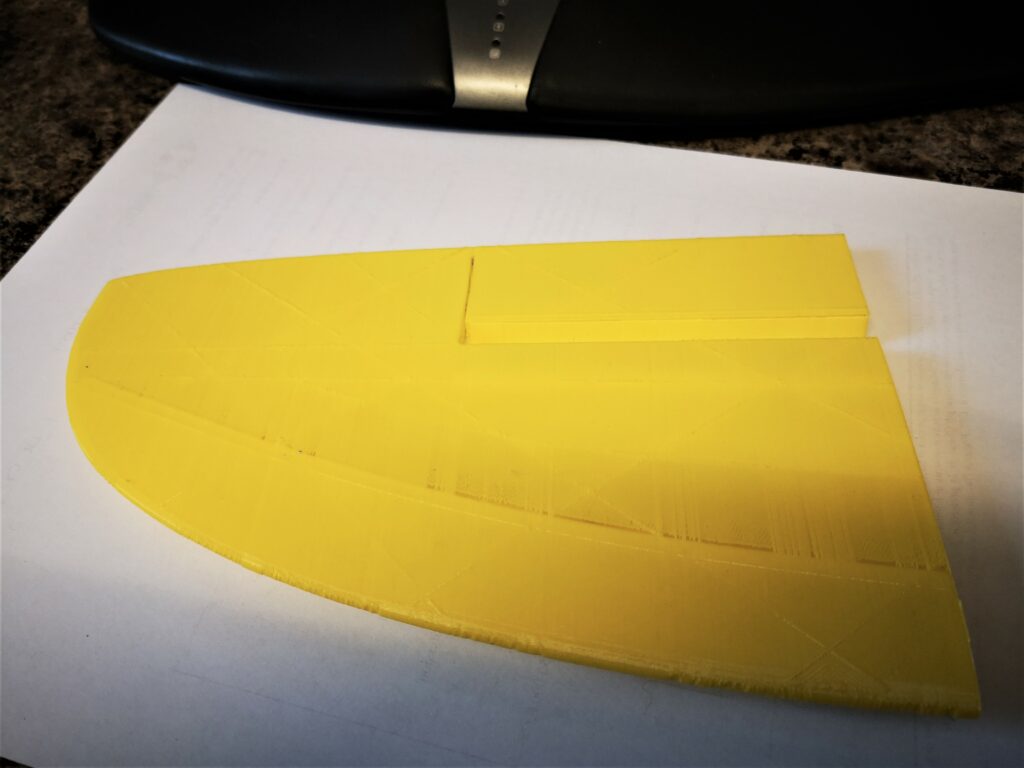
The Qidi comes with a slicer that is a skinned version of Cura. I struggled to get good thin wall results. The main problem being transparency effects in the printed surfaces immediately following internal bulkheads within the wing design. I mentally envisaged this as the extruder being unable to start pumping filament fast enough following the bulkhead transition. You can see this along the inner curved line on the image below. There are very fine threads of PLA bridging the gaps.
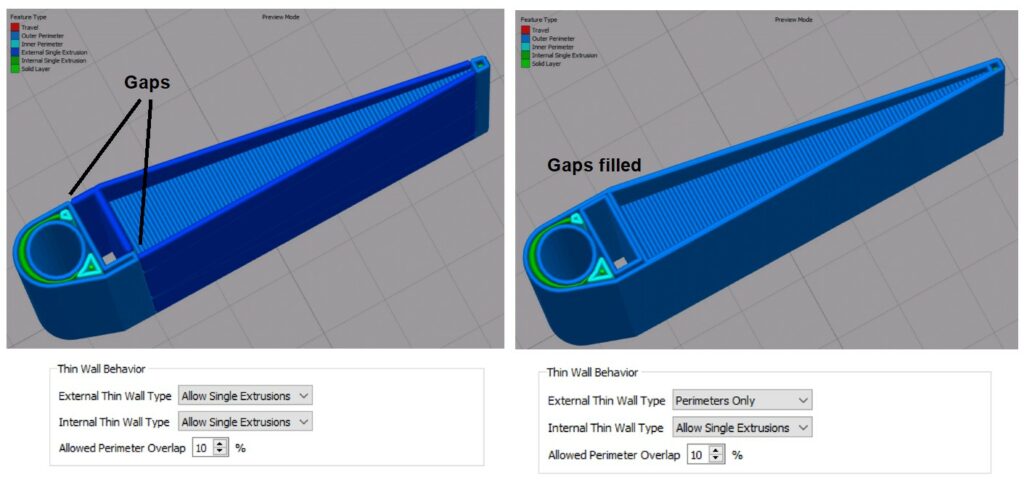
I am also a subscriber to Simplify3D. Their website has a help article on Thin Wall printing and a recommendation that the Thin Wall Behaviour can be improved under the Advanced/Thin Wall Behaviour by selecting Allow Single Wall Extrusions for both internal and external walls. Playing with these options led to good prints that met the SoarKraft recommended weight. I need to do more investigation on the other options in the two Thin Wall drop down boxes but here is an image of two examples.
I asked Qidi if there was a similar fix in their slicer. They sent me a revised config file that did fix the problem but led to a significant increase in weight on the finished print.
The problem has also been beneficial in making me realise how important the slicer simulation was as a tool (as can be seen above). It allows you to see what is likely to happen with each change to the configuration print settings. Obvious but not always investigated.
The other discovery was that neither slicer (Qidi or S3D) are able to import STEP files which does seem a bit strange. STEP files are more accurate than STL files and STEPs are easier to modify in CAD programmes.
Sorry this is not a radical post but does show that 3D printing is not just ‘click and go’. The other comment is that there are so many options to change in a slicer config that I don’t think I will every get to grips with their individual impact on the print.
Links to similar or related post are listed below : –
- Hybrid 3D brass threaded insert tool
- Tap shank adapter for 4mm AF hex drivers
- Qidi Slicer auto support error on my part
- Qidi X Smart 3 revised fan installation
- Qidi X Smart 3 tweaks
- Qidi X Smart 3 special weekend pricing
- Stop losing Qidi ifast 3D prints down the chamber front gap
- Fitting a Bento air filter to a Qidi ifast 3D printer
- 3D Printed Brass Threaded Insert Soldering Iron Stand
- eSUN filament reel silica drying pod