Spindle Illumination Light for the Tormach PCN440

I am a great lover of having enough light to see what I am doing and being of a certain age my optics are not as sensitive as they used to be.   I have fitted Ebay sourced Angel Light ring car clusters as illumination lights on my pillar drill press and on my Myford VMB manual mill.   The arrival of the Tormach PCNC440 got me thinking of doing the same.

As luck would have it I had a 120mm OD ring light left over from the VMB installation and this was just about dead right to fit the Tormach 440 spindle diameter.  All it needed was a mounting boss.

On the drill press and on the VMB I machined up a boss in Acetal which left a mountain of swarf and I was not looking forward to another session vacuuming out the lathe.   Then the thought struck me I have 3D printing so why not print a boss ?   It is quite funny how you get locked into one way of doing things and then you step back and realise there are more ways to skin the cat.  (Is that a non PC thing to say these days ???)

Booted up Fusion 360 and one extrude pull and two extrude cuts plus three clamping screw holes had a design ready to print.  Print time on the Sindoh was just under 4 hours but this would be longer if the central hole for the spindle fit is smaller.  The final product  looked a lot more professional than the Acetal ones I had previously made.

Tormach PCNC440 Fusion 360 Sindoh 3DWOX
3D printed boss for Tormach PCNC440 spindle illumination designed in Fusion 360 and printed on Sindoh 3DWOX DP200 and using 120mm Angel light ring LED cluster

It also fits like a glove and the three M5 nylon screws lock it in place.   I just need  to find a 12V plug top power supply to power it.

Tormach PCNC440 illuminator
Component parts of the illumination ring
Tormach PCNC440 Fusion 360
Completed illumination ring for Tormach PCNC440
Illuminator in place on Tormach PCNC440
Wider view showing the illuminator and my home made swarf (chip) shield

If you would like the Fusion STL or the link to the Angel Lights on eBay let me know.  I have the STL file for the 3D printed small enclosure to suit the regulator for the Angel Lights from a 12V supply.

I also have the Fusion file for the handles on the magnetically mounted perspex front shield as seen above.   The handle mountings have 45mm centres to match the magnet plates which are standard UK sourced magnetic latches.

Update : –

While producing a ring light for a client I tried mounting the ring without the plastic lens that comes attached to it.   The lens focuses the light forward but does not allow spreading of the light and there is some attenuation associated.   Conclusion is to leave the lens off in future.

The other conclusion is to go for the largest ring light you can tolerate for your machine so the light (without the lens) has the chance to diverge wider and illuminate around the tool in use much better.  On EBay the most common large size is 120mm OD.   They are also available on Amazon.

Similar or related subjects : –

First Ding on the Tormach PCN440

Well it had to happen …. first ding on the Tormach 440 which thankfully was not major.

I made a spring loaded pen from an old Parker Pen body and refill to allow me to sketch the XY movements of the mill on sheet of paper on the mill table.  I forgot to reference the tool lengths and the pen buried itself into the table …. fortunately I had a sheet of MDF fastened to the table for protection but the pen dramatically disintegrated and distributed itself around the workshop.

A new pen has been made, better than the first one and no damage to the mill, just to my pride.

I must practice hitting the STOP button with my eyes closed.

Similar or connected posts : –

First trial cut on Tormach 440 using Fusion 360 CAM

After a lot of research and testing I managed to run a small test piece in MDF using Fusion 360 CAM imported into the Tormach 440.   Hand hovered over the emergency stop button but all went well.  Getting there slowly.

There are so many boxes in the CAM settings for each function that is a worry what needs ticking where.   Lars Christensen‘s Part 4 video on CAM helped no end.  The other one to watch that was useful was the Library tutorial.

Similar or connected posts : –

Battery replacement module for Chinese vernier scales

When I created the external 1.5V PSU modules for use with my DRO350 it struck me at the time it might be possible to create the same PSU in a dummy battery to fit directly into the scale battery socket.

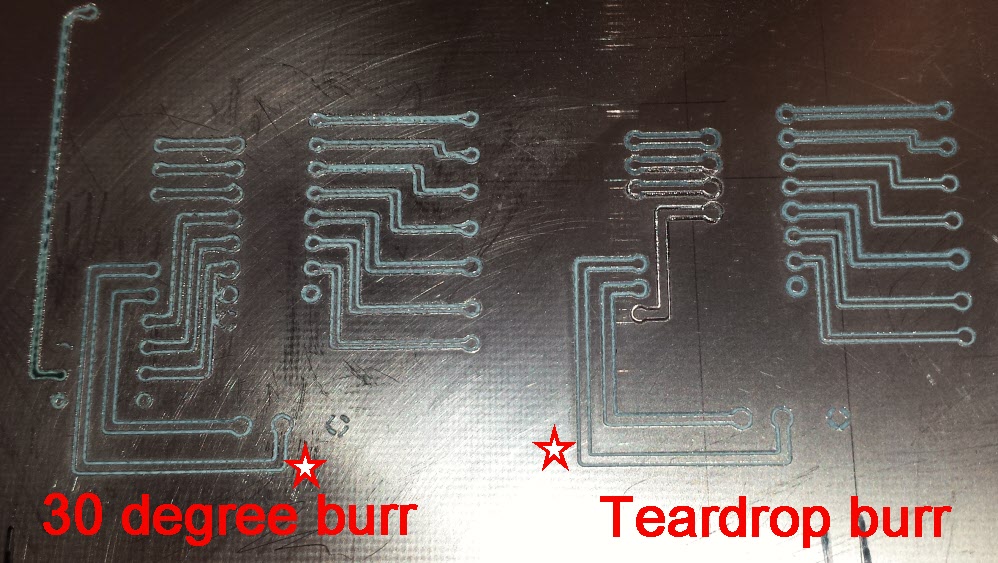
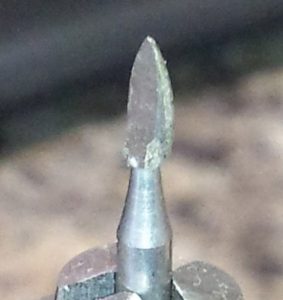
I used the same AMS1117 regulator chip and decoupling capacitors mounted on a small pcb inside a short piece of K&S thin wall brass tubing.  The pcb was milled on the Tormach 440 with hand written G Code and using a dental burr as the engraver.  Once the pcb was soldered into the end of the tube I turned back the tube to leave the pcb proud of the tube to match the normal battery profile and spring contact in the scale battery socket.

It was a bit tight to put together but it works !   I am debating a full write up so look back in the future.

Similar or connected posts : –

Shumatech DRO350 Experiences and Fixes

The Shumatech DRO350 is a kit based digital readout display for low cost vernier scales and can be bought for either a milling machine or lathe.   Shumatech appears to no longer trade but I managed to buy the full lathe kit including the box from the UK agent.  The US agent is Wild Horse.  See previous post from France.

The product is quite well conceived and has a wide range of functions beyond just a basic readout of X,Y,Z scales.  The kit was simple to put together and I quickly had it working as a lash up on the bench.

The first problem was the fact that all the connections are configured to come out of the back plate of the plastic enclosure.  For my application this was not ideal.   The connectors as supplied with the kit also were not the same as the RJ11 on my scale cables.

I created a ‘pod’ in Fusion 360 that would mount on the end wall of the box and carry all the connections.   This was 3D printed in black to match the enclosure supplied.  Space was tight to fit all the connections into the space and I had to resort to RJ10 style connectors for the scale leads as RJ11 were too large.  I had to extend some of the connecting leads. That aside the ‘pod’ concept worked well.

shumatech 350, DRO

There is significant debate on the internet about the Shumatech design and its apparent instability or flickering of the digits on the display. Opinion seems to be mixed as to where this originates.  The PCB design is not ideal with some very long thin power supply tracking and no ground plane screening.  My two small scales seemed to not suffer this problem but my long scale definitely had a problem.

Once again opinion on the internet is mixed as to how to overcome this.   This ranges from changing the wiring in the readout box for better earthing, leaving the batteries in place in the scales or replacing them with capacitors to add smoothing.

I tried all these to no real positive effect on the long scale.   I even tried inductive decoupling of the connections at the scale terminations.

I took a step back and tried to run the scale on a separate 1.5V bench power supply on long leads and lo and behold the problem still existed suggesting it was a power supply pick up fault and nothing to do with the Shumatech electronics.

I had to hand a small 9V to 1.5V power supply module based on the AMS1117 “3 legged” integrated regulator.   I connected this close to the scale and ran the regulator input from 5V.   The jitter disappeared suggesting it was really about the pick up on the supply to the scale.

I had stock of the AMS1117 chips and SMD caps so I made 3 regulator boards and in Fusion 360 created a small box and lid to contain the regulator module.

The pcbs were made as a first job on the Tormach 440.   I hand coded the G Code to run a dentistry burr in the chuck to profile the pcb tracking.  OK it was a simple job but it gave me some confidence on how to make the mill sing to my tune.

AMS1117
Paper design for the 1.5V regulator using the AMS1117
AMS1117
Finished pcb of just 5 components
Fusion 360, Shumatech
3D Printed enclosure for 1.5V regulator designed in Fusion 360
Shumatech, AMS1117
Power supply module mounted in the plastic box and in series with the lead to the scale.
Shumatech, AMS1117
Finshed module with lid in place

The finished assembly was then connected in line with the scale lead and close to the scale.  For consistency I modified all three scales in this way.

I needed a 5V feed at the display end and to achieve this I cut the display positive lead from the pcb connectors and connected them with a flying lead to the 7805 on board 5V regulator.

On power up the scales all worked well with no obvious jitter and my Myford Super 7 now has a nice readout facility.

For the full story see the following Shumatech DRO350 Experience.

Similar or connected posts : –

Verified by ExactMetrics