A Bull’s Foot file comes in various formats. In its simplest form it is a small circular filing surface mounted at right angles to a handle. Its common use is for making good after a clock plate has been re-bushed when there is a need to selectively finish the newly inserted bush material to be flush with the plate surface.
The commercially made files sometimes have a curved lower surface or have a periphery ring or bordering parallel strips of metal to ensure that the filing action cannot go deeper than the existing plate surface level. Without this the filing action would lead to unwanted scratching and disfigurement of the plate.
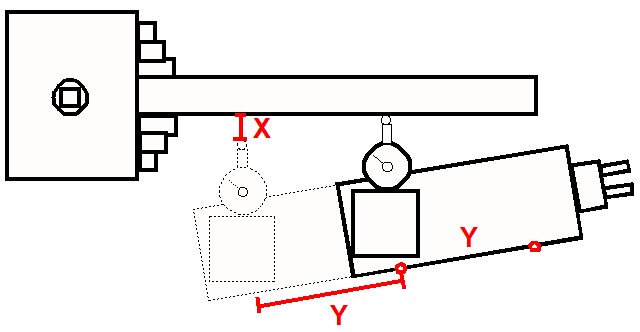
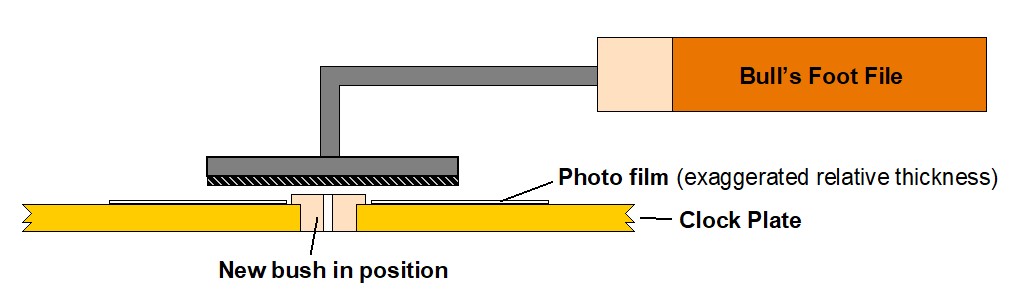
I have got around the commercial geometry by using a homemade flat filing surface with two protective spacing mediums. To get quickly to somewhere near flush I use a piece of 35mm film (5 thou thickness) with a suitable hole punched in it glued or held over the bush. This protects the plate from a wider area of damage caused by my flat homemade Bull’s Foot. There is graphical representation of the concept below. This is a method suggested by William Smith and John Wilding in their various books. If I want to get even closer to the plate surface I have some sticky backed shim material that is 1.2 thou thick that I stick around the bush.
With the commercial items, the bush is filed until flush using an increasing finer grade abrasion on the Bull’s Foot disc. This means having to have a number of different abrasive Bull’s Foot files. These are unusually difficult to source and expensive to accumulate.
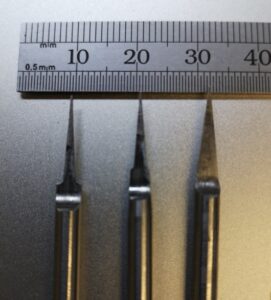
My solution to this is to have a few Bull’s foot metal ‘blanks’ to which I mount appropriate circles of different grades of wet and dry paper. The chosen wet and dry is simply held in place on the ‘foot’ with double sided tape.
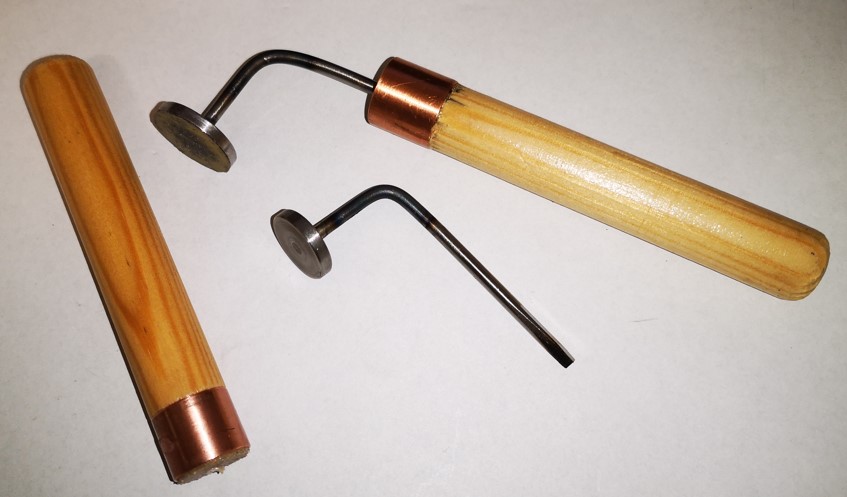
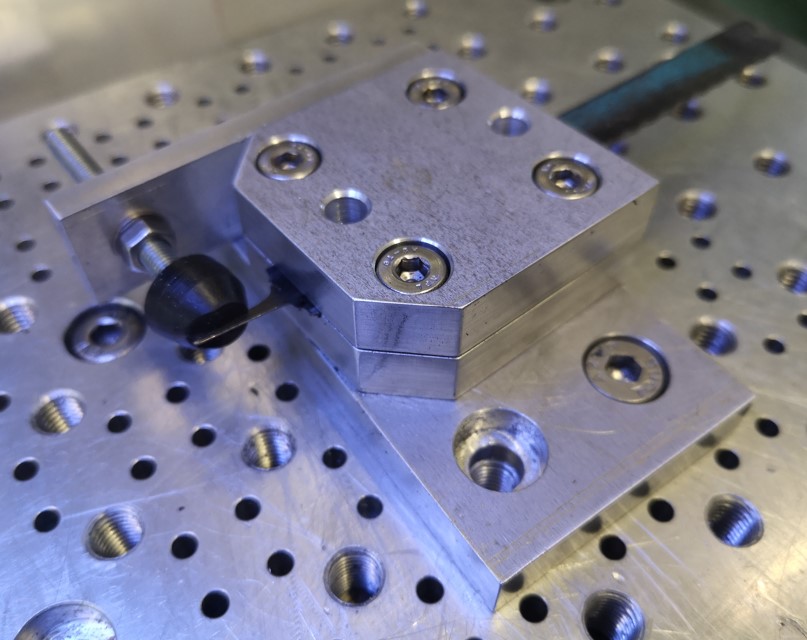
The blanks (no more than 12mm diameter) are made from a disc of 3mm ground flat stock brazed onto a 3mm silver steel shaft. Once brazing is complete the disc is trued in the lathe by gripping the shaft. The shaft is then heated to allow bending at right angles and then mounted in a home made handle.
The handle is around 75mm long and is made from 15mm wooden dowel with a strengthening collar made from a 15mm length of 15mm copper water pipe. The dowel is turned down such that the collar is a push fit and a 3mm pilot hole is drilled in the end face. After preparation the dowel is varnished with the collar in place. These homemade handles get used on other tools around my workshop such as needle files and gravers.
I agree the wet and dry will not last for ever but it is a cost effective and flexible option to a box full of ‘proper but not used very often’ Bull’s Foot files. An alternative to using wet and dry is to Araldite shaped pieces of broken files onto a similar shaft and handle concept. These would last longer but once again more handles would be needed to cover the grades of file needed. The spacer medium would still be required to protect the plate surface.
For those of you more adventurous there is an alternative handheld solution detailed on the Sherline website.
Similar or related subjects : –
- Small handheld vacuum cleaner
- Eccentric Engineering Turnado freehand turning tool
- Rotring 300 2mm clutch pencil modification
- Kindling Cracker – a safer option
- SINO SDS2MS DRO repair
- A useful Amazon sourced small item storage system
- 3D Printed Threads Modelled in Fusion 360
- Three axis stepper controller PCB in stock
- Myford Super 7 Large Bore depth stop
- Tangential Lathe Toolholder for Myford Super 7