My TIG welding frustration suffered more than usual the other day .
I have an ESAB Warrior Tech helmet which works really well when welding but it would not stay flipped up when I wanted to see things in daylight. Every time I leaned forward the helmet would drop down over my eyes and thump me on the chest. Added to the fact I was trying to TIG some thin wall tubing I was no in no mood for distractions.
Before the helmet joined the happy hunting ground over the neighbours fence I took it apart to see why the latch up action was not working. Inspection revealed that the backing plate had cracked around the latching cam.
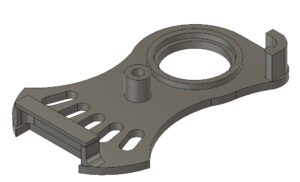
I could have bought a completely new head band assembly but the part in question might just be 3D printable. The Fusion 360 sketch ended up being very complicated based on eyeball guesses on curves and centres but on the second version I had a printed replacement which did the job …. for the time being anyway.
The final version of the replacement plate for the ESAB Warrior Tech welding helmet latch.
If anyone is suffering from a bruised chest let me know and I will forward the Fusion file.
I have been using a Wildhorse Innovation CNC set up probe for some time now. It works OK but sometimes the results are not consistent. After one frustration session I decided to upgrade it to the Hallmark ITTP probe from Threadexpress in New Zealand.
It arrived today after nearly a month in transit due to the current lock down restrictions. On opening the package I was impressed with the quality of the engineering. It is a nice device. It uses the usual 3 pronged contact mechanism. Supplied with the probe is a tube of grease that helps protect the contact reliability. The interface cable has a 5 pin DIN that plugs into the Tormach expansion socket and the shank is a standard TTS compatible size.
The Hallmark ITTP probe mounted in the Tormach ready for setup and testing. You can also see my angel ring light illuminator and Hall Effect tool height setter.
I ran through the initial preparatory procedure and then loaded it into the Tormach 440 spindle. Pathpilot has a number of excellent set up routines to adjust the probe and make measurements. One of these, the Effective Tip Diameter is quite critical. All this went to plan and very quickly. Some initial probing gave repeatable and accurate results so first impressions are good.
PathPilot probe setup screen and the two probing routine screens.
I’ll give some updates as the probe gets pressed into service but my first impressions are good with repeatable accurate readings.
In the course of checking out the ITTP probe I needed a reference cross check on the various setup measurements. My Haimer Taster seemed a bit erratic and on inspection I discovered the axial shank holding bolt had worked lose. This meant a re-calibration of the eccentricity of the probe point would be needed.
The alignment process involves adjustment of four grub screws in the shank body. These tweak the ’tilt’ of the shank to get a concentric rotation of the probe ball point. As there are four screws I use two hex Allen keys to make the adjustments to each in line pair. This is quicker than with a single hex key being swapped from side to side. It is a bit like the process I use when centring a 4 jaw chuck. The adjustment is done against a dial gauge riding against the probe ball point. Once you get the knack this process doesn’t usually take too long using the two key method.
The frustration is that the Allen keys provided with the Haimer are a bit chocolate based and the ends chew up easily. The result is you tighten a grub screw and the hex key end twists and gets jammed into the hex socket in the grub screw. While trying to waggle the jammed key you mess up your carefully made adjustment. Aaaargh !
I ground back the worn end of the Allen keys to clean up the hex profile but they quickly degraded. In the end I took the grub screws out completely and replaced them with some M4 cap head bolts. Joyful !
How ugly is this ? Replacement screws on my Haimer Taster
Yes I know it doesn’t look pretty but it is now a real pleasure to make the adjustments with a couple of larger T wrenches. It is probably a criminal thing to do to such a lovely instrument but life is too short.
Lots of activity to be documented and posted but let’s start off with a short note. Not earth shattering but might help someone somewhere.
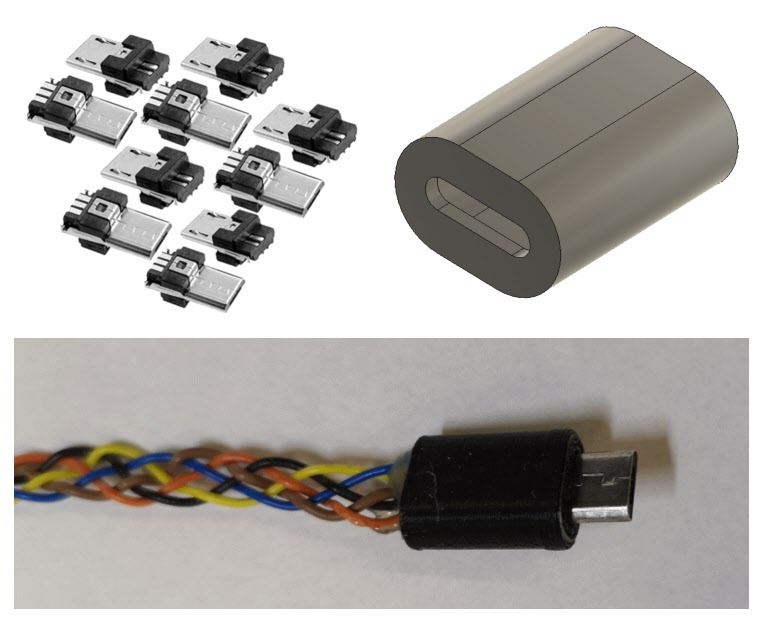
I had the bright idea of using Micro USBs as a connecting medium on a couple of projects. This was driven by the need for a 5 wire connection. The design was finished and I dug out the Micro USB to Micro USB cable that had been bought in for the project and connected things together. All the LEDs went out on my project circuit board. Gloom.
After buzzing the cable through I found that on a standard Micro USB cable the Sense pin is linked to the Ground pin. There are not 5 independent and isolated cores as you would expect. Just four. What to do ?
By chance I had some Micro USB connector ends with solder tabs but no shells. I did not have any flexible small diameter cable with 5 cores. After some discussions with my other half she offered to plait 5 independent cables together for me as a cable form. These were soldered to the Micro USB ends. Two small end caps were quickly designed in Fusion 360 and took 10 minutes to print on the 3D printer. Job complete and project back up and running.
Custom Micro USB 5 core cable components showing solder terminal end connectors, 3D printed shell and plaited 5 core cable courtesy of my wife.
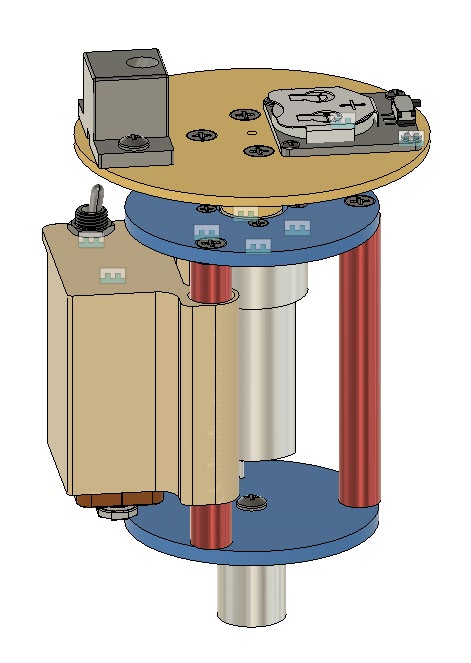
One of my favourite additions to the workshop has been a laser centring tool for use on my Tormach PCNC milling machine. The tool consists of a low cost laser diode mounted on a 3D printed disc and with a 19mm steel shaft. The tool is held in the Tormach spindle power drawbar. The laser is angled inwards towards the spindle axis at approximately 20 degrees. The 3D print has facilities for a battery supply and ON/OFF switch such that when the laser disc is pulled into the power tool bar collet it switches on the diode.
In use, as the spindle is raised or lowered, the rotating diode creates a circle of light on the milling table which can be used to locate and centre the spindle on features of the item being machined. This might be to locate the centre of a hole or the centre of a block depending on need.
I recently had the need to use my four jaw centring chuck on my Myford lathe. Usually I duck and dive to avoid having to use the 4 jaw as I find it frustrating to set up. This recent bout of frustration lead me to wonder if I could adapt my laser centring tool for use on the lathe such that it would give me a guide ring of light to show where the material was sitting relative to chuck centre.
On the milling version the laser rotates and the job stays fixed. On a lathe version this would be similar. The chuck would be stationary and the laser would rotate in the tailstock.
I am quite anal in needing to have a tidy workshop with everything having a place where I can find it easily. It is a kind of insurance policy to perhaps give me a bit longer time in the workshop before I lose the plot altogether. (The less palatable advantage is the dealer who comes in to clear my workshop when I am in turn in ‘a box’ can easily see what a treasure trove he has stumbled on. We’ll move swiftly on from that thought).
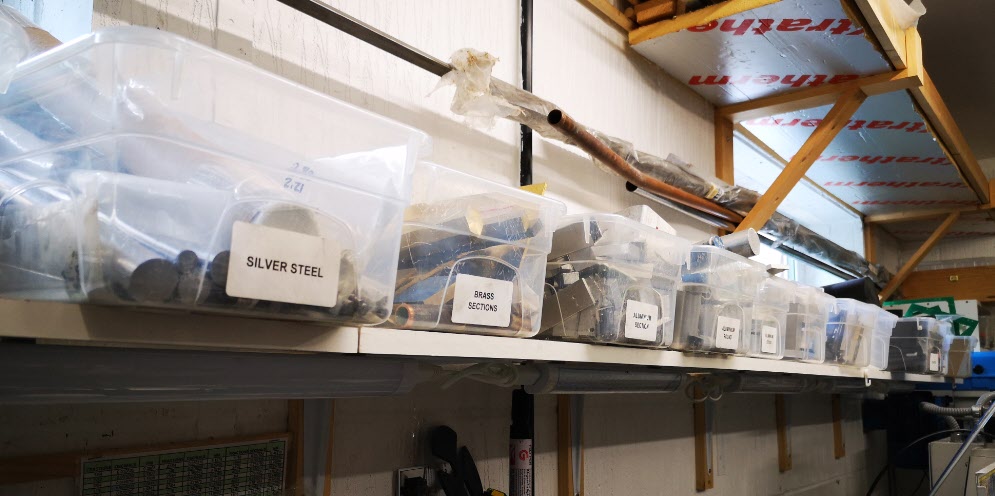
To this end I have settled on using 5 Litre Spacemaster storage boxes for all my ‘stuff’ (technical term as defined by my long suffering wife). These are readily available in the UK at Dunelm and on the net. They are made from a very durable plastic and supplied with a lid which is rarely useful for my application. I believe they are principally intended for ladies to store their shoes in.
Update : – Dunelm no longer supply Spacemaster boxes but Zoro UK have added them to their range. Their stock code is ZT1053092X.
The boxes have a 6.5″x 12″ footprint and are 4″ deep. It is surprising just how much workshop kit can be stored in these (and of course nicely labelled). The 12″ is just not long enough for 13″ silver steel but a little hang over can be tolerated for such useful material.
How sad is this ? Just a small section of my anal storage system
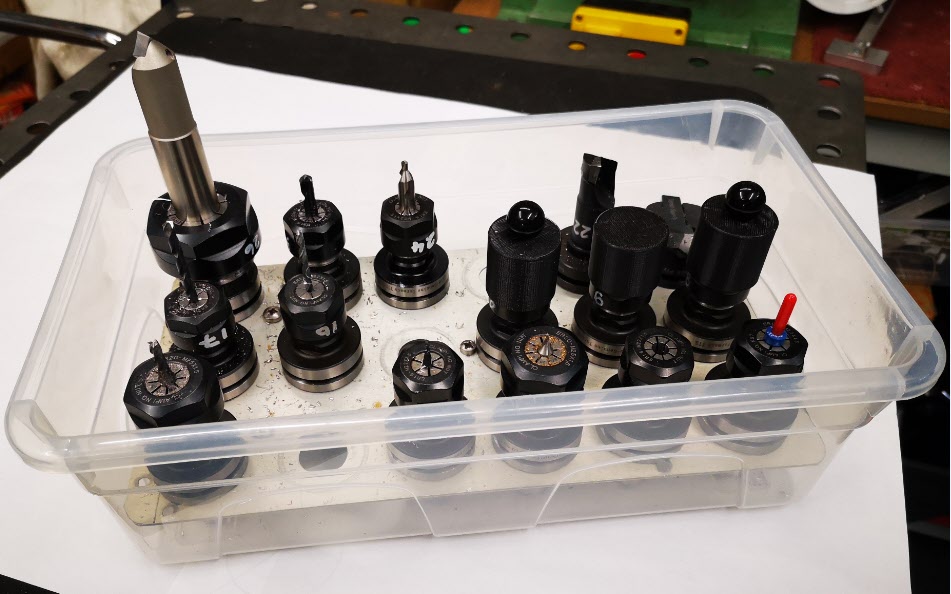
I have accumulated a reasonable (by my standard) set of Tormach TTS tooling collets with my preferred tools permanently fitted. These are each numbered to match my tool table entries in PathPilot. The numbering is done using an Edding 750 white paint marker.
My solution to storing the collets was to use the same boxes. I used a sheet of Dural (150mm x 290mm) and punched a (3 x 6) matrix of 20mm holes into it to take the collets. The Dural sheet sits on 5 off 10mm diameter x 36mm long spacers.
Spacemaster 5L box used for TTS tooling storage. Side view showing Dural plate
To give you some idea of the strength of the boxes, you can pick up one of these fully loaded with tools by the front wall and your wrist will break before the box does. (Well you know what I mean).
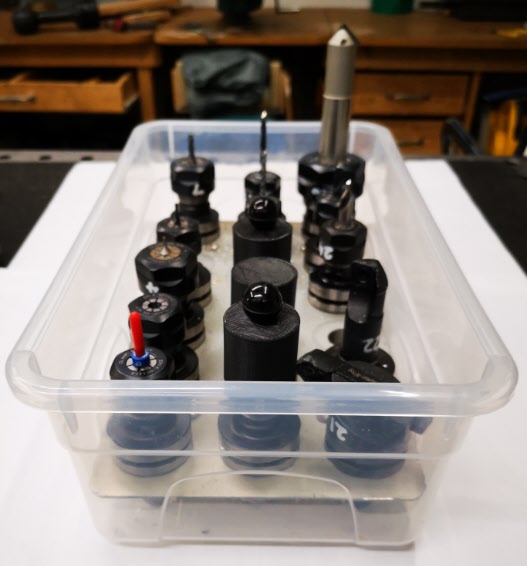
You will notice in the above photo that after some expensive clumsy breakages I now fit 3D printed caps over the most fragile tools such as carbide PCB drills.
Spacemaster based TTS storage box showing protective 3D printed caps over fragile tools
So a bit of a slow news day but thought this might stir an organisational initiative somewhere ……